
How To Grow Garlic - A Simple Step-By-Step Guide To Planting, Growing, Harvesting, Curing & Storing Your Own Garlic
I’ve had so many requests for information about growing garlic, so I put together this little guide. It’s just 9 simple steps and when you’re done you’ll have the most delicious homegrown garlic.
If you don’t have a garden, check it out and then share with a friend who does. You might just be lucky enough to receive some of their homegrown garlic harvest. It’s that good!
Hope you enjoyed my guide to growing garlic. Now that you’re excited to plant, check out my DIY raised garden beds and my garlic scape and basil pesto recipe.
As always, let me know if you have any questions.
- Care

Watch My New Video to Learn More About With Care
It's hard to believe that this summer marks 5 years of running my business. Throughout the last 5 years I have been honoured to educate and support over a thousand local families. In addition to teaching classes and workshops, my goal for the next phase of my business is to bring my educational and inspirational content online to a wider audience. I made this video with Anchor Studio to give everyone an idea of what they can expect from my YouTube Channel and Blog. I would love if you would watch and subscribe to my channel.
It's hard to believe that this summer marks 5 years of running my business. Throughout the last 5 years I have been honoured to educate and support over a thousand local families. In addition to teaching classes and workshops, my goal for the next phase of my business is to bring my educational and inspirational content online to a wider audience. I made this video with Anchor Studio to give everyone an idea of what they can expect from my YouTube Channel and Blog. I would love if you would watch and subscribe to my channel.

Please feel free to send along any topics you would like covered. I have some amazing collaborations coming up this summer and fall, so stay tuned for lots of new content and some incredible giveaways! I appreciate all of the incredible support from the families I have worked with and can't wait to see where this new journey takes me.
- Care xo
P.S. If you're on Instagram I would love it if you could give me a follow.

From Caterpillar to Butterfly - Take Part in Junction Wings 2018
It's that time of year again. Time for the most fun community fundraiser ever - Junction Wings! For anyone who isn't familiar, it's basically the story of The Very Hungry Caterpillar (without the inappropriate food choices) come to life in your very own home.
It's that time of year again. Time for the most fun community fundraiser ever - Junction Wings! For anyone who isn't familiar, it's basically the story of The Very Hungry Caterpillar (without the inappropriate food choices) come to life in your very own home.


For only $10 you get a caterpillar in a little container with some caterpillar food. We always get a few caterpillars. In nature not everything works out, so think of extras as an insurance policy to avoid a disappointed kid. Your fuzzy friend(s) will remain in the little cup eating until they're nice and big and tired. Then it will attach to the lid of the container and spin it's cocoon. At this time you can move the container lid with the attached cocoon to an appropriate butterfly habitat.
Check out my post from last year about a simple Ikea Hack for a perfect butterfly enclosure.


About 10 days later a beautiful painted lady butterfly emerges. Your butterfly will need to remain in the butterfly habitat for a few days while it's wings dry out and it gains strength. Then it can be released outside. (Don't worry, all the details are included in the instructions that come with your little critter)
The whole experience is so magical and such a fun activity to do with your kids. We look forward to this event every year and are so excited that it's almost time to bring a few hungry caterpillars home.
If you live in the area and are willing to drive to the Junction to pick up your little fuzzy friend(s), you are more than welcome to take part in this event. Simply Buy Your Caterpillars Here by Tuesday April 10th.
Please Note: Caterpillar pickup will take place on Saturday May 12th from 12pm-4pm on the 2nd floor of the Legion in the Junction 3591 Dundas Street West. If you can't make this pickup time you will need to arrange for someone to pick them up for you.
Make sure to share your caterpillar adventures on instagram and facebook with #junctionwings so we can all follow along.
Care

Oven Roasted Tomatoes with Burrata - Simple Summer Recipe
Summer is here and local tomatoes are hitting the farmers markets, so I wanted to share one of my favourite seasonal recipes. I was forced to recreate this recipe at home, because the local restaurant I usually get it at sadly closed this spring. I'm so happy with how it turned out. I always think it's a good sign when you need to make a new recipe twice in one weekend. That's exactly what I did with this one.

Summer is here and local tomatoes are hitting the farmers markets, so I wanted to share one of my favourite seasonal recipes. I was forced to recreate this recipe at home, because the local restaurant I usually get it at sadly closed this spring. I'm so happy with how it turned out. I always think it's a good sign when you need to make a new recipe twice in one weekend. That's exactly what I did with this one.
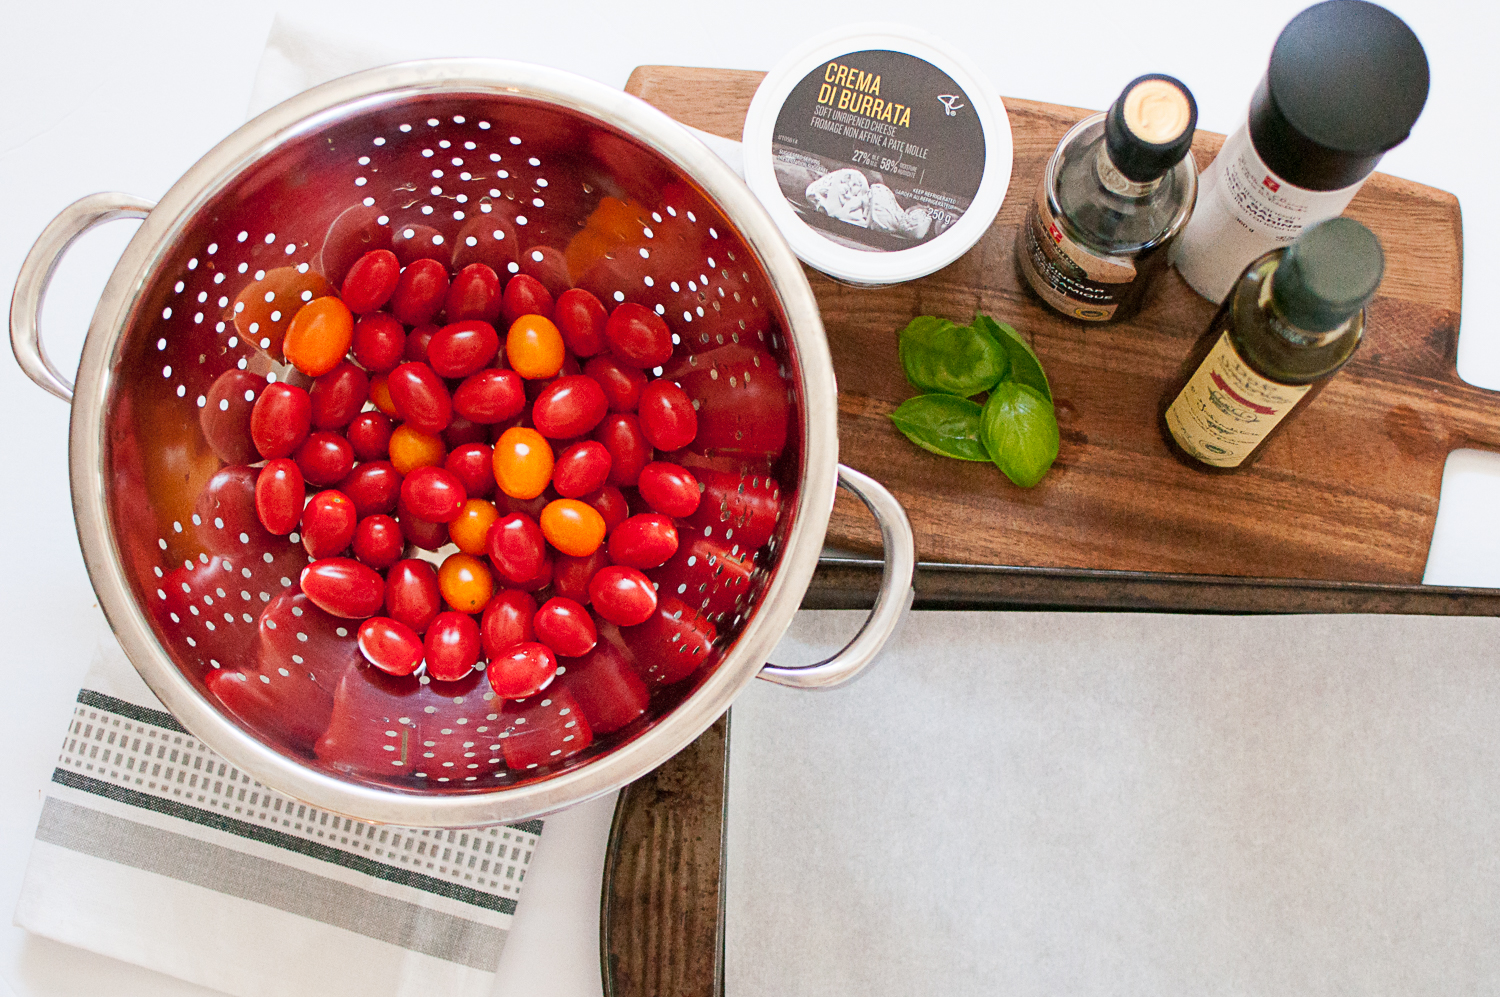
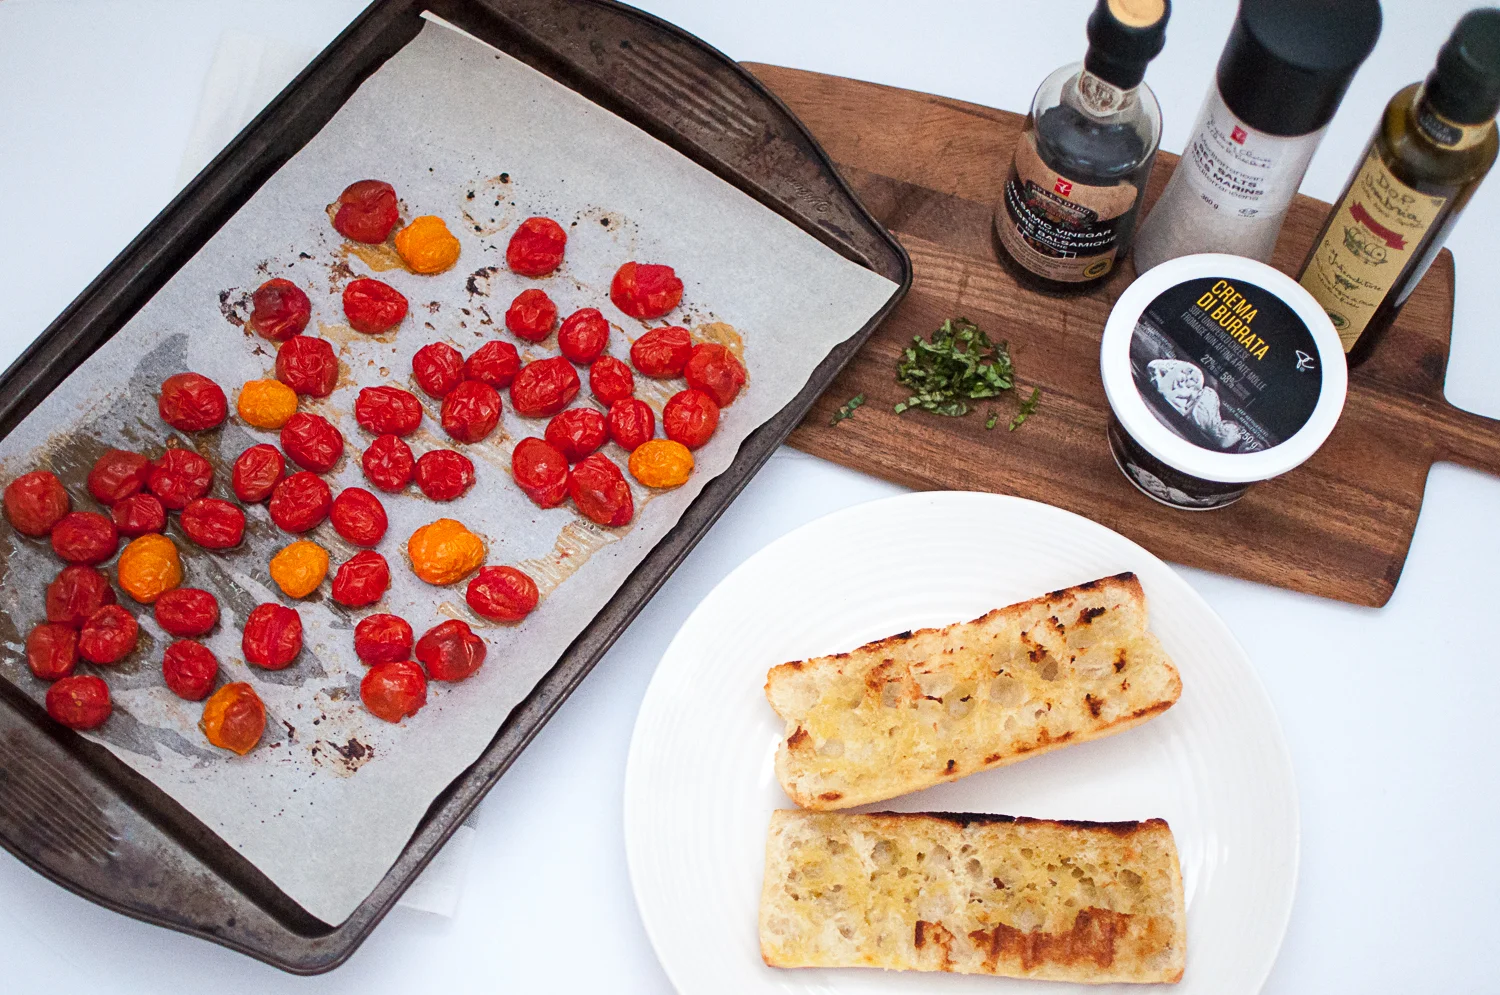
If you're anything like me you won't be able to get enough of these soft, warm roasted tomatoes drizzled with olive oil, balsamic, sea salt, fresh chopped basil and a generous helping of burrata. Add in some grilled bread and you really can't go wrong.
This recipe includes only 7 ingredients, 6 of which we typically have on hand ...not the buratta ;) It takes about 20 mins to make from start to finish, and tastes like pure summer, so that makes it pretty perfect in my books.
INGREDIENTS: 1 quart of grape or cherry tomatoes, a few basil leaves, olive oil, sea salt, balsamic vinegar, 1 pkg of burrata cheese, baguette.
DIRECTIONS:
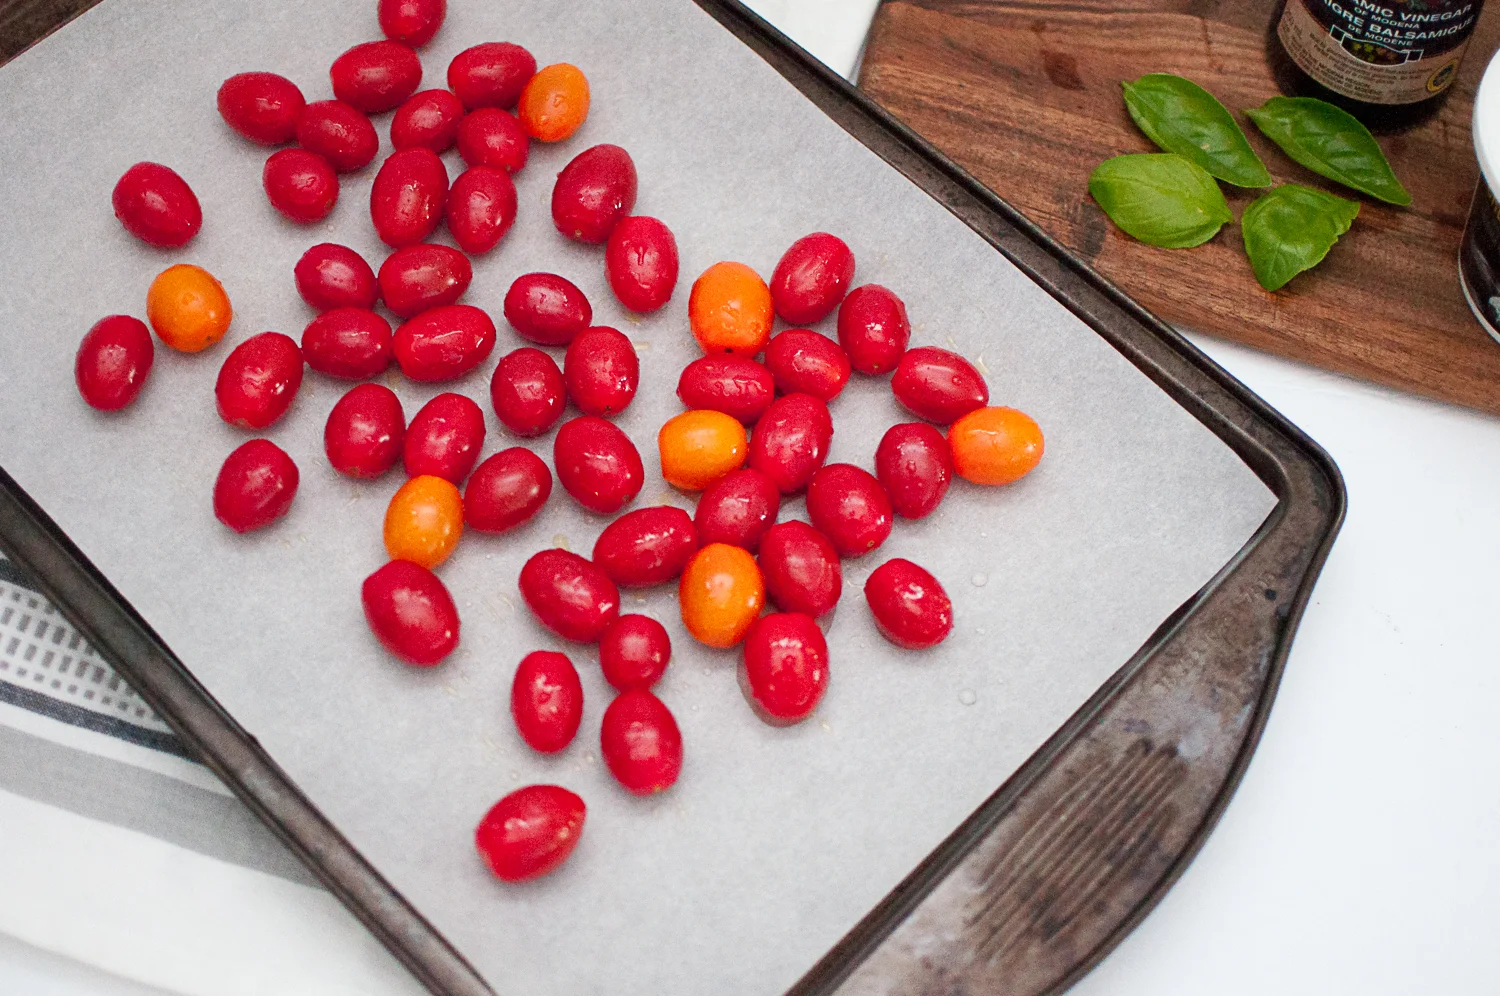
1. Wash tomatoes & basil
2. Toss tomatoes with olive oil and sea salt and place on parchment lined baking sheet. Bake at 400 for 15-20 minutes
3. Brush baguette with olive oil and grill in a grill pan over medium high heat while tomatoes roast.
4. Once tomatoes are done, remove from oven, let cool for a few minutes, and then transfer to plate.
5. Add generous helping of buratta, and drizzle with balsamic, olive oil, sea salt and fresh chopped basil. Serve with grilled bread.

This recipe is going to be in heavy rotation around here this summer. I can't wait until we can make it with our own homegrown tomatoes.
Care

Simple DIY Raised Garden Beds
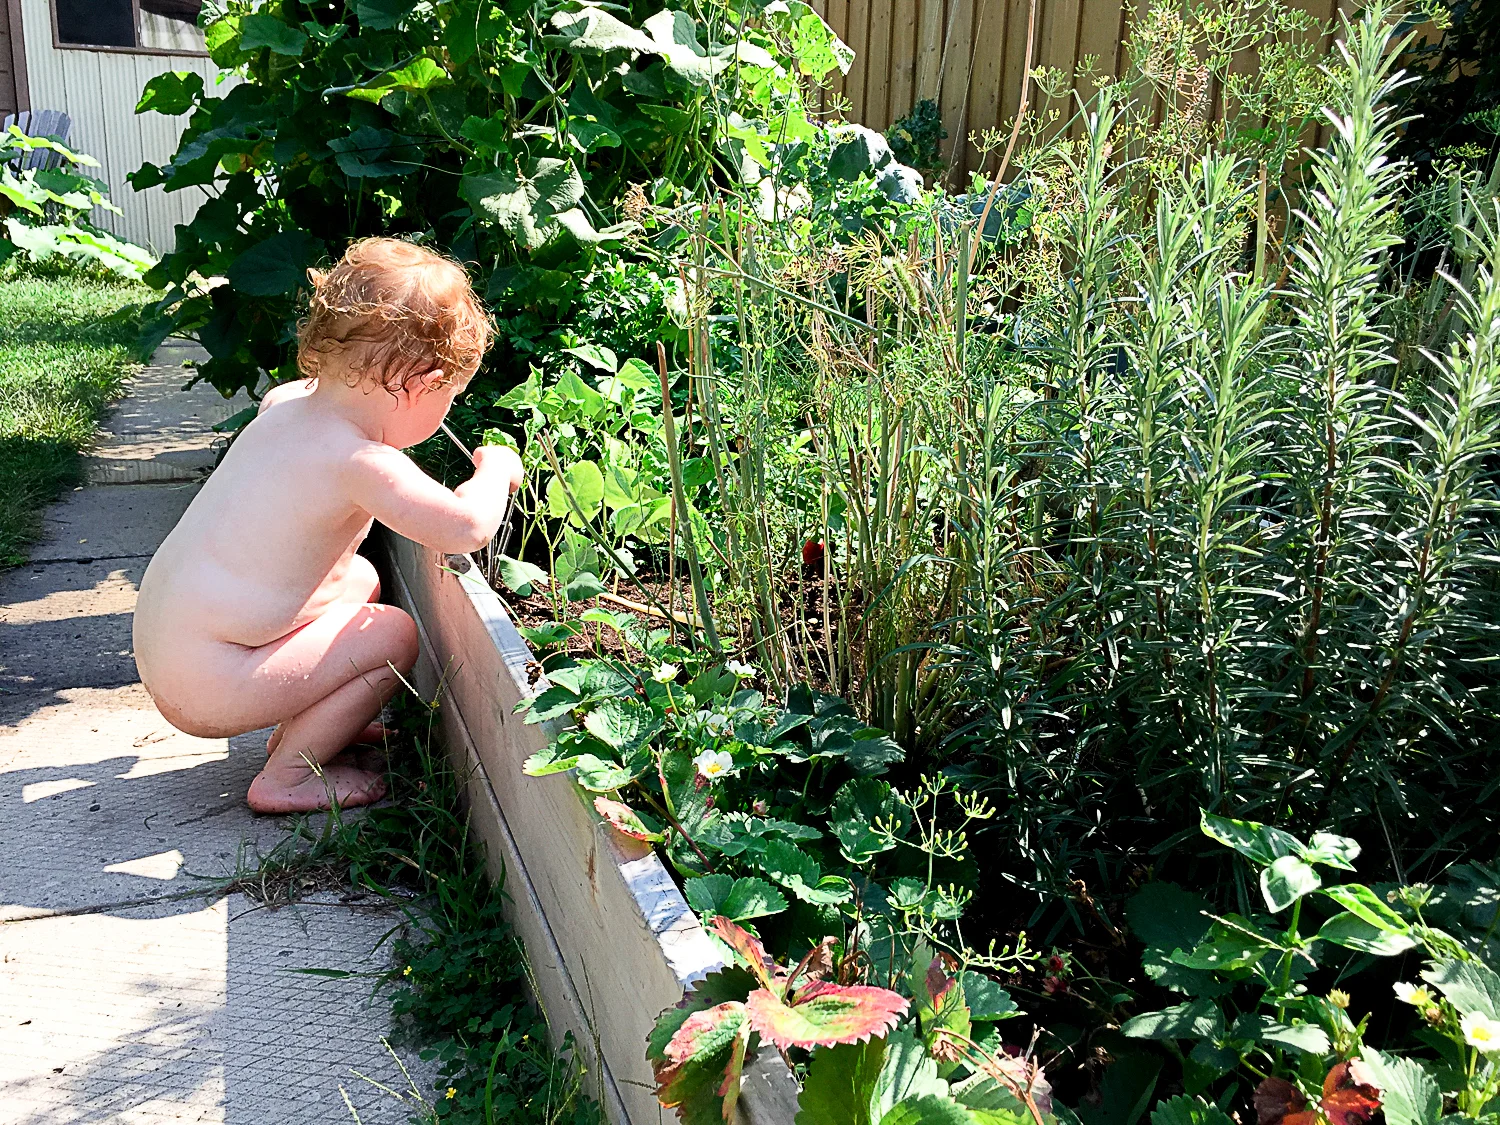
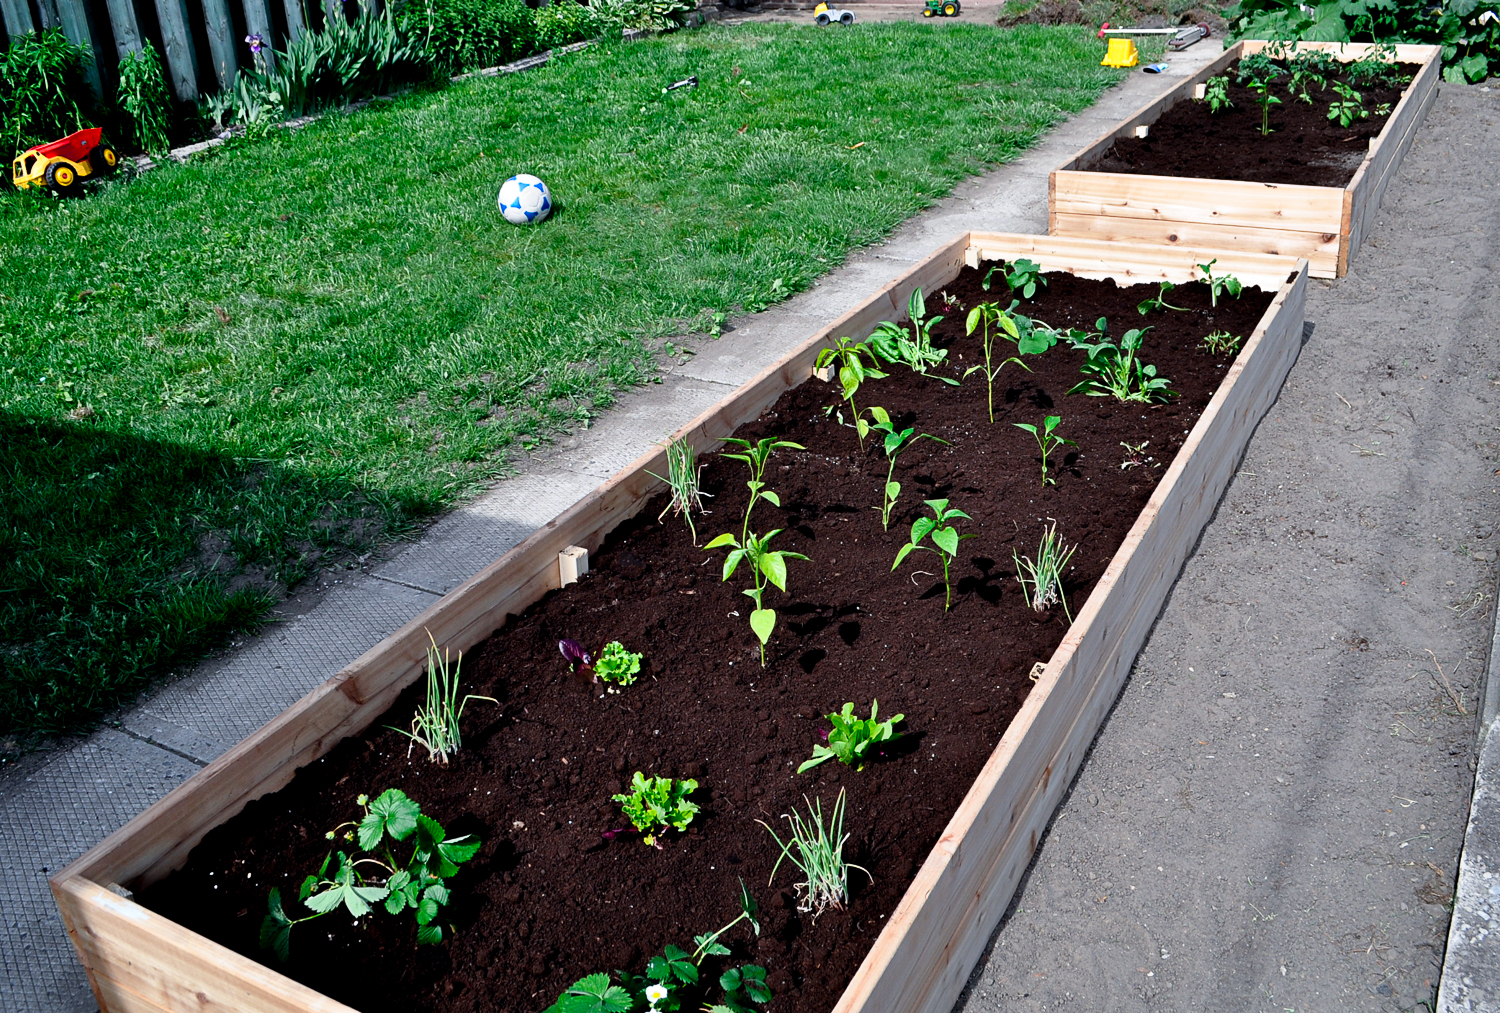
With planting season upon us it seems like the perfect time to share a post that I've been meaning to write for 3 years! I've had tons of requests by readers and friends for a DIY of our raised garden beds, so here it is. Better late than never...right? Some of these photos are really old, so don't get confused. That's little Lucy! These pics are making me so excited for our Garage Makeover on a Budget, coming this summer!
With planting season upon us it seems like the perfect time to share a post that I've been meaning to write for 3 years! I've had tons of requests by readers and friends for a DIY of our raised garden beds, so here it is. Better late than never...right? Some of these photos are really old, so don't get confused. That's little Lucy! These pics are making me so excited for our Garage Makeover on a Budget, coming this summer!
These raised beds are so simple to make and such a great addition to any garden. You can make them in whatever size and shape works best for your individual space. Keep in mind that it's ideal to be able to crouch, kneel or sit by each side of your garden bed, and be able to reach at least half way across, so you don't have to hurt your back while caring for and harvesting your plants.

Why use raised beds?
You can grow a lot of high quality produce in a small area
They prevent soil compaction a.k.a. keep your kids from falling onto your plants and on the soil ...most of the time ;)
They provide a space to top up with high quality soil which helps your plants grow (Especially important in big cities like Toronto where our soil has been depleted of many minerals and nutrients and filled with many heavy metals and toxins)
The soil warms up faster than than in the ground, so most plants can be added earlier
They keep weeds out of your growing area, and are a barrier for slugs and snails
They provide good drainage. Most vegetables need lots of sun, lots of water, and good drainage with loosely packed soil to grow optimally. *Keep in mind that raised beds will dry out quicker than the ground, but this is good for vegetable crops. Consider a rain barrel to help with your water needs. See my post from a few years ago for 3 Must Haves for Veggie Gardening Success.
Supplies:
Cedar Lumber to make up the 4 sides of your beds
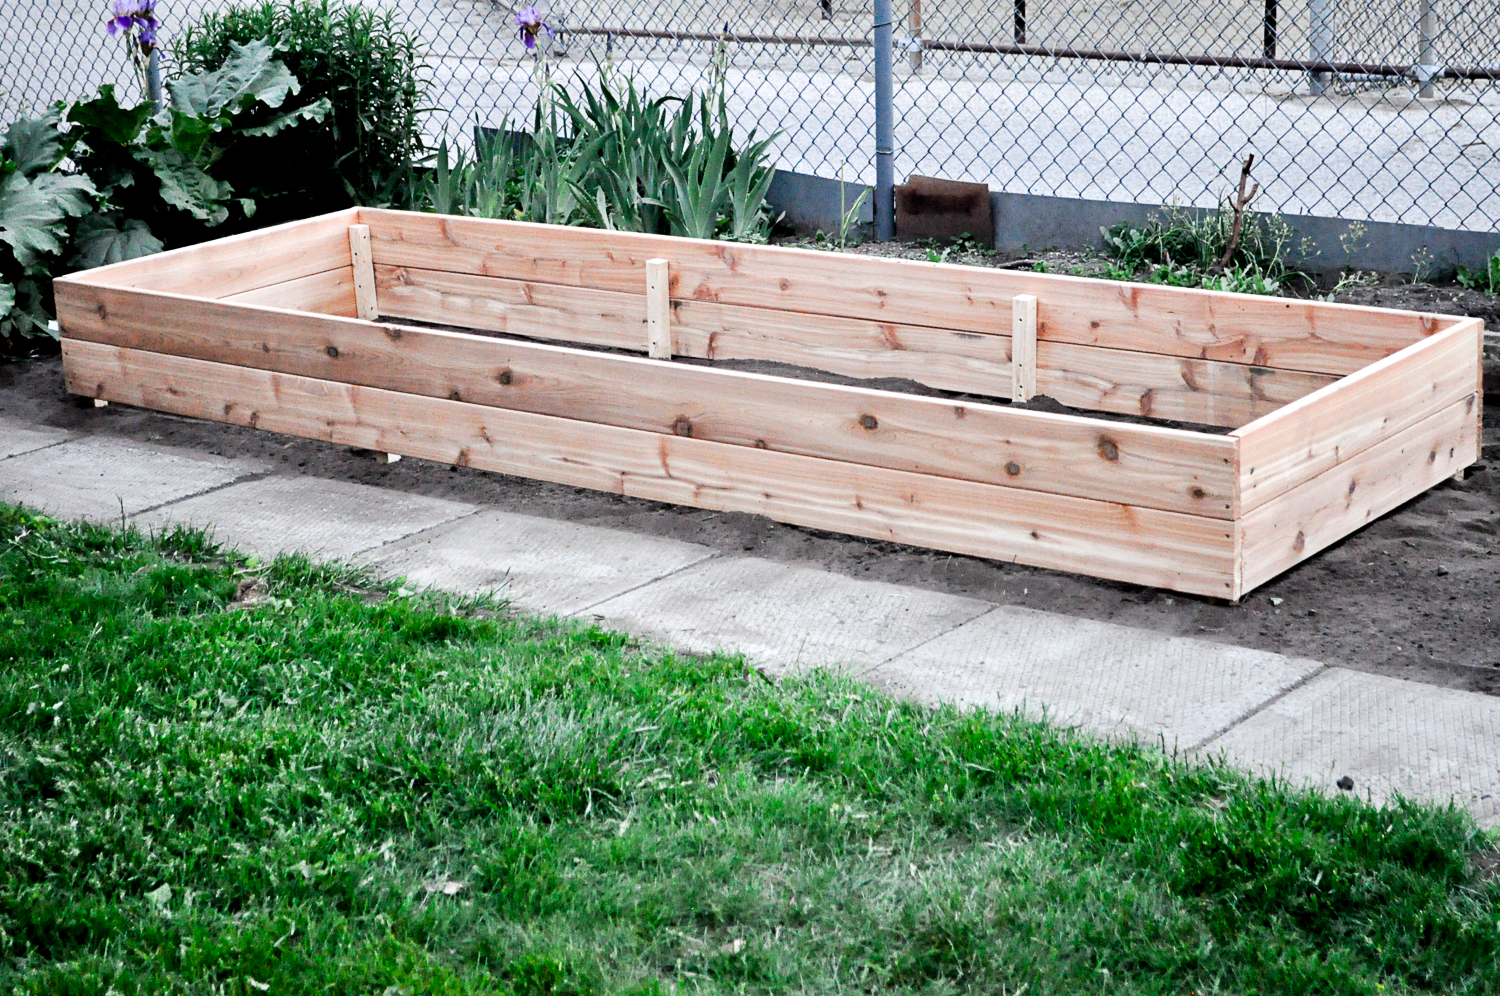
You needs 2 boards per side for a stacked box like ours. We used 1"x6" boards and made 10' long beds, so we used 12' long boards for the sides and cut them down to size. Our beds are 3' wide so we used a 6' board for each end and cut it in half to make 2 perfect size boards. You will have to choose the appropriate length and width for your space and plan accordingly. Please note that lumber isn't actually the width it says, which is so weird. A 1"x6" board is typically more like 5.25" - 5.5" wide, so keep this in mind with any projects. You could also do 1"x8" boards, or a single board instead of stacking 2 boards. That's the best part about these, you can totally customize them.
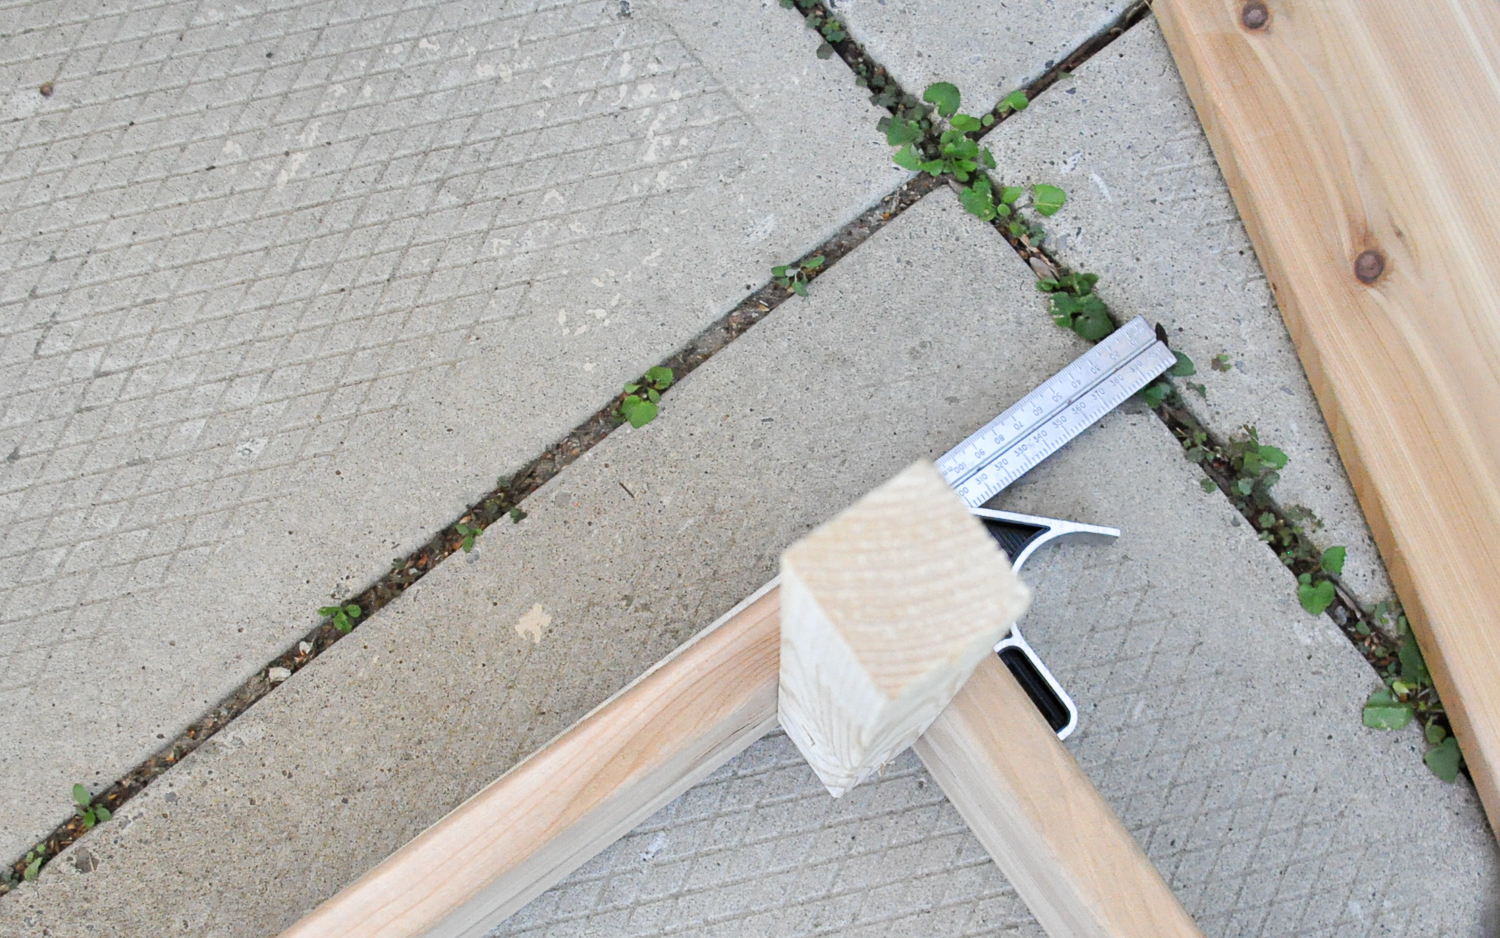
2"x2"x8' Framing Lumber
To be cut down to lengths for corner and side supports. We used a support in each corner and then 2 more evenly spaced along each long side. We cut our supports down to about 11.5" in length and constructed our beds upside down so we could offset the stakes (not level with top and bottom of the main boards). This means that when you turn your beds the right way the stakes go down into the ground creating stability and keeping your beds in place. We were able to get all 8 stakes for each bed out of one 8' long piece of framing. You lose a little length when you make your cuts, so we just cut 8 equal pieces and ended up with pieces approximately 11.5" long.
8x2" Deck Screws
Soil & Plants to fill beds
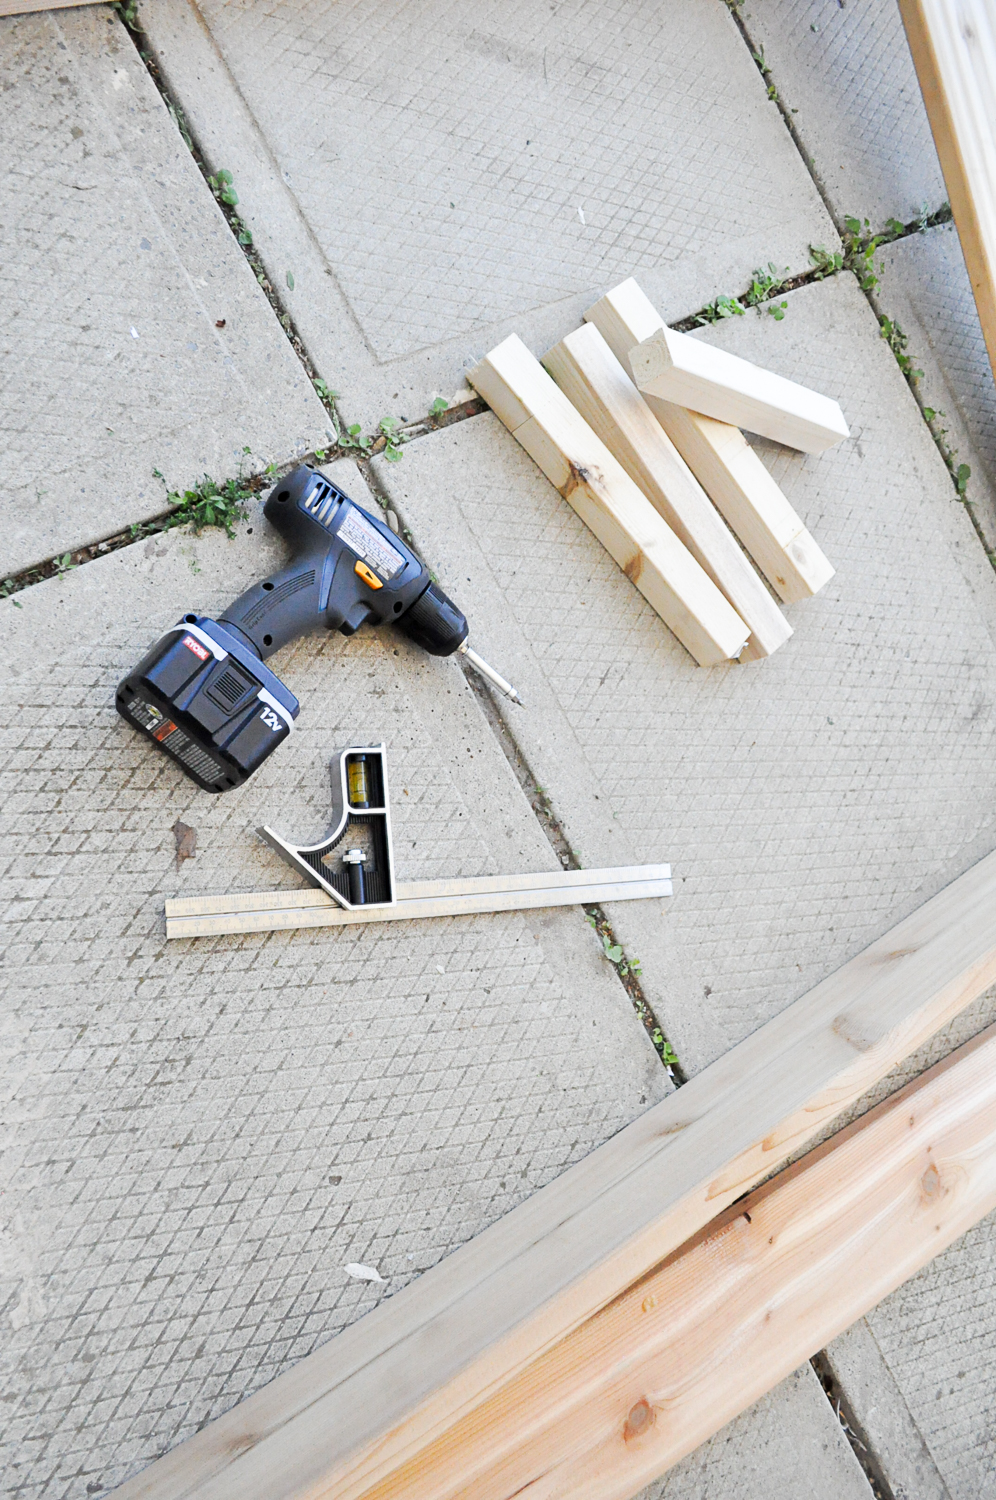
Tools:
Saw (or get the hardware store to cut it for you)
Drill and bits
Square
Rubber Mallet
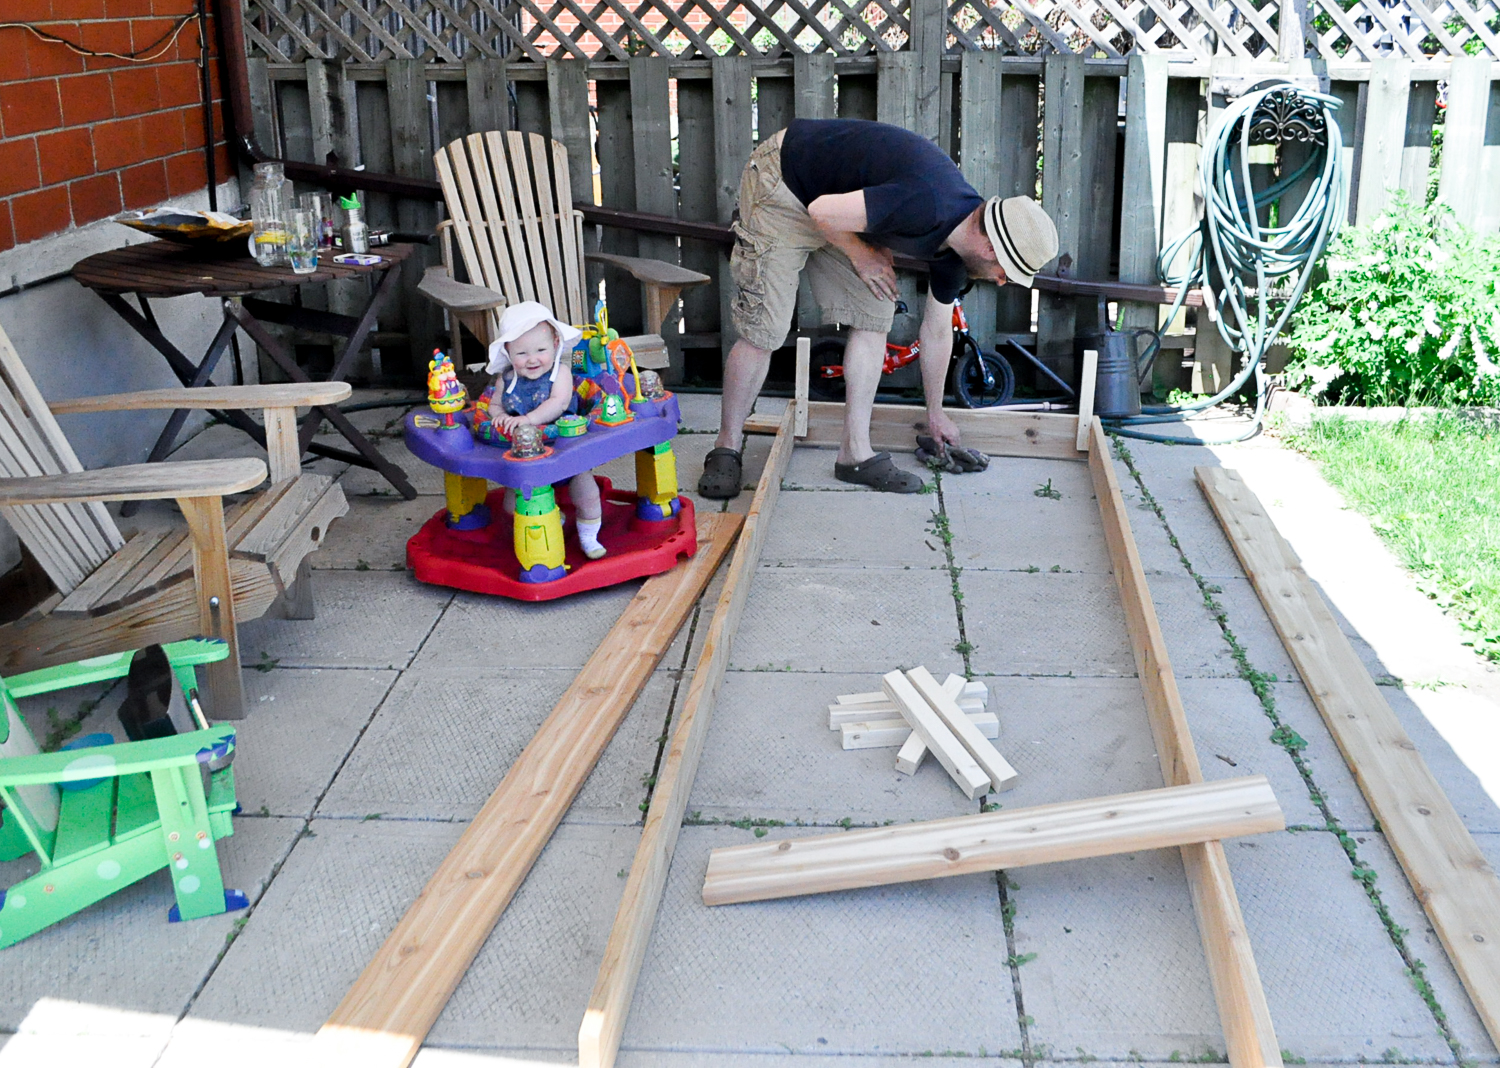
Instructions: *It's best to have 2 people for assembly
Plan your raised bed(s) and size of all lumber needed (Measurements for our 10'x3' beds are included in the supplies section)
Cut all lumber to size (or have them do it for you at the lumber area of the hardware store)
Lay bed out and ensure all pieces are ready
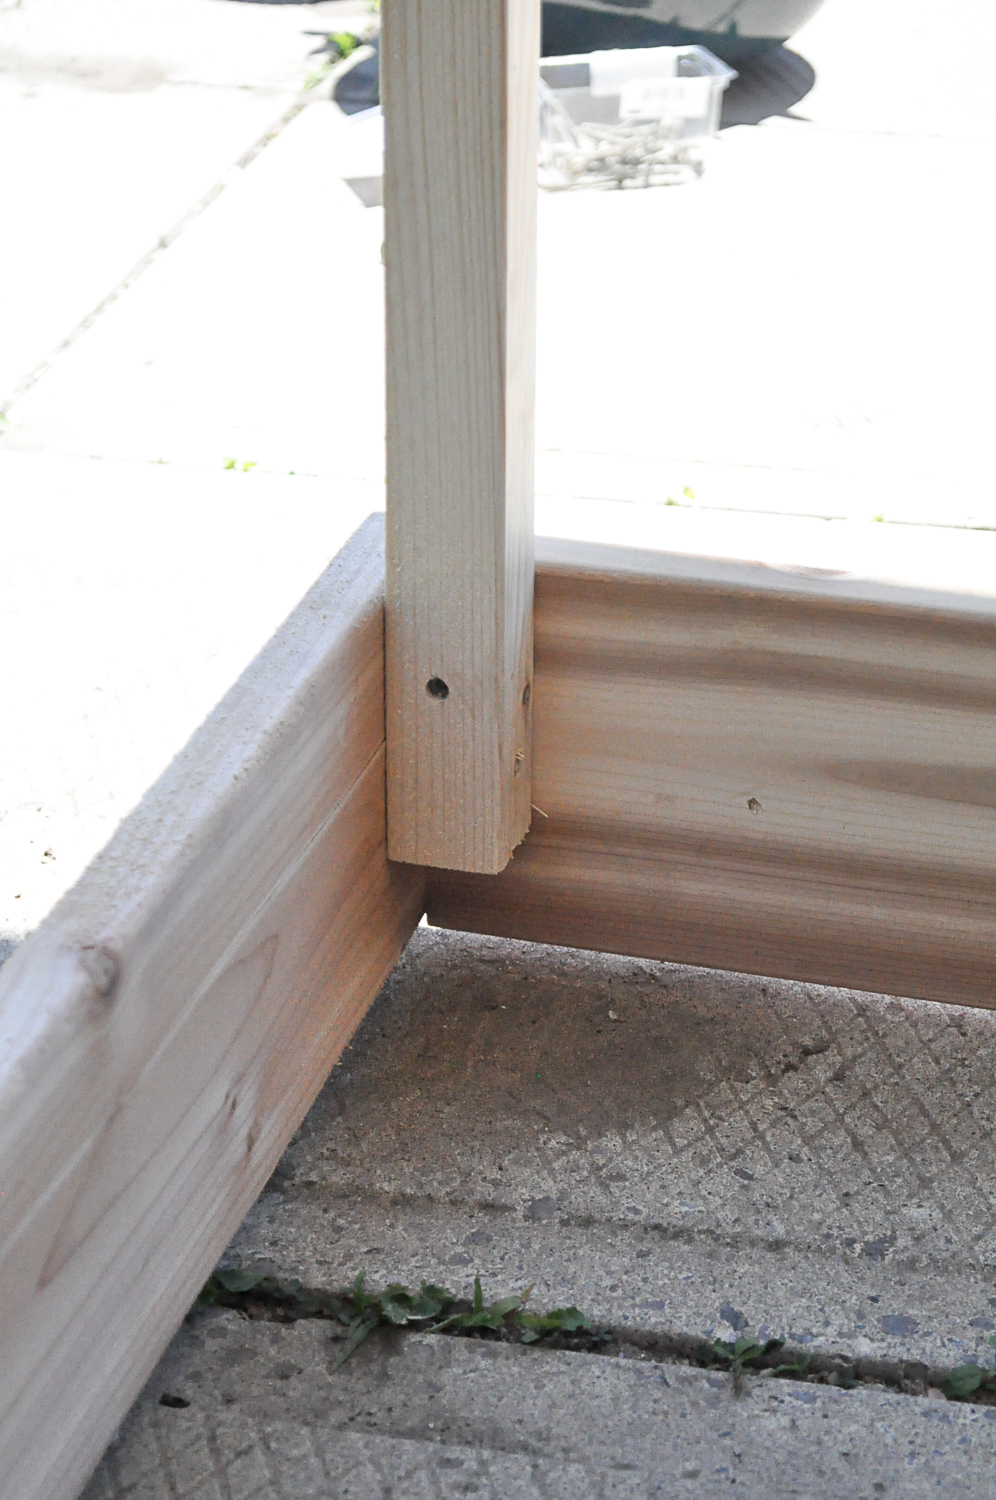
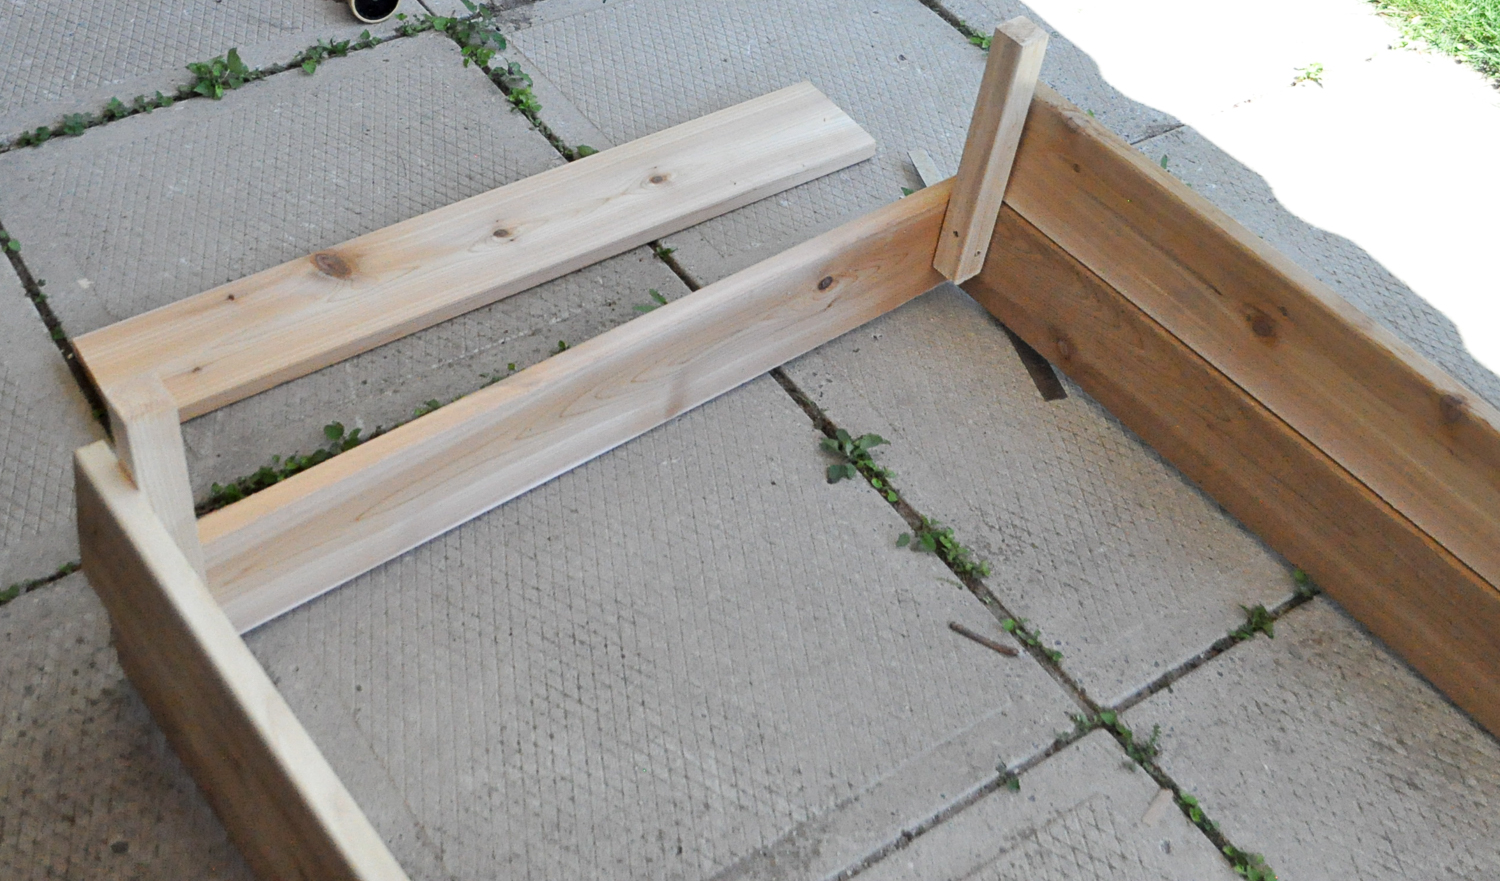
Begin assembly by having one person hold the top long board upright in place (this board will be siting on the ground as we're working upside down).
Have the 2nd person screw one of the measured support stakes into the end of the board, flush with the end of the support stake. *Remember to offset the stake a few inches so they will be sunken down when you turn your beds over to install them. This means your stakes should be about 1.5" off the ground. *See photos
Next, attach the short board to the same stake to create your first corner. Use your square to get an even corner each time.
Continue to work your way around your bed screwing in each corner support to your 4 top boards
Then add your 4 bottom boards (which are on top right now). *Your support stakes should be sticking up above the top of this 2nd row of boards
Screw in additional support stakes spaced evenly along the long sides of beds. We did 2 extra supports on each long side at just over 3' apart each. Depending on the size of your beds you may use more or less.
To reinforce the corners and keep the boards flush together go around the planters and screw through the end of each long board directly into the short end board from the outside in.
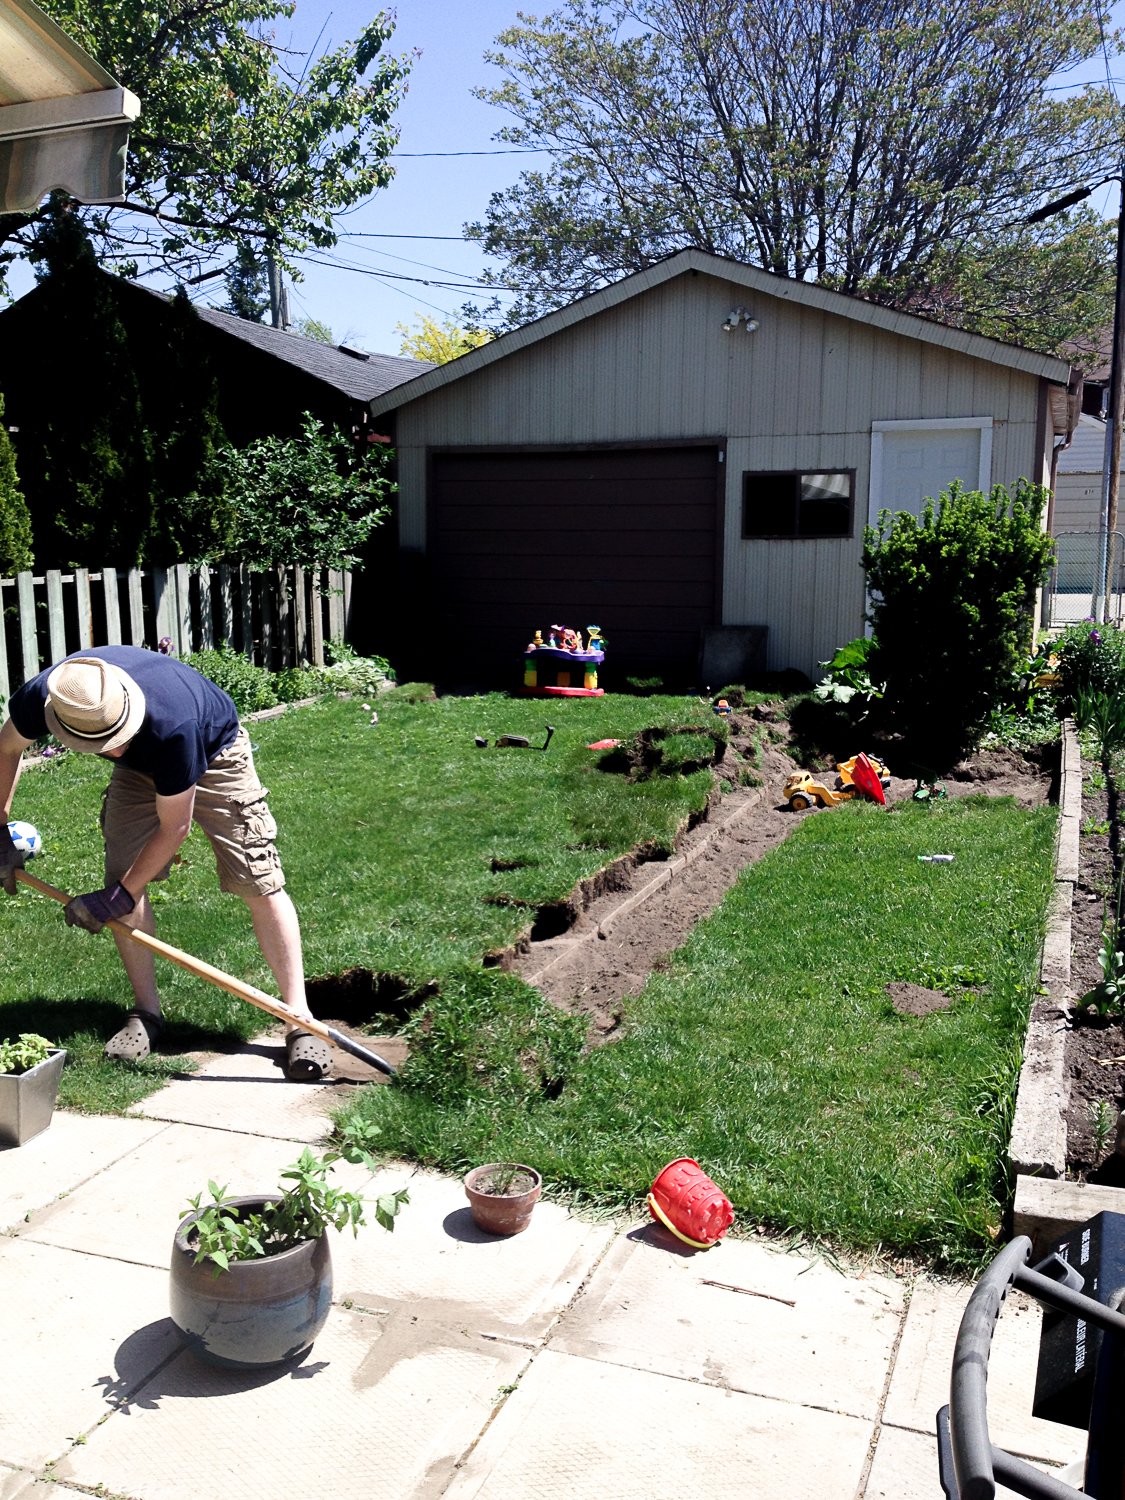
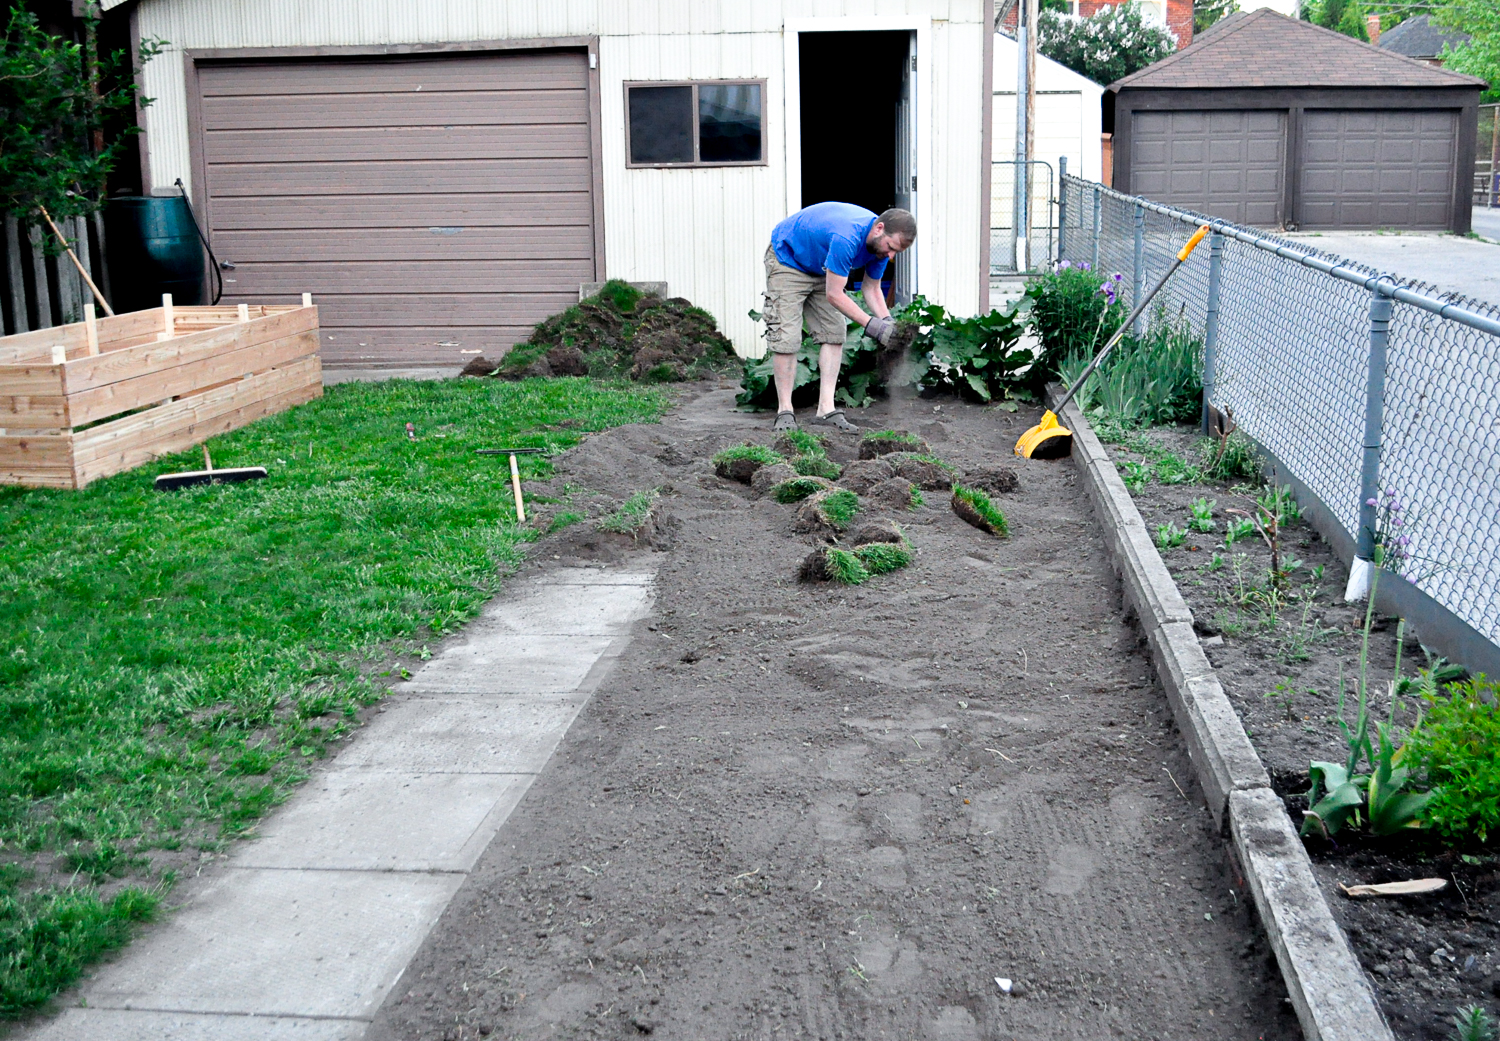
When all of your support stakes and boards are screwed into place you'll need to till up the earth where they are to be placed. This is the most time consuming and tiring parts of the project.
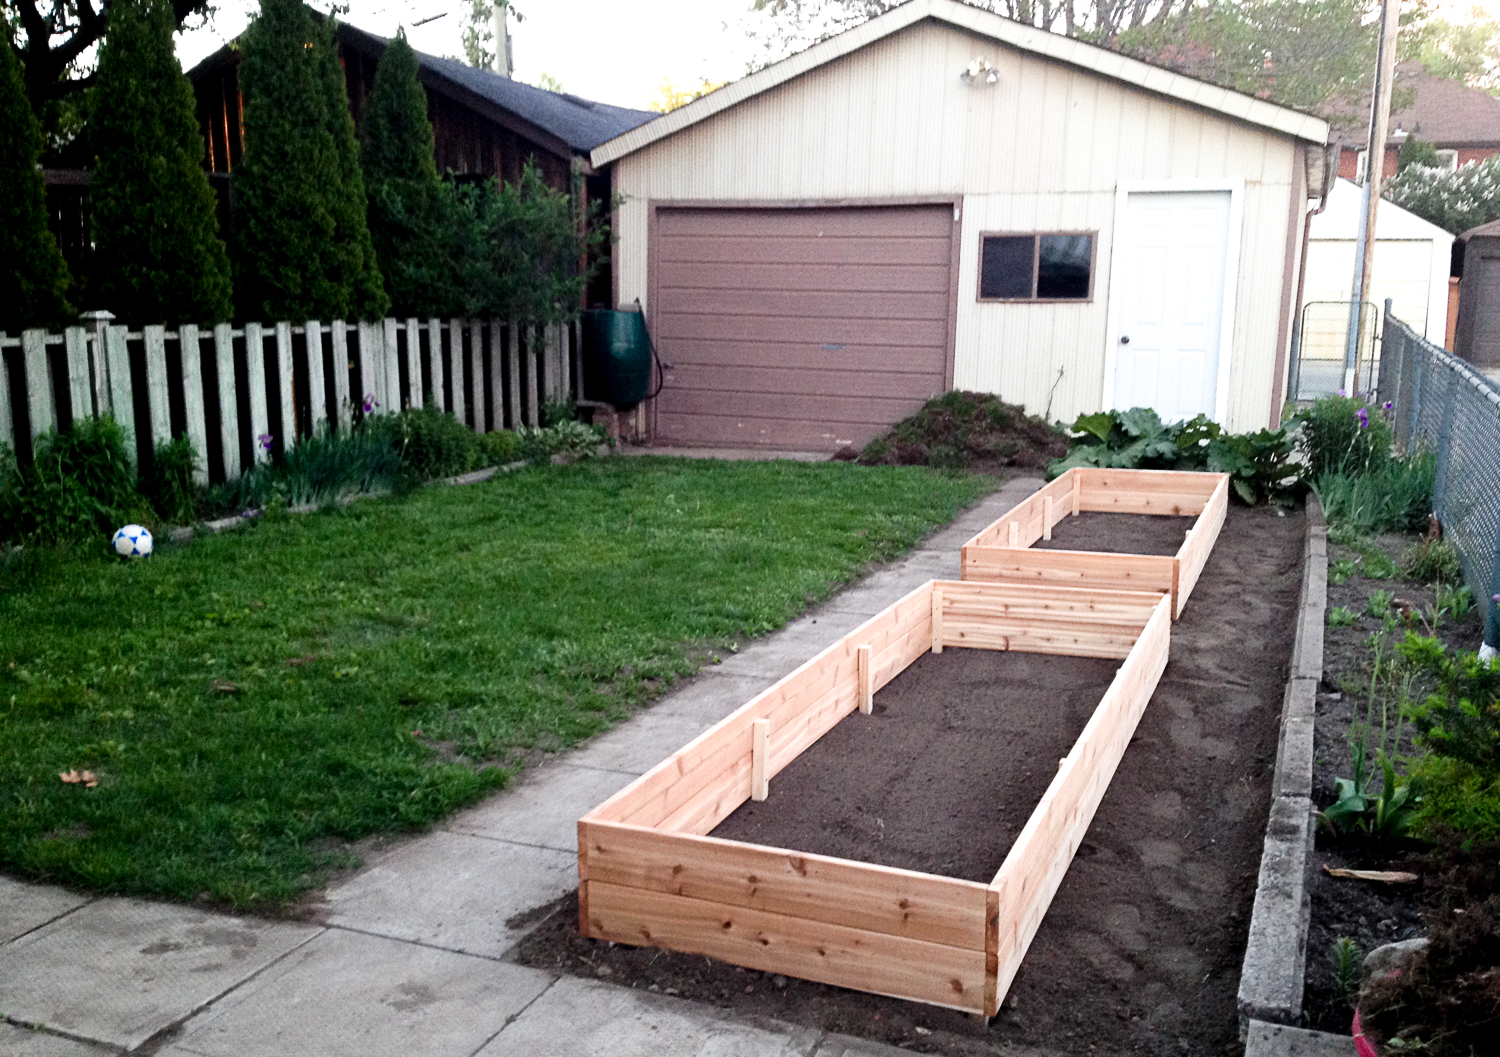
Once area is all prepped, flip beds over and set in place. Tap down each corner and edge gently with a rubber mallet to stabilize.
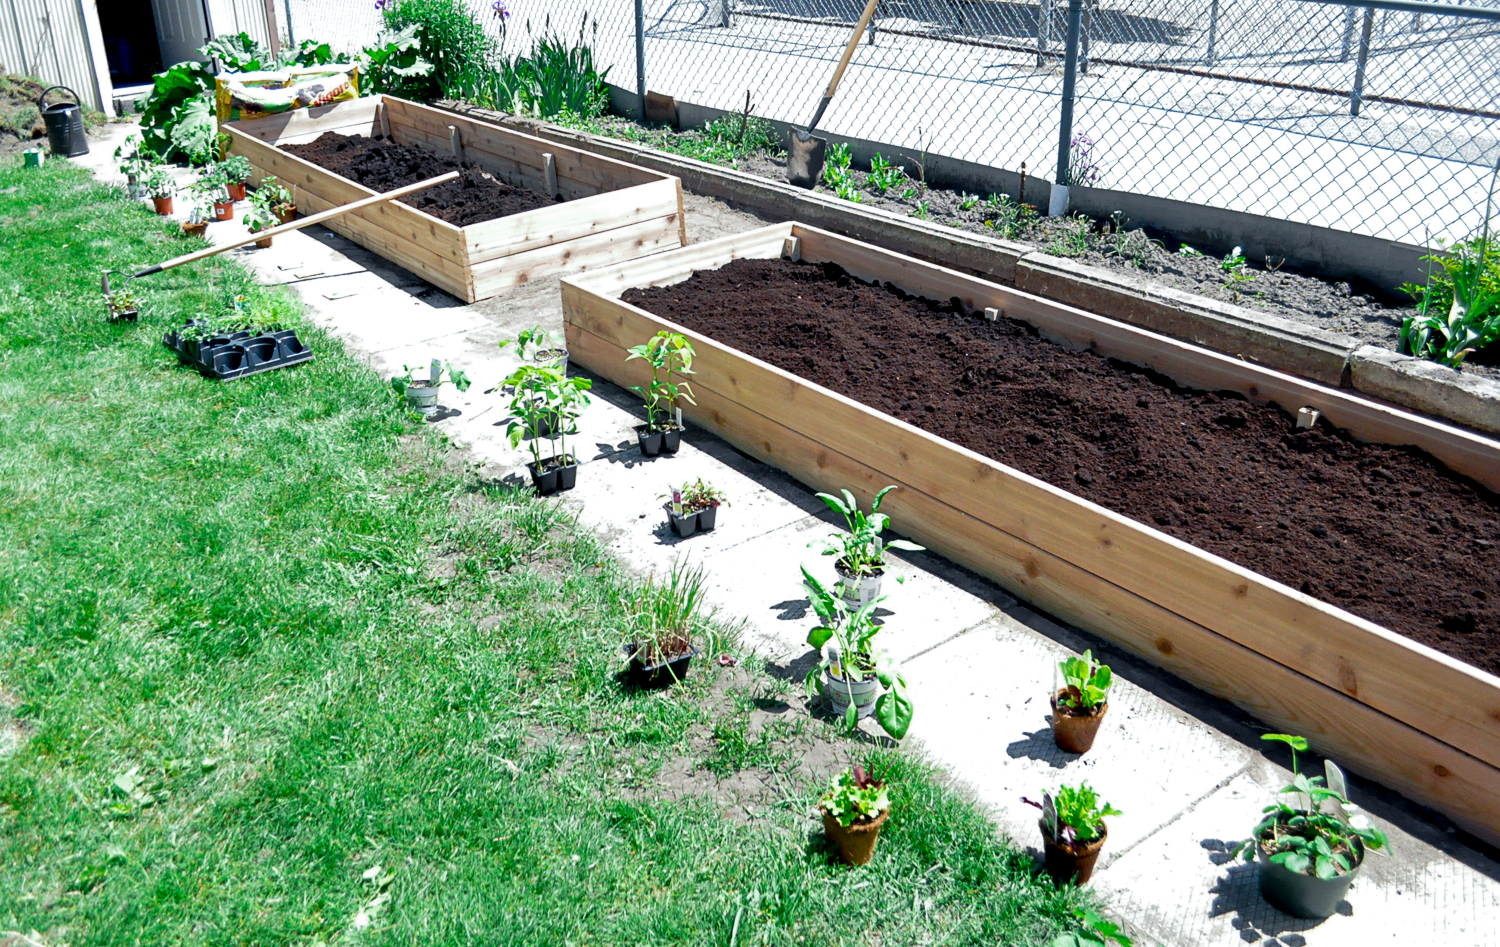
Fill with fresh soil, add plants & water.
We love using our raised beds with our favourite Garden Covers from Lee Valley.
Hope this gives you a little garden inspiration. Remember you can make these to fit any space, big or small. Don't hesitate to send along questions or projects you would like to see featured.
Care

From Caterpillar to Butterfly - Habitat Inspiration & A Super Simple Ikea Hack
As promised, I wanted to share some butterfly habitat inspiration as a follow up to my post about The Junction Wings Project. So here it is! Don't hesitate to post questions in the comments.
Now that you've welcomed (or will soon be welcoming) some fuzzy little caterpillars into your home, you need to start thinking about a habitat. Lucky for busy parents, your caterpillars will remain in their little cup with their food for the first week, so you don't need to rush out to prepare this right away.
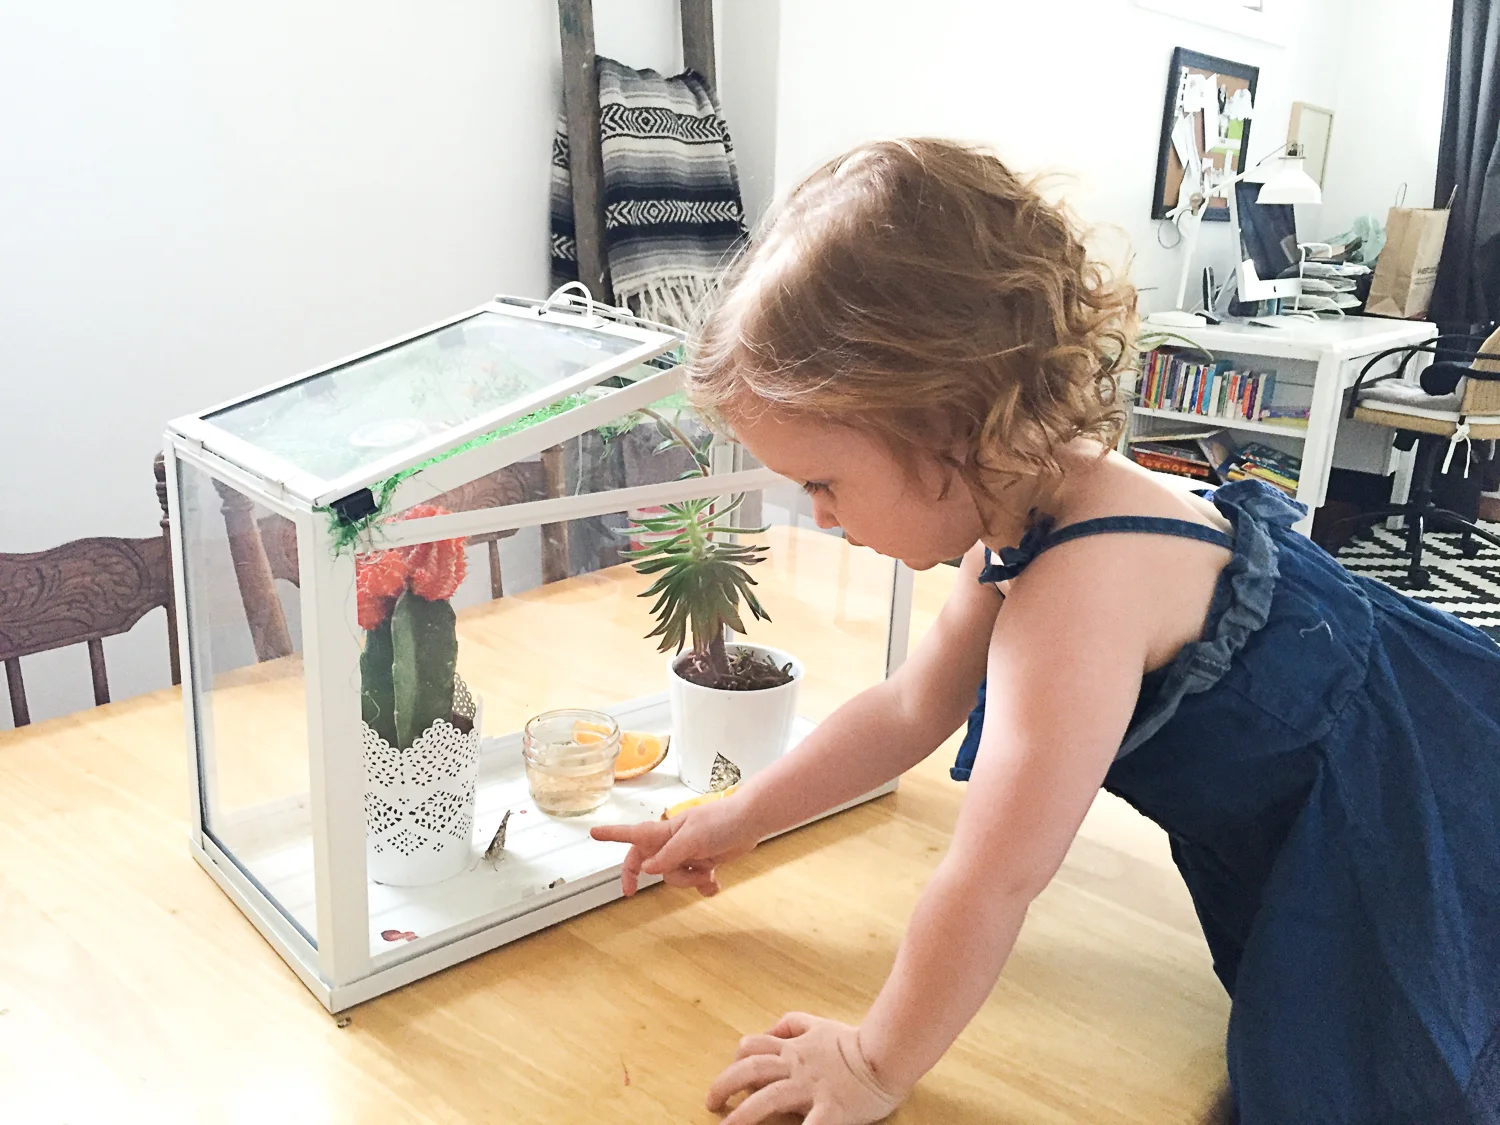
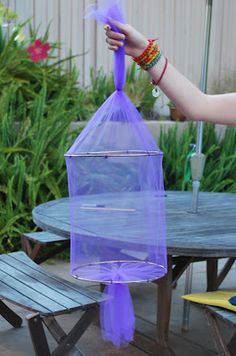
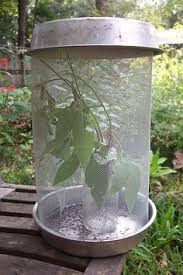
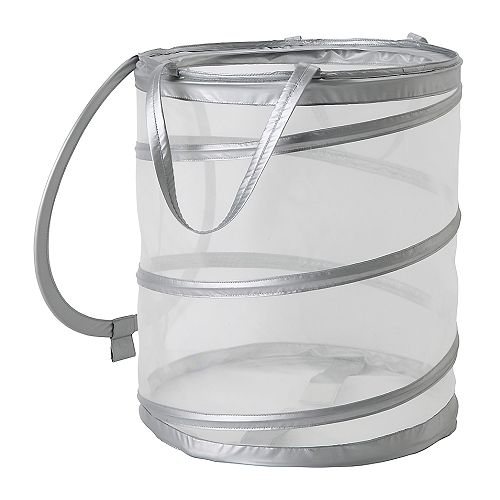
There are tons of ways to make a great butterfly enclosure, but keep in mind how old your children are and what might be needed to keep said children from killing said butterfly ;) The enclosure doesn't need to be fancy, but it needs to allow fresh flow of air, have a place for your cocoons to hang down while waiting for them to emerge, and keep your little butterflies safely inside once they hatch. You can make some simple DIY versions with mesh netting and various household items (see pics below). You can also use a mesh laundry hamper (like the one below from Ikea). Personally, having something that can't be easily crushed, and that doesn't sit on the ground, is top priority in our house. Our littlest is currently in the "destroy all things" phase, so keeping them out of her reach and safe is key.
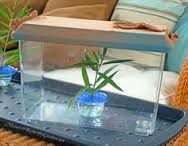
This is our 3rd season welcoming butterflies and we're still loving out Ikea mini greenhouse. We usually add a few plants and a mesh top. Last year we used simple bulldog clips to hold the mesh top in place (I used a recycled lime bag), but I found it frustrating with curious kids. This year I decided I wanted to improve the mesh top, so I removed one of the glass panels from the greenhouse lid and traced it out on a piece of cardboard (the box it comes in works great).
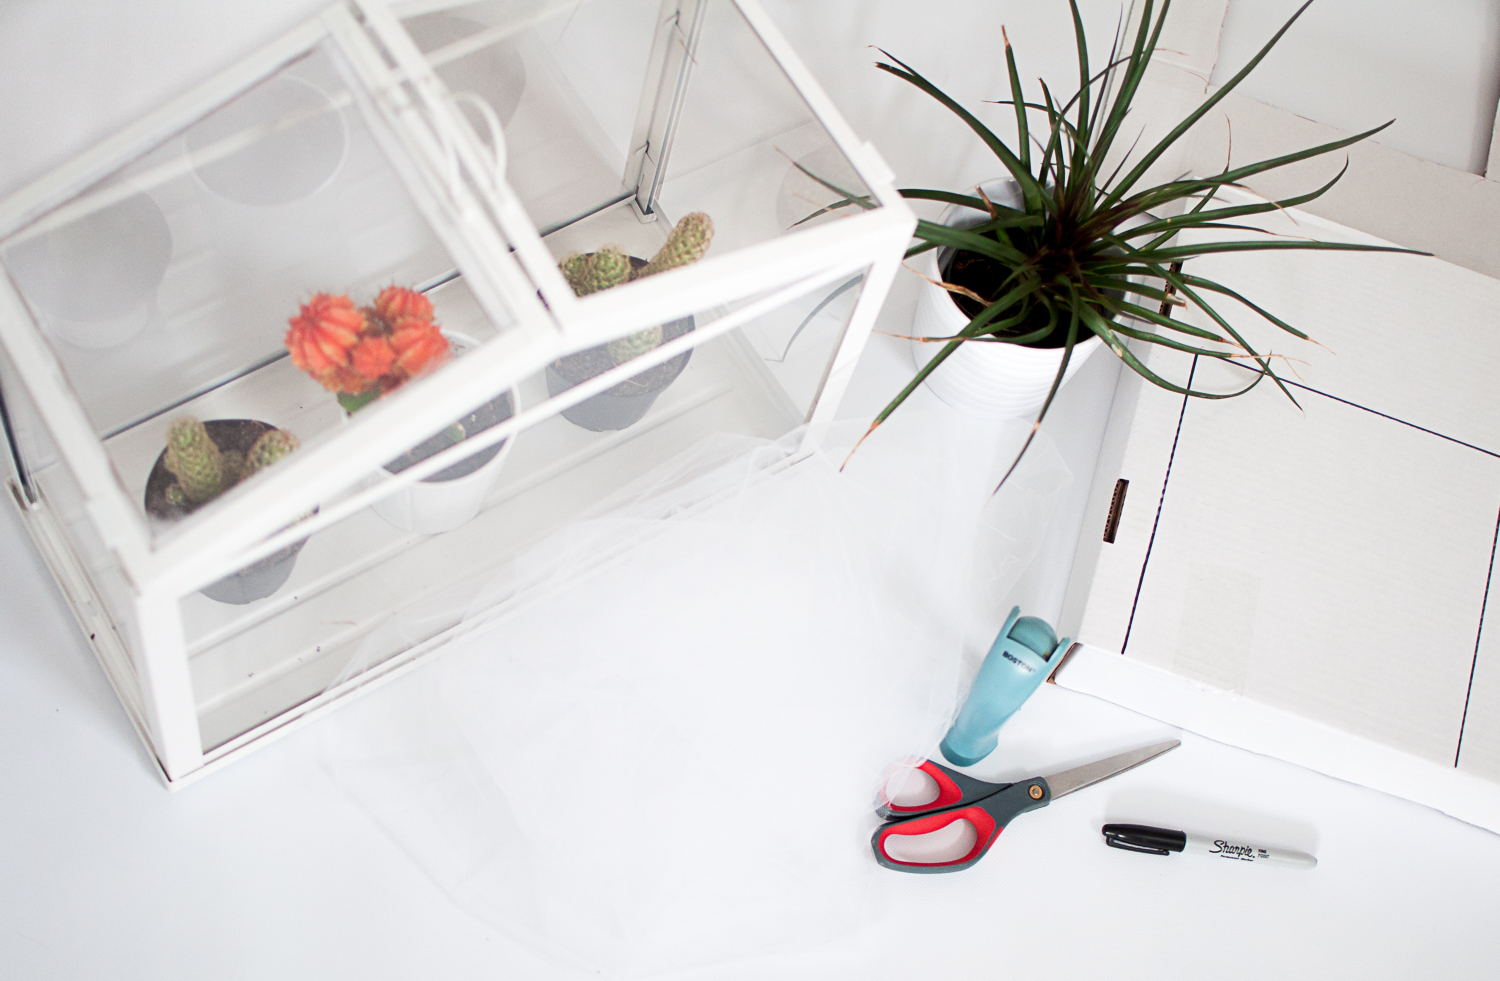
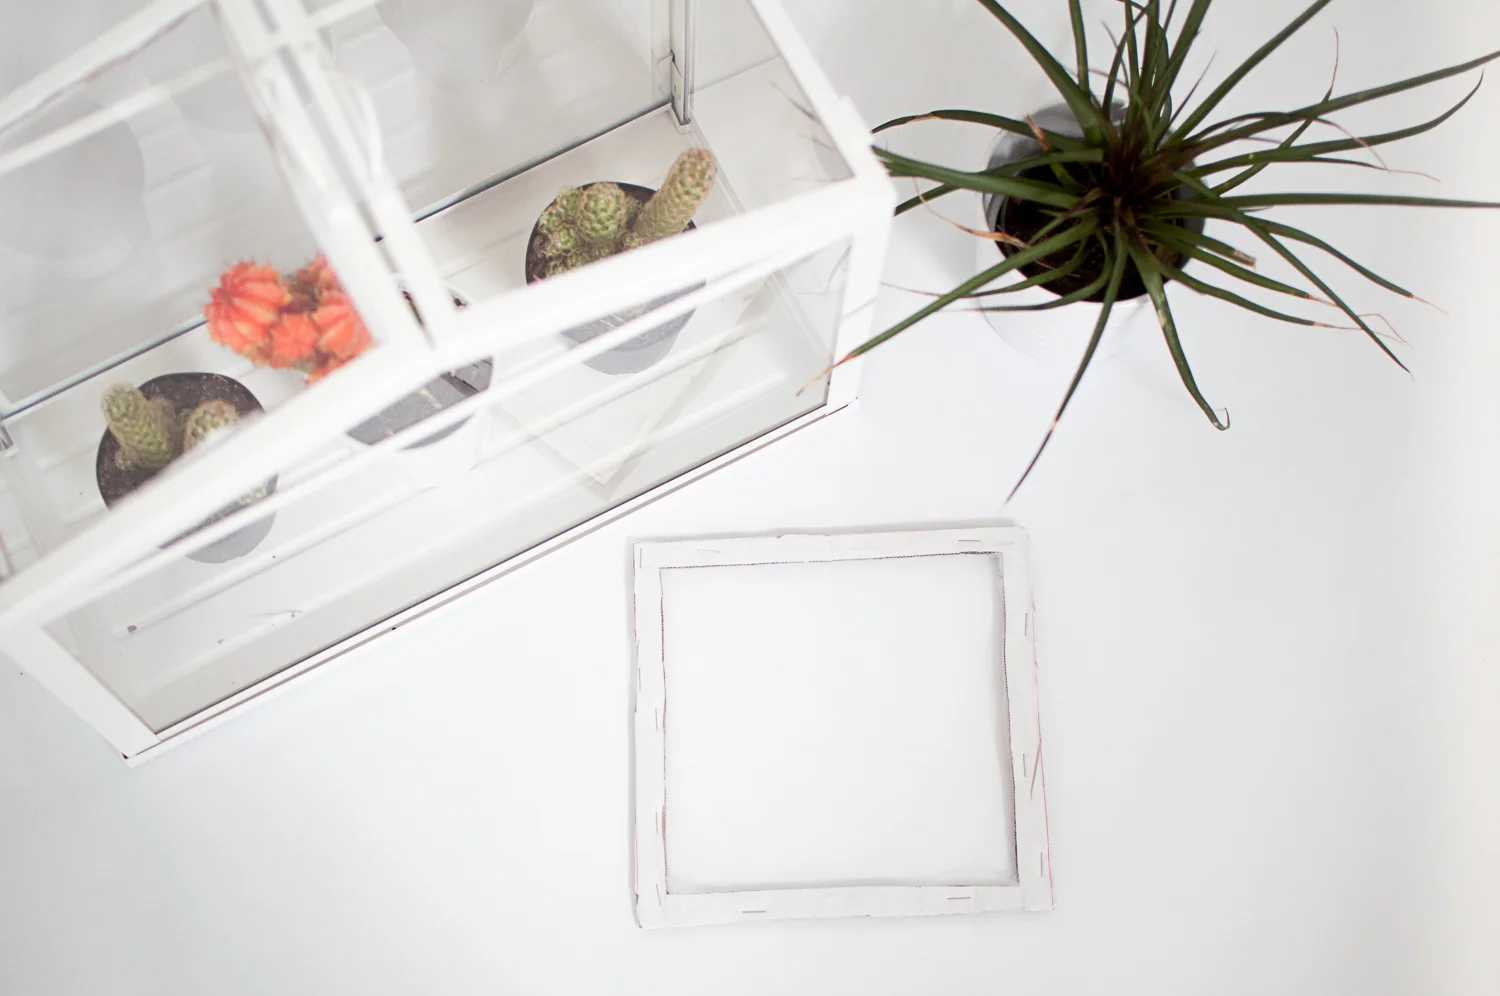
I cut out the square of cardboard and then cut out the centre of the square leaving only a 1cm wide outer edge frame. I then wrapped some organza (any type of soft mesh or screen will work. If you don't have a scrap laying around, your local hardware, fabric or dollar store will probably have something appropriate) over the cardboard frame and stapled it into place. The screen frame then slid nicely back into place in the top of the greenhouse. You could do both sides, but we're going to leave 1 glass and 1 mesh. Once the cocoons are ready and attached to the lids of their cups I will cut an X in the mesh and carefully lower the cocoons through. The plastic lids of the containers sit in the holes of the mesh so the cocoons can hang down into the greenhouse awaiting their arrival.
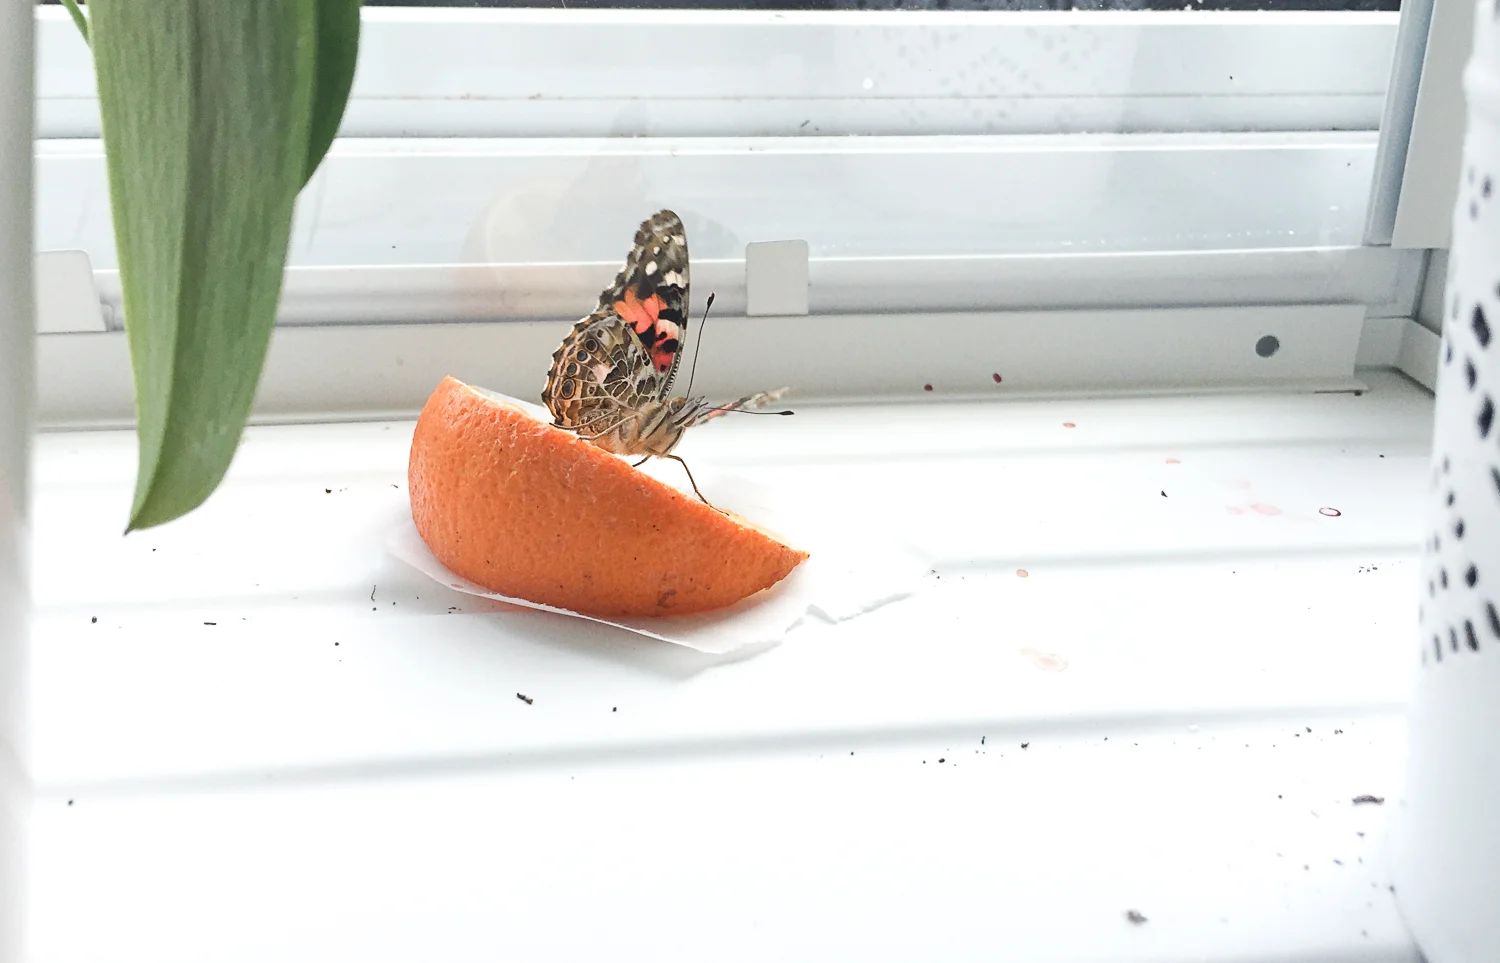
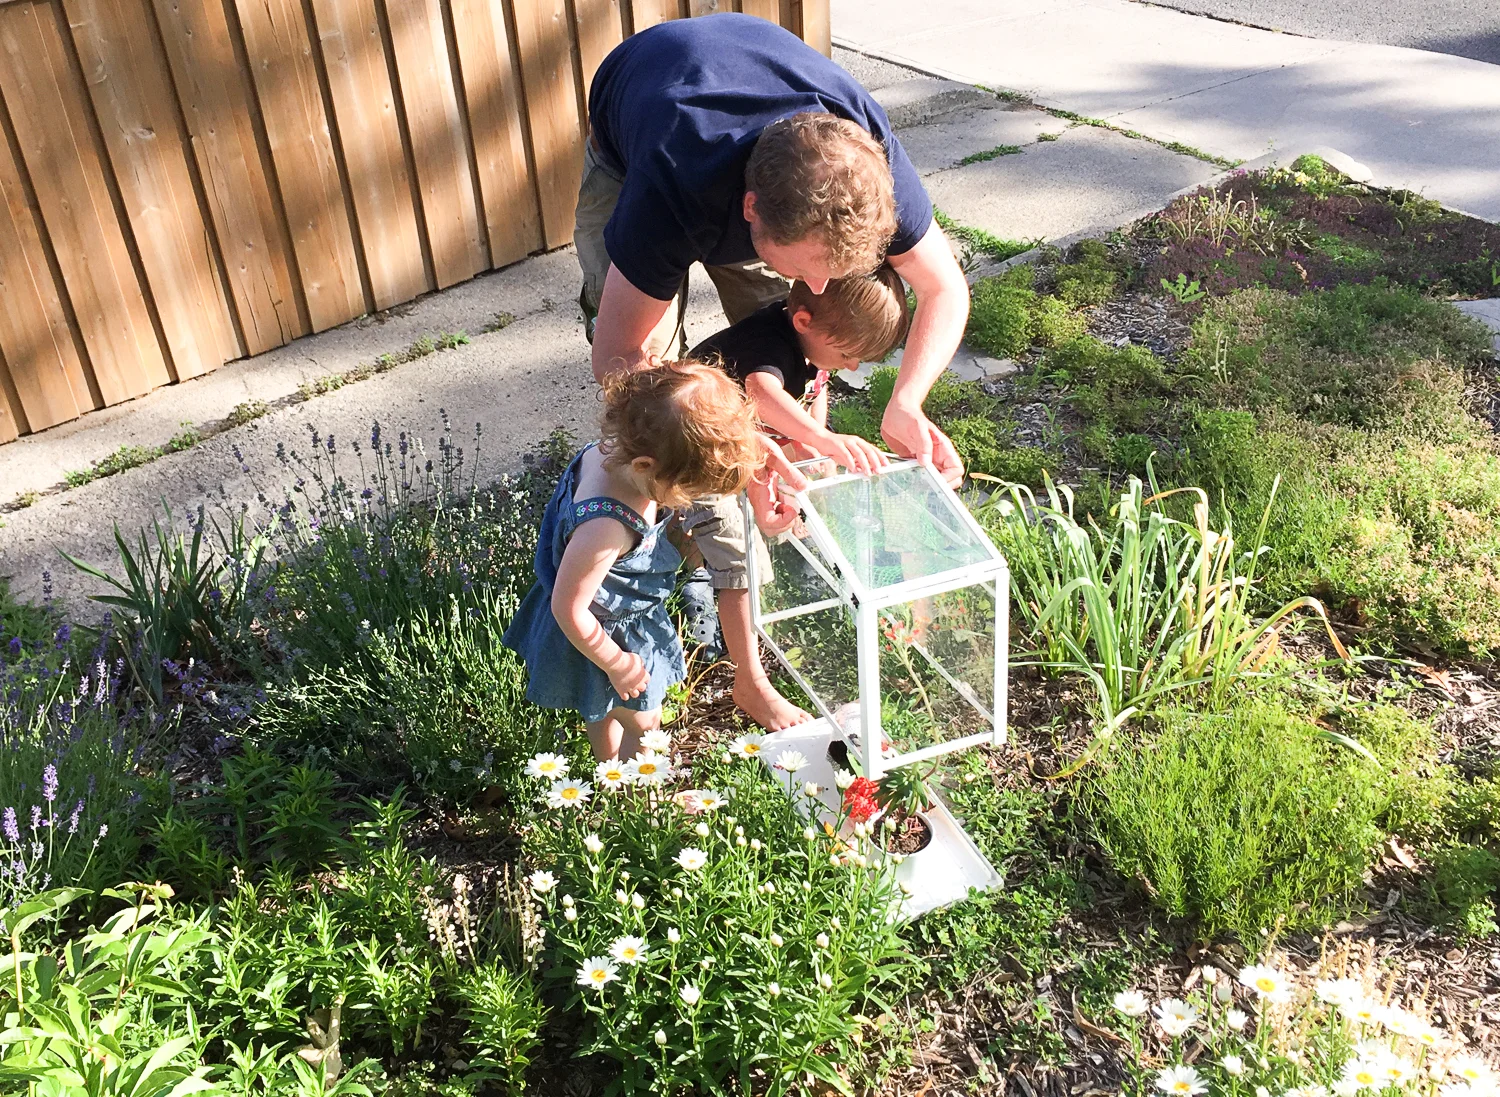
Once your butterflies hatch they will need to remain in your habitat for up to a week to dry out their wings and gain strength. Don't worry, the instructions that come with your caterpillar will give you all the details on the food options eg. sugar water & sliced fruit. Once your butterfly is flying around it's ready to be freed into the wild. We love letting our butterflies go in our garden every year.


Here is some more butterfly habitat inspiration:
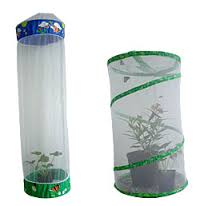

Hope you have fun making a habitat for your little critters. Don't forget to share your adventures with #junctionwings.
Care

Garlic Scape Basil Pesto
It's Garlic Scape season, so I thought I would share a yummy scape recipe with all of you. It's our first year with homegrown scapes, so after harvesting them, I busily researched all of the great things you can make with these delicious garlic greens. I decided to make pesto, so that the scapes could be preserved and savoured later in the year when they're long gone.
It's Garlic Scape season, so I thought I would share a yummy scape recipe with all of you. It's our first year with homegrown scapes, so after harvesting them, I busily researched all of the great things you can make with these delicious garlic greens. I decided to make pesto, so that the scapes could be preserved and savoured later in the year when they're long gone.
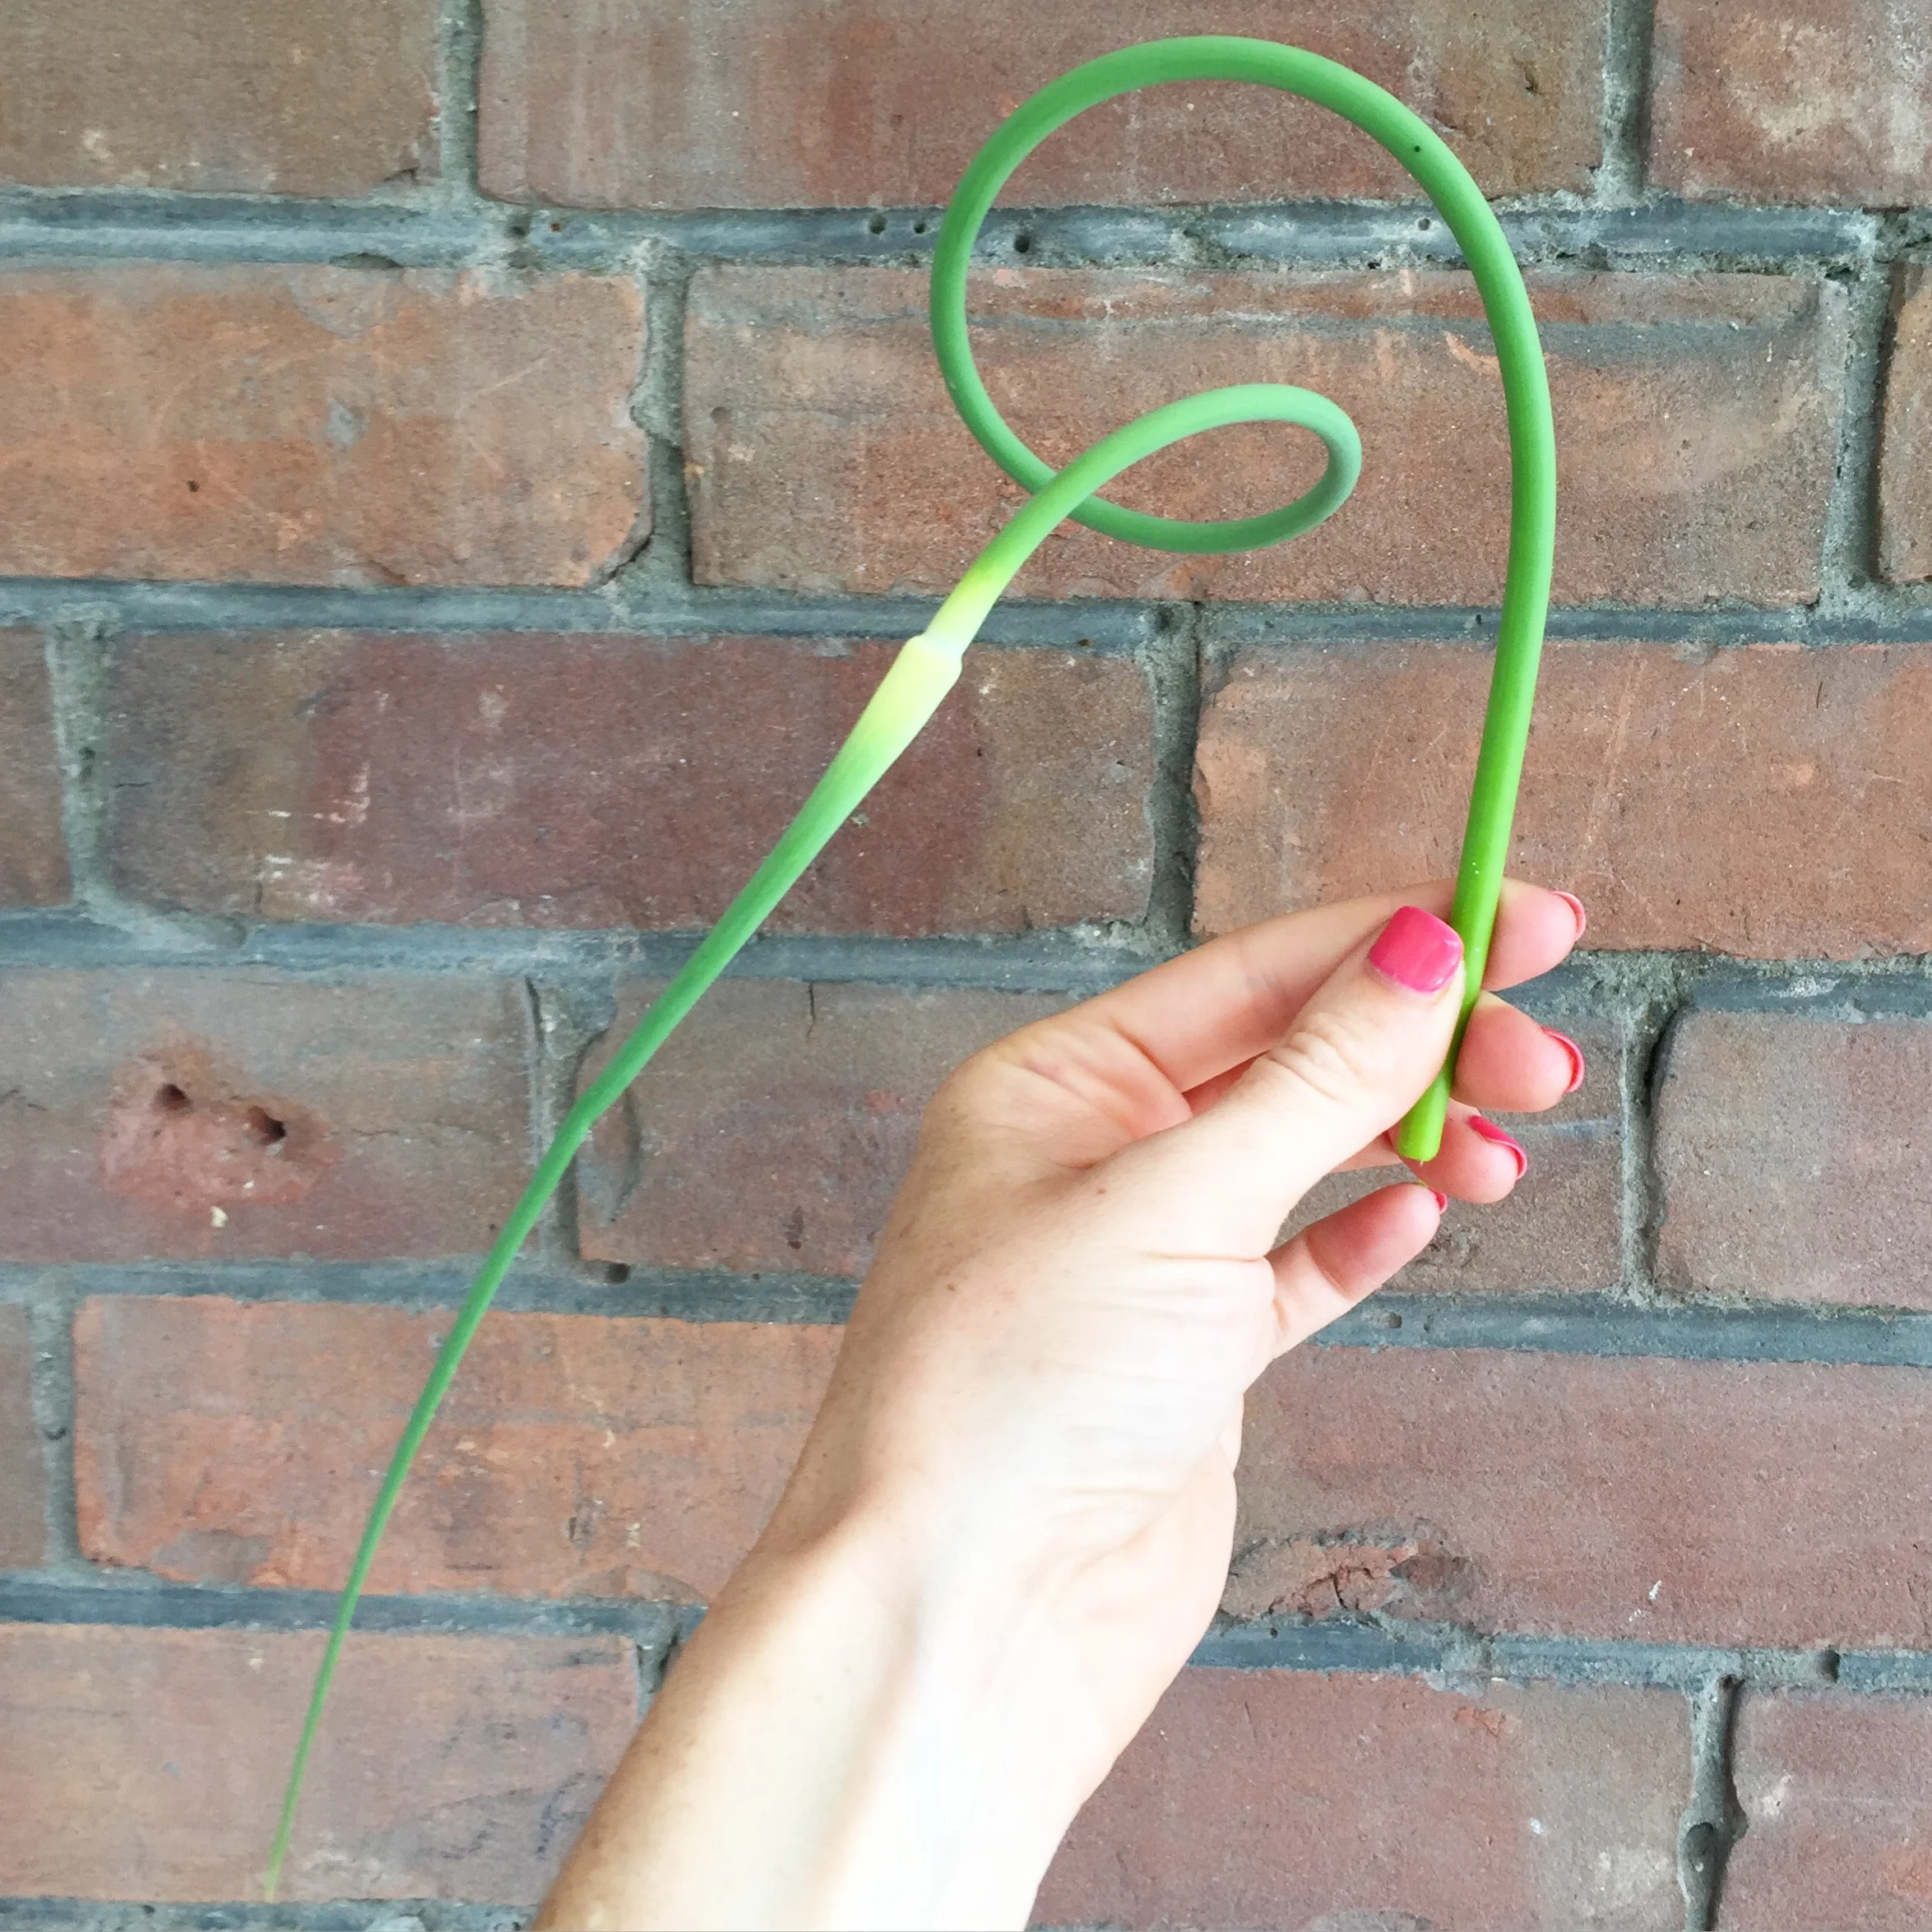
Although I found several versions of garlic scape pesto online, none were exactly what I wanted, so I combined a few to create this recipe. It's hands down one of the most delicious things I've ever made. I'm extra proud since we grew the scapes & basil ourselves. If you have some scapes lying around in your garden, or find some at you local farmers market I highly recommend making this. You won't regret it! Best part, it uses 7 simple ingredients and takes only minutes to mix up.
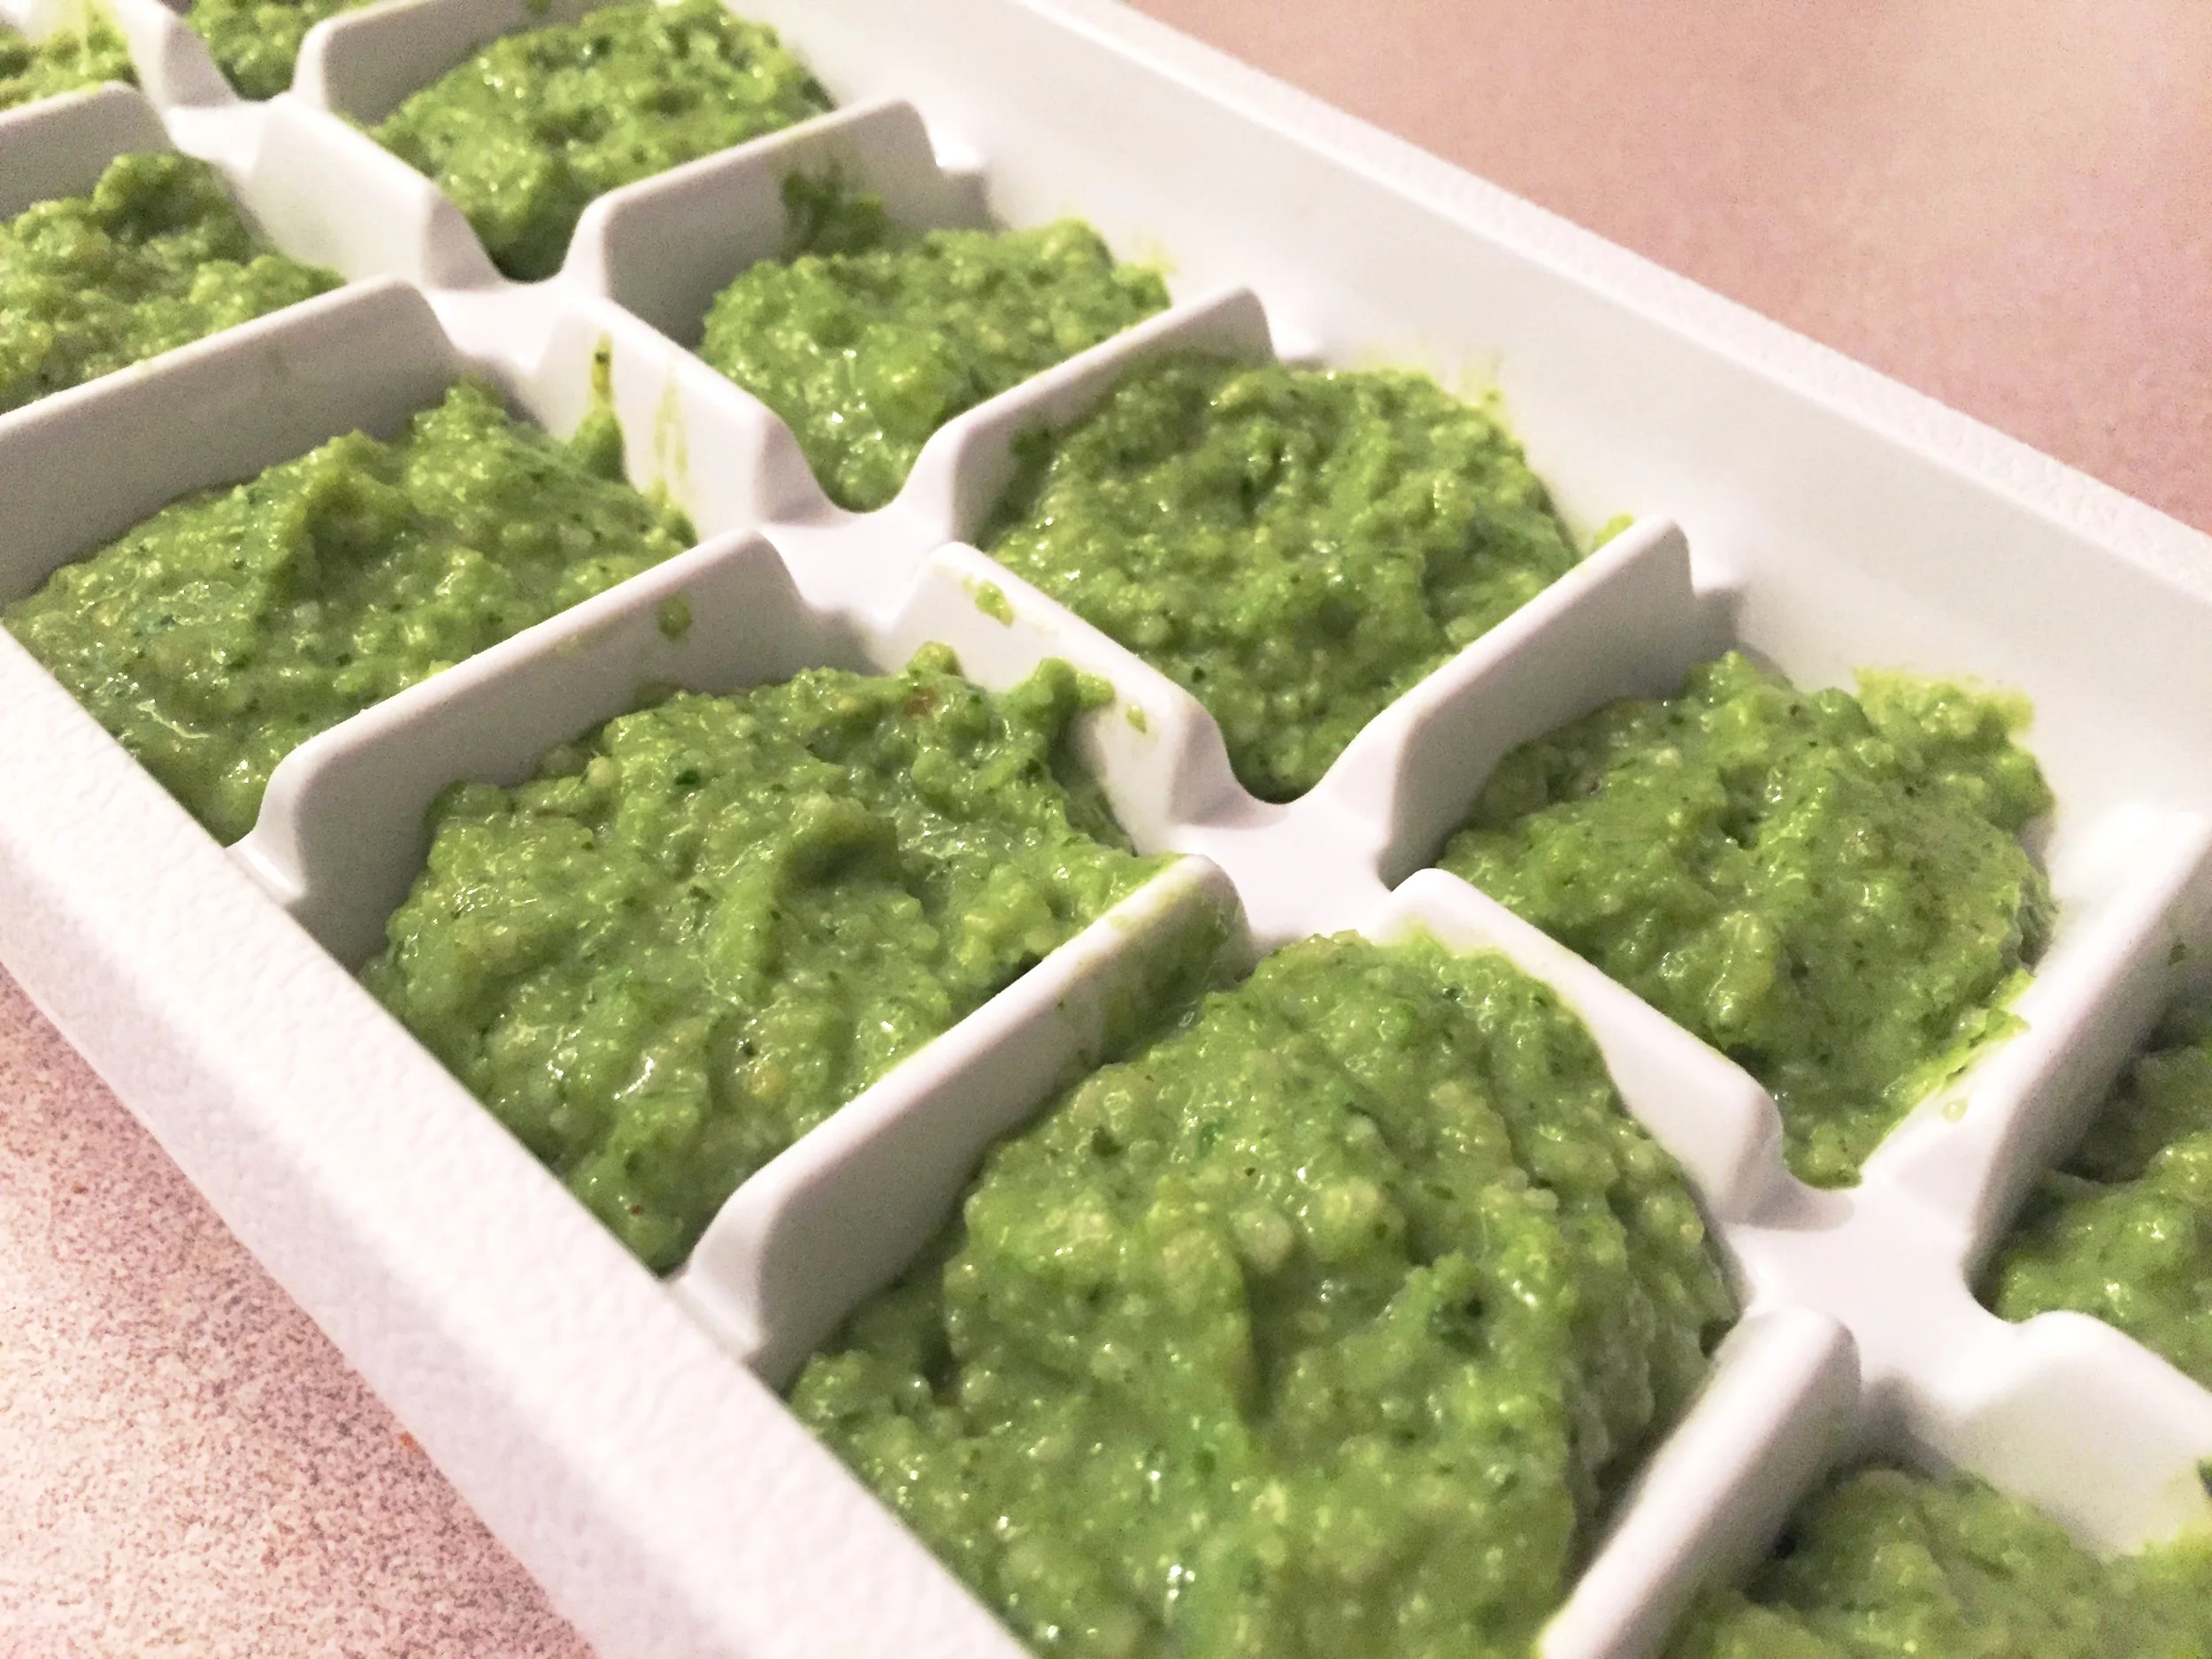
*Note: Freeze your pesto in an ice cube tray and then pop out cubes and store in an airtight freezer safe container or freezer bag. Ideal for single use on sandwiches, salads or pasta.
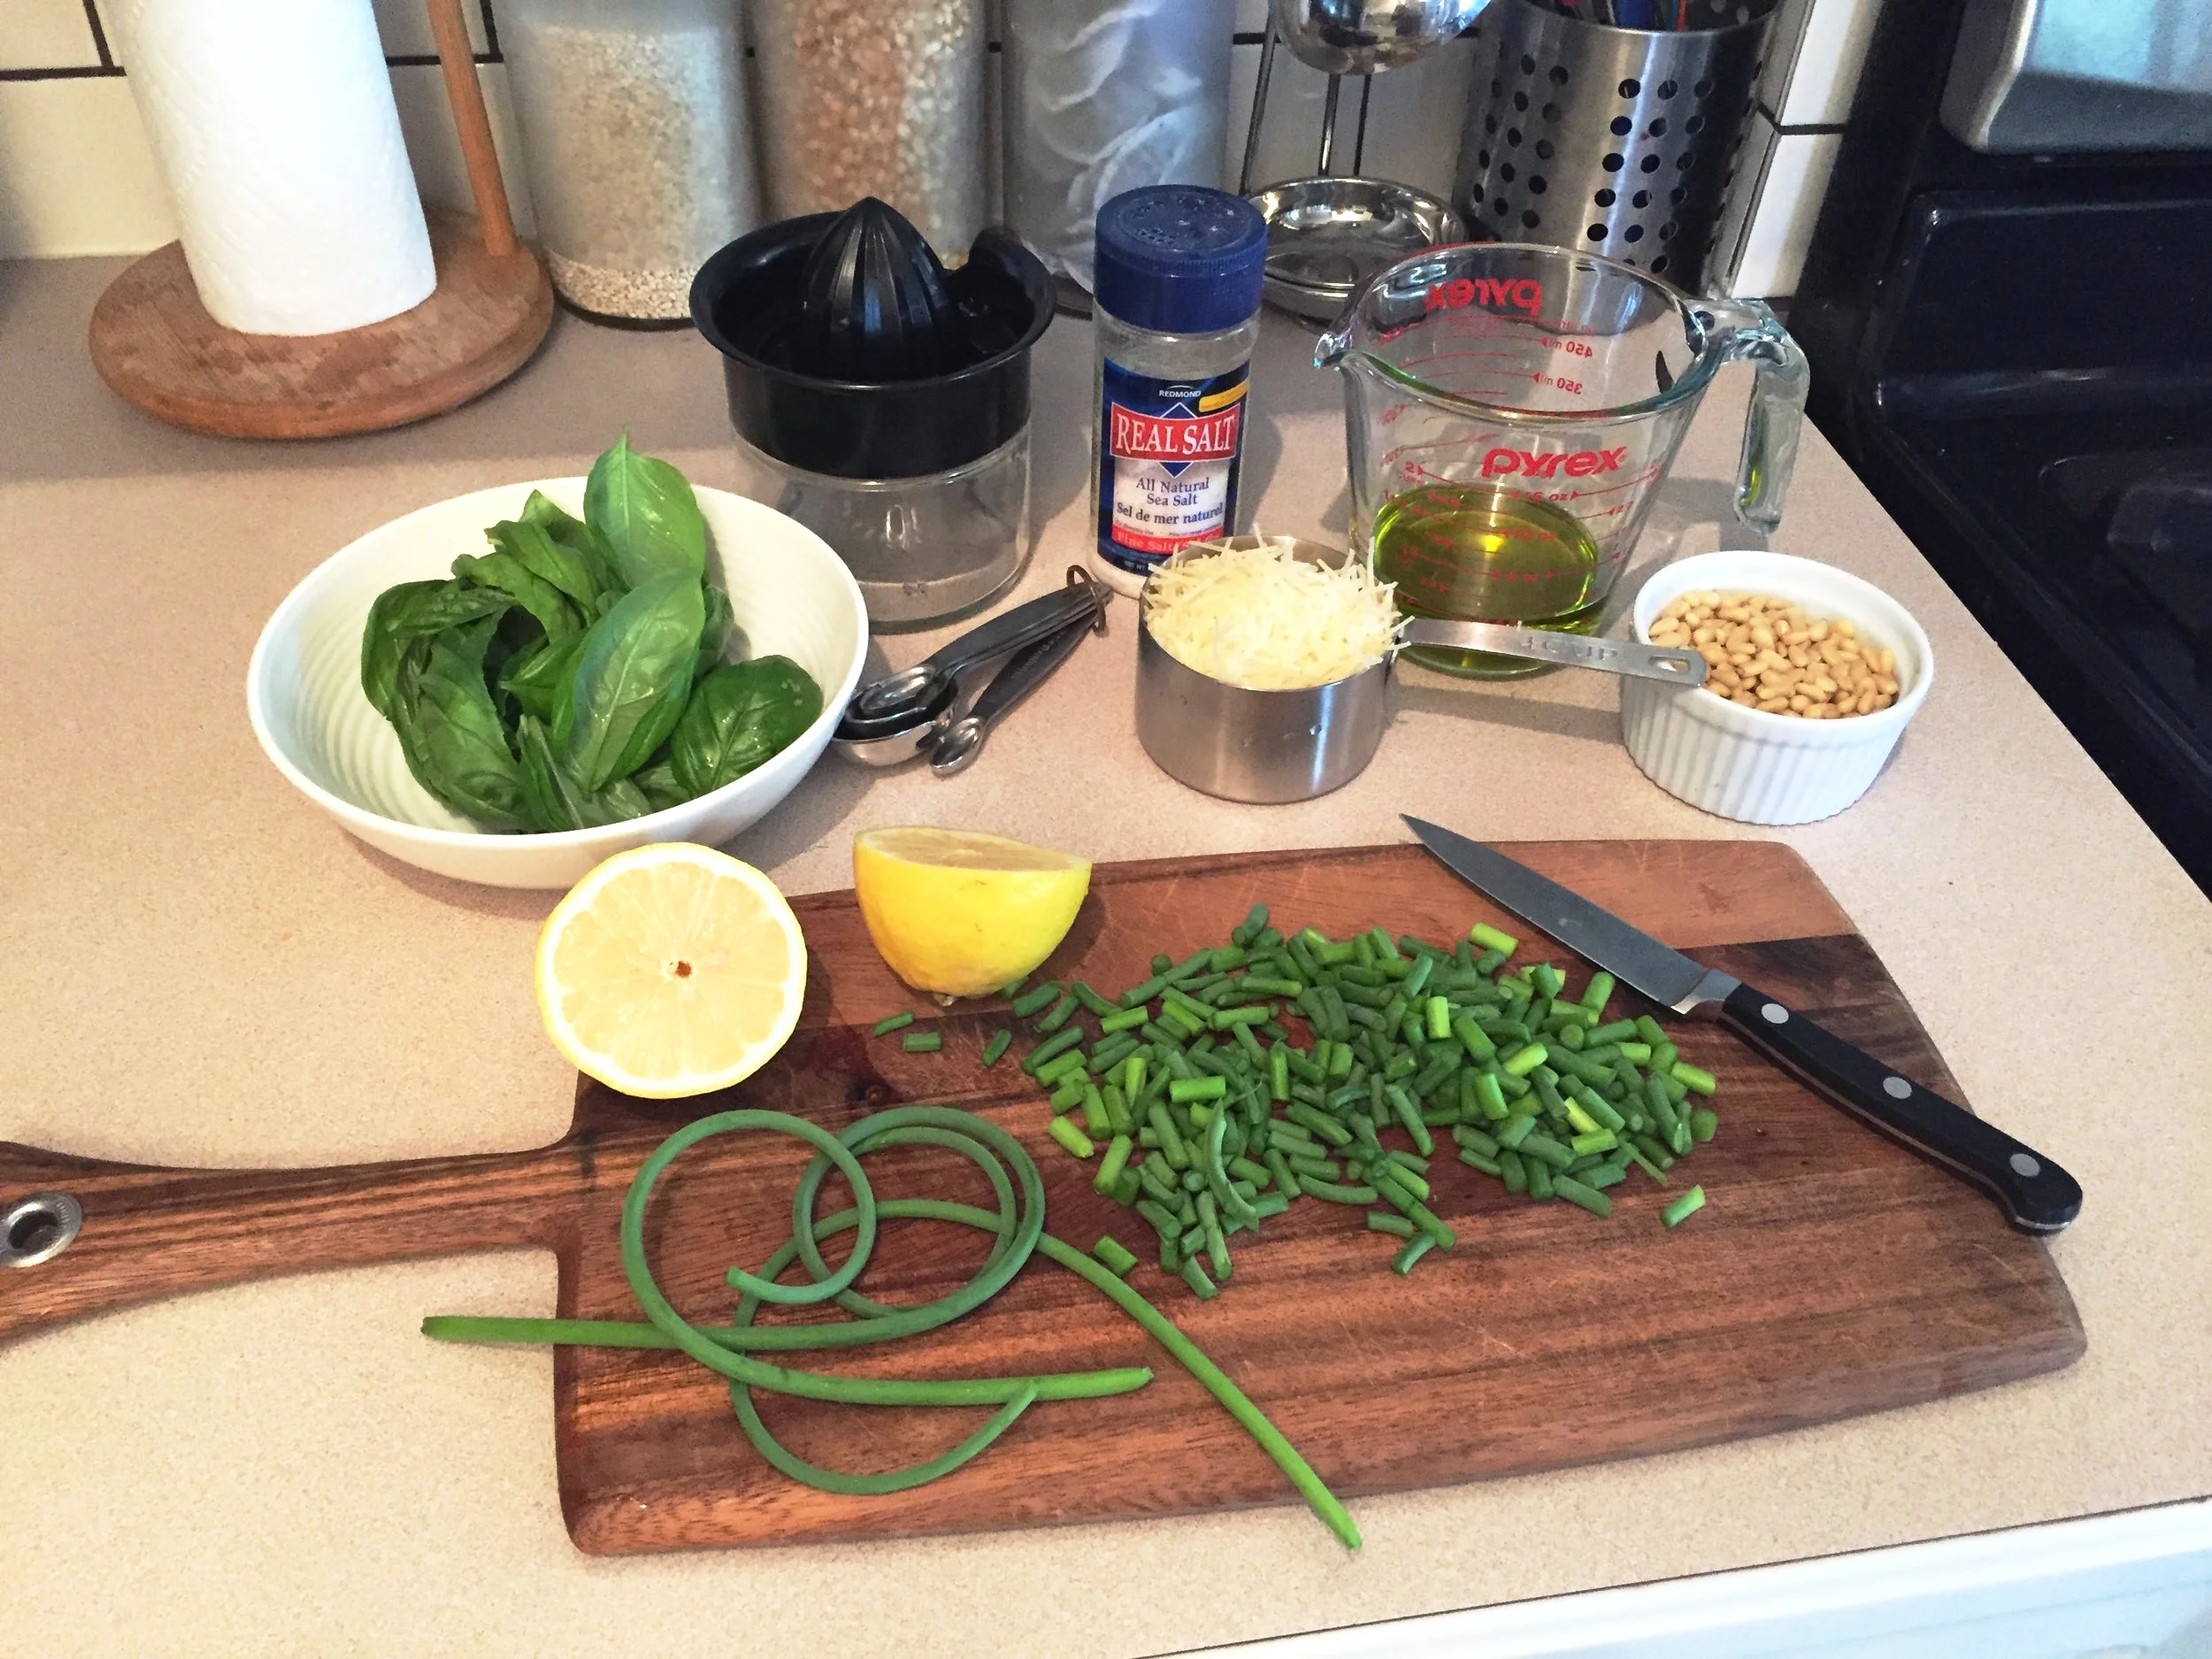
Ingredients:
- 1 cup fresh clean basil leaves
- 10 garlic scapes, cleaned, bud removed, and cut into 1" pieces
- 1/4 tsp sea salt
- 1/2 of a lemon juiced
- 1/2 cup olive oil
- 1/2 cup pine nuts
- 1 cup freshly grated parmesan
Instructions:
- Add basil, garlic scapes & salt to food processor and blend until almost smooth, scrape down sides with spatula.
- Add lemon juice, olive oil, pine nuts & parmesan and blend until smooth scraping sides with spatula.
- Pour pesto into ice cube trays, freezer bags or mason jars and freeze for several months, or keep pesto in the fridge if you plan to use it within a week or so. The flavours will meld together and mellow over time when frozen.
Excellent on pastas, sandwiches, or salads. Enjoy!
- Care

3 Must Haves for Veggie Garden Success!
Spring is here and it's officially gardening season. Yay! My hubby and I are avid gardeners and have been busy at work over the last few weeks preparing and planting our annual fruit, veggie and herb garden. As I've been posting pics to Instagram I've been getting lots of requests for details about our garden accessories, so I thought I would share my must haves with everyone...
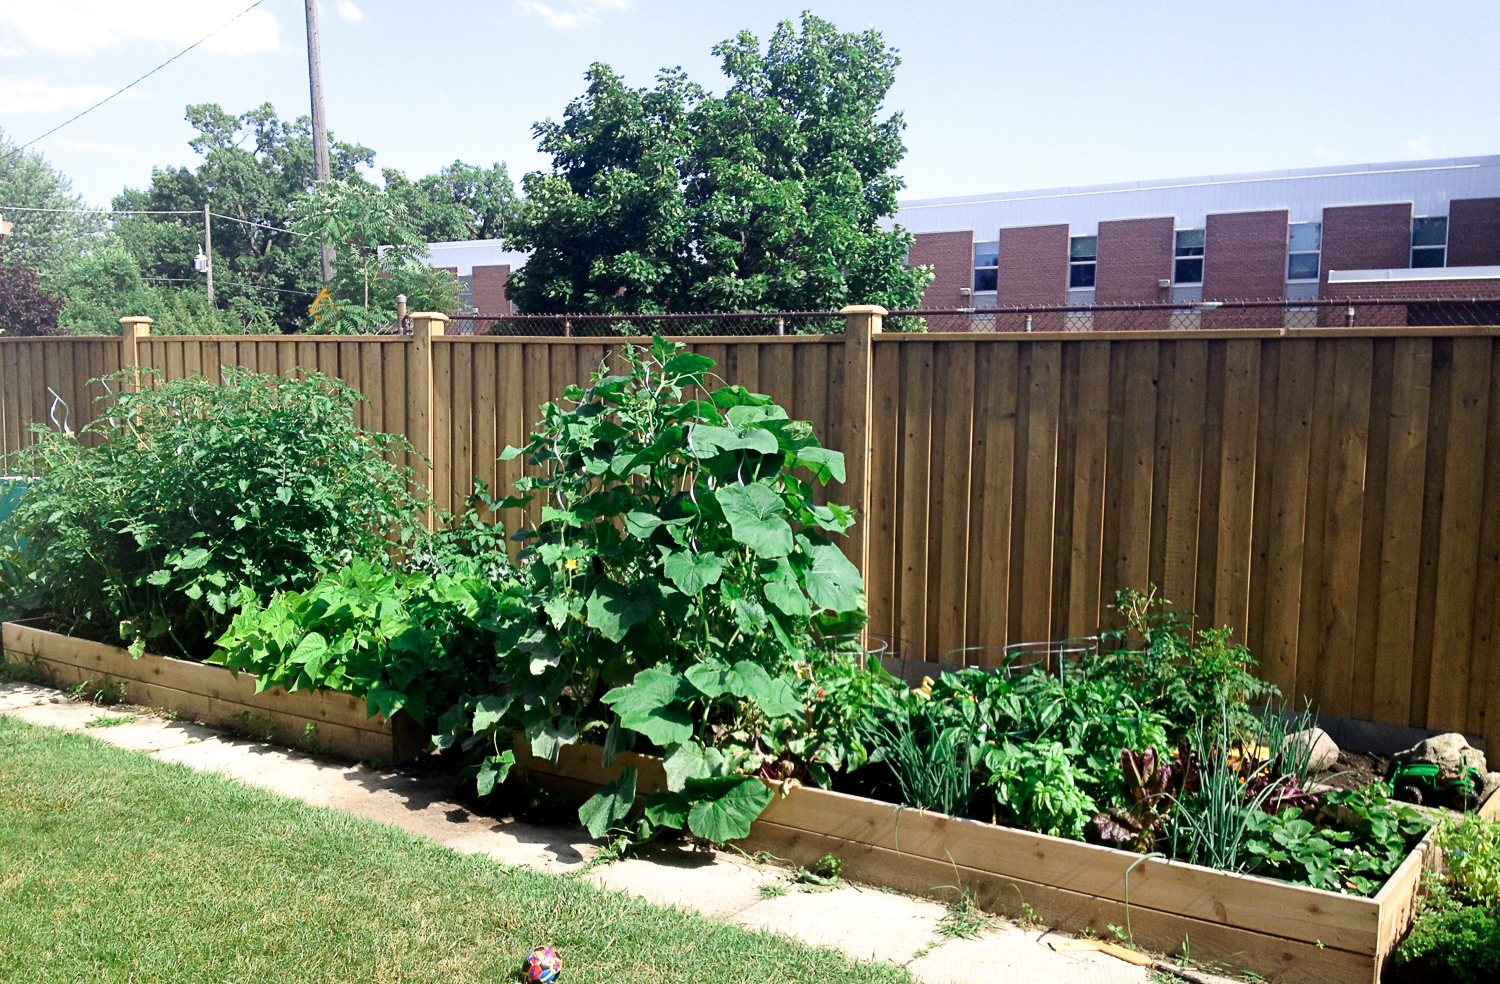
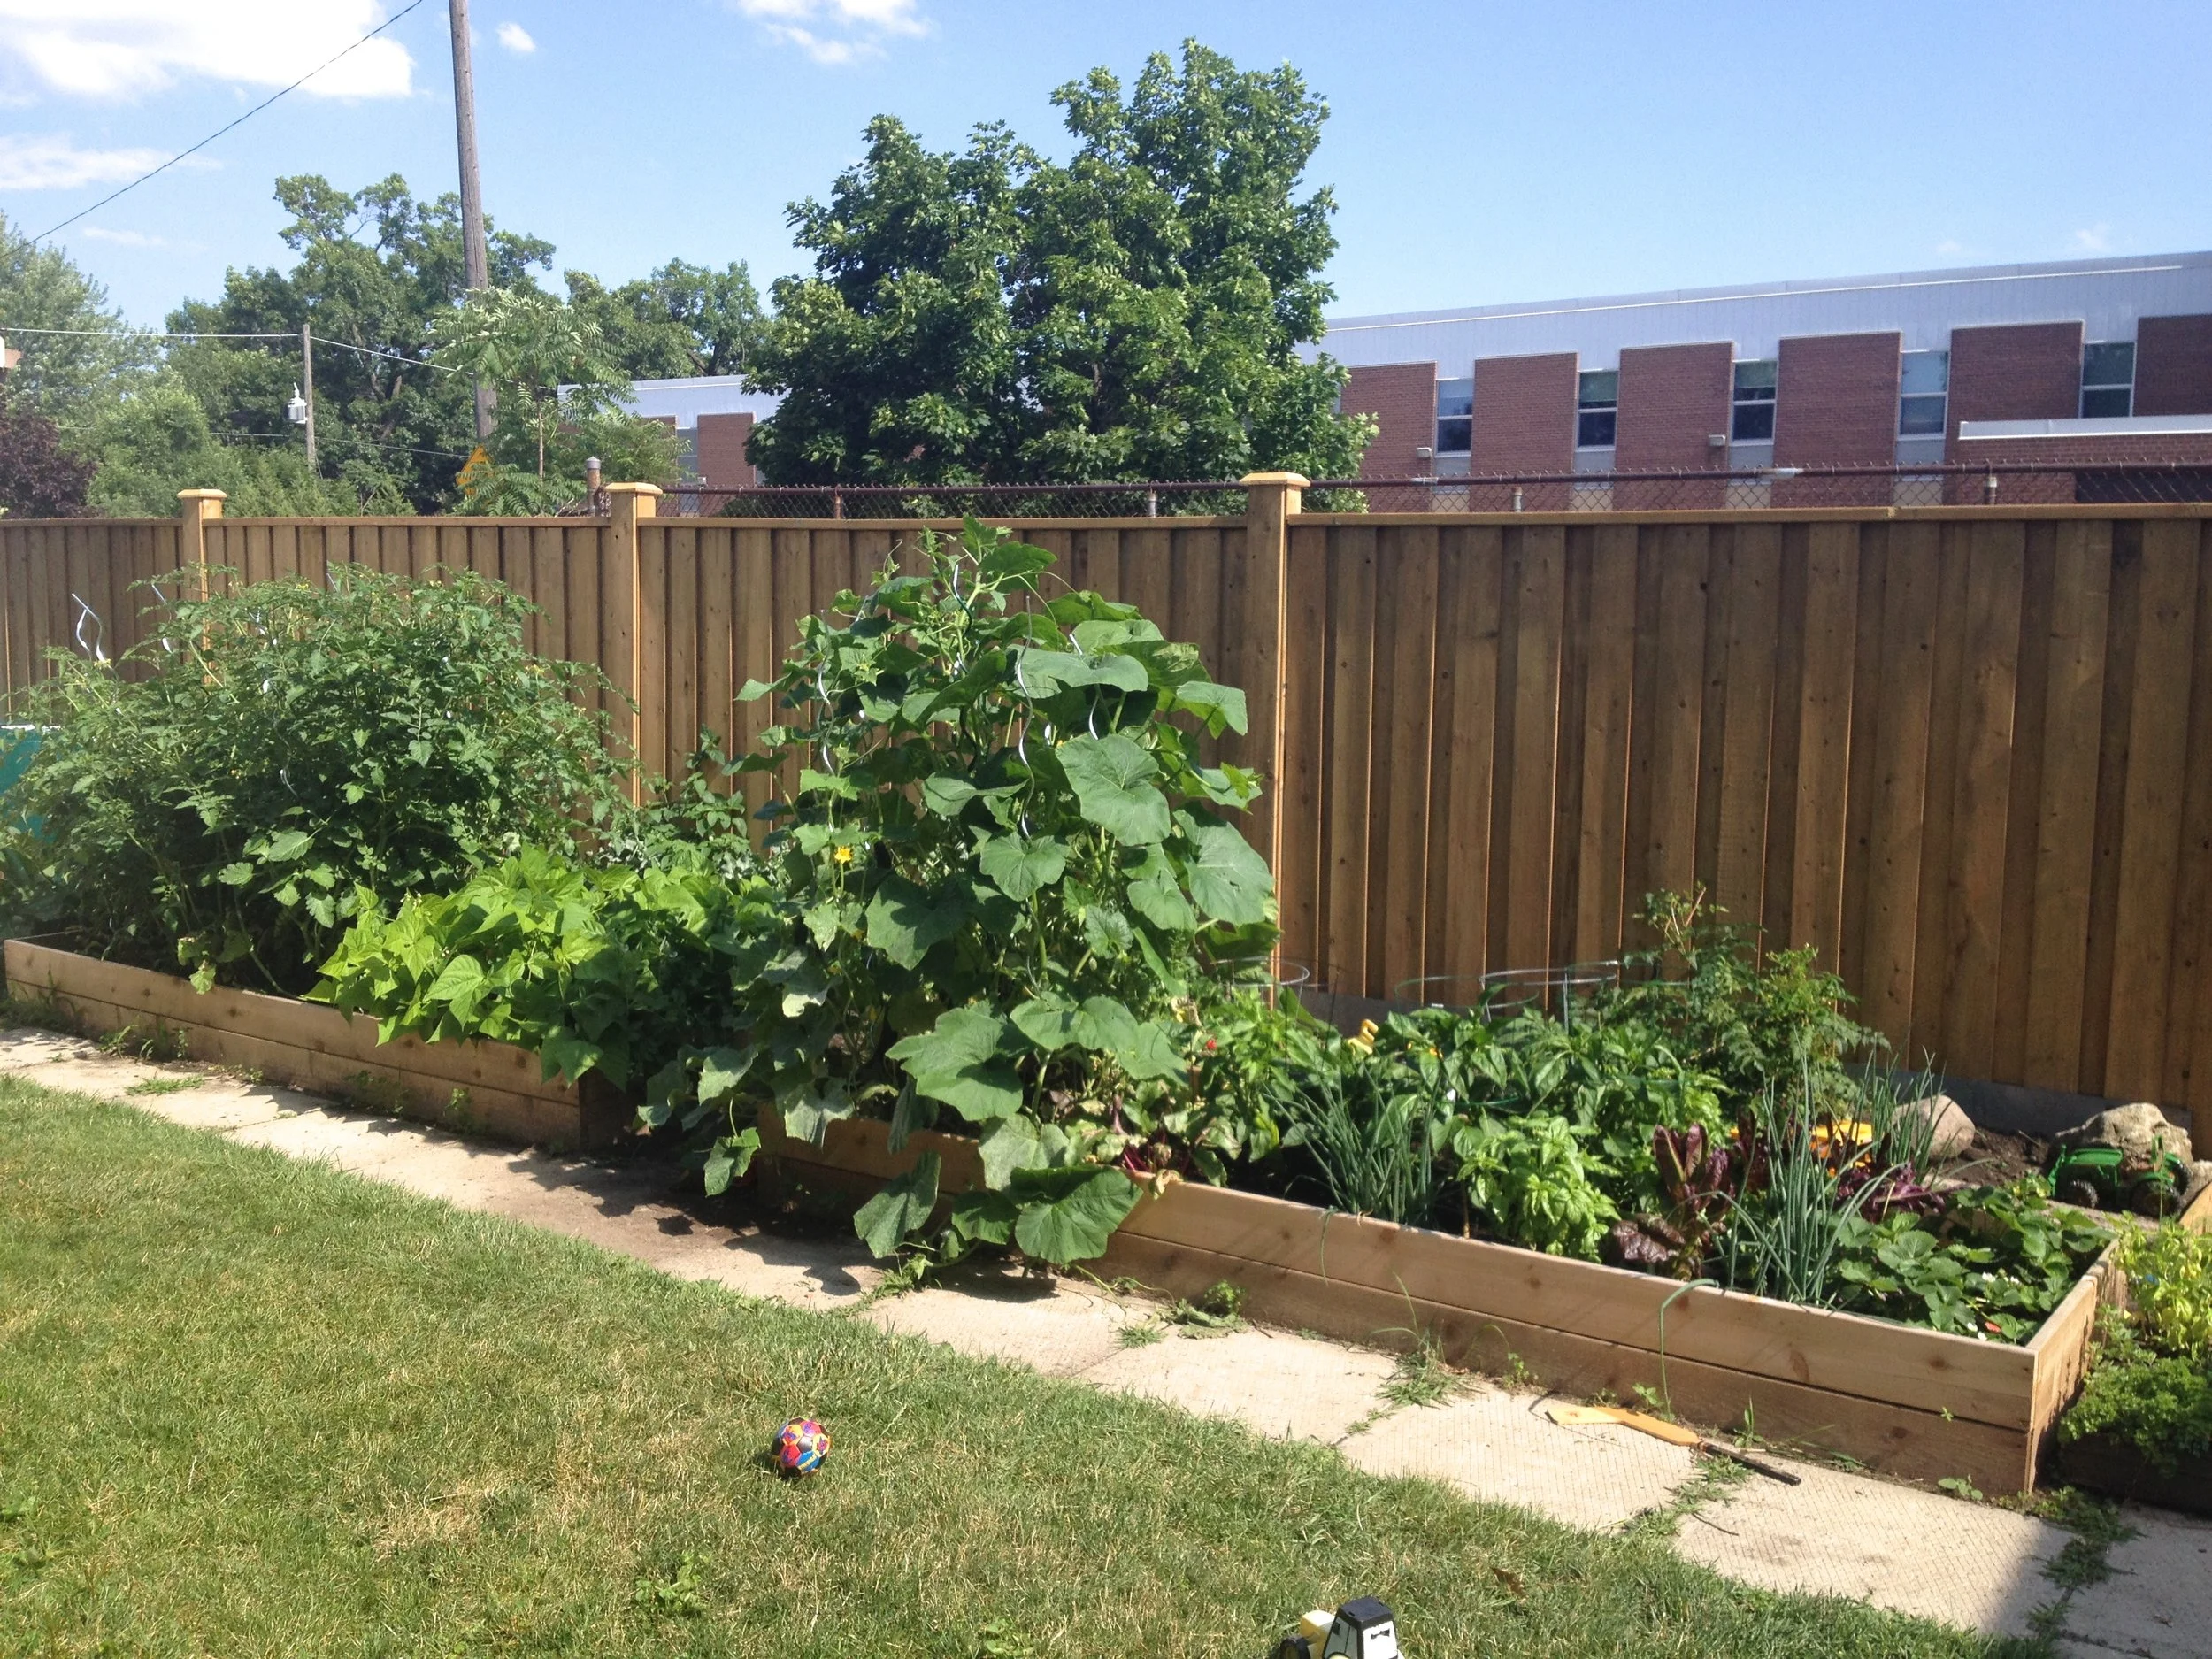
Spring is here and it's officially gardening season. Yay! My hubby and I are avid gardeners and have been busy at work over the last few weeks preparing and planting our annual fruit, veggie and herb garden. As I've been posting pics to Instagram I've been getting lots of requests for details about our garden accessories, so I thought I would share my must haves with everyone. These 3 items are a big investment up front, however all of them will serve your garden well for many years to come, and impact the survival, growth and yield of your garden each year.
Here's a glimpse of our garden in July 2014. Needless to say we hope to have another year just like it.
Care's 3 Must Haves for Veggie Garden Success!
1. Rain Barrel
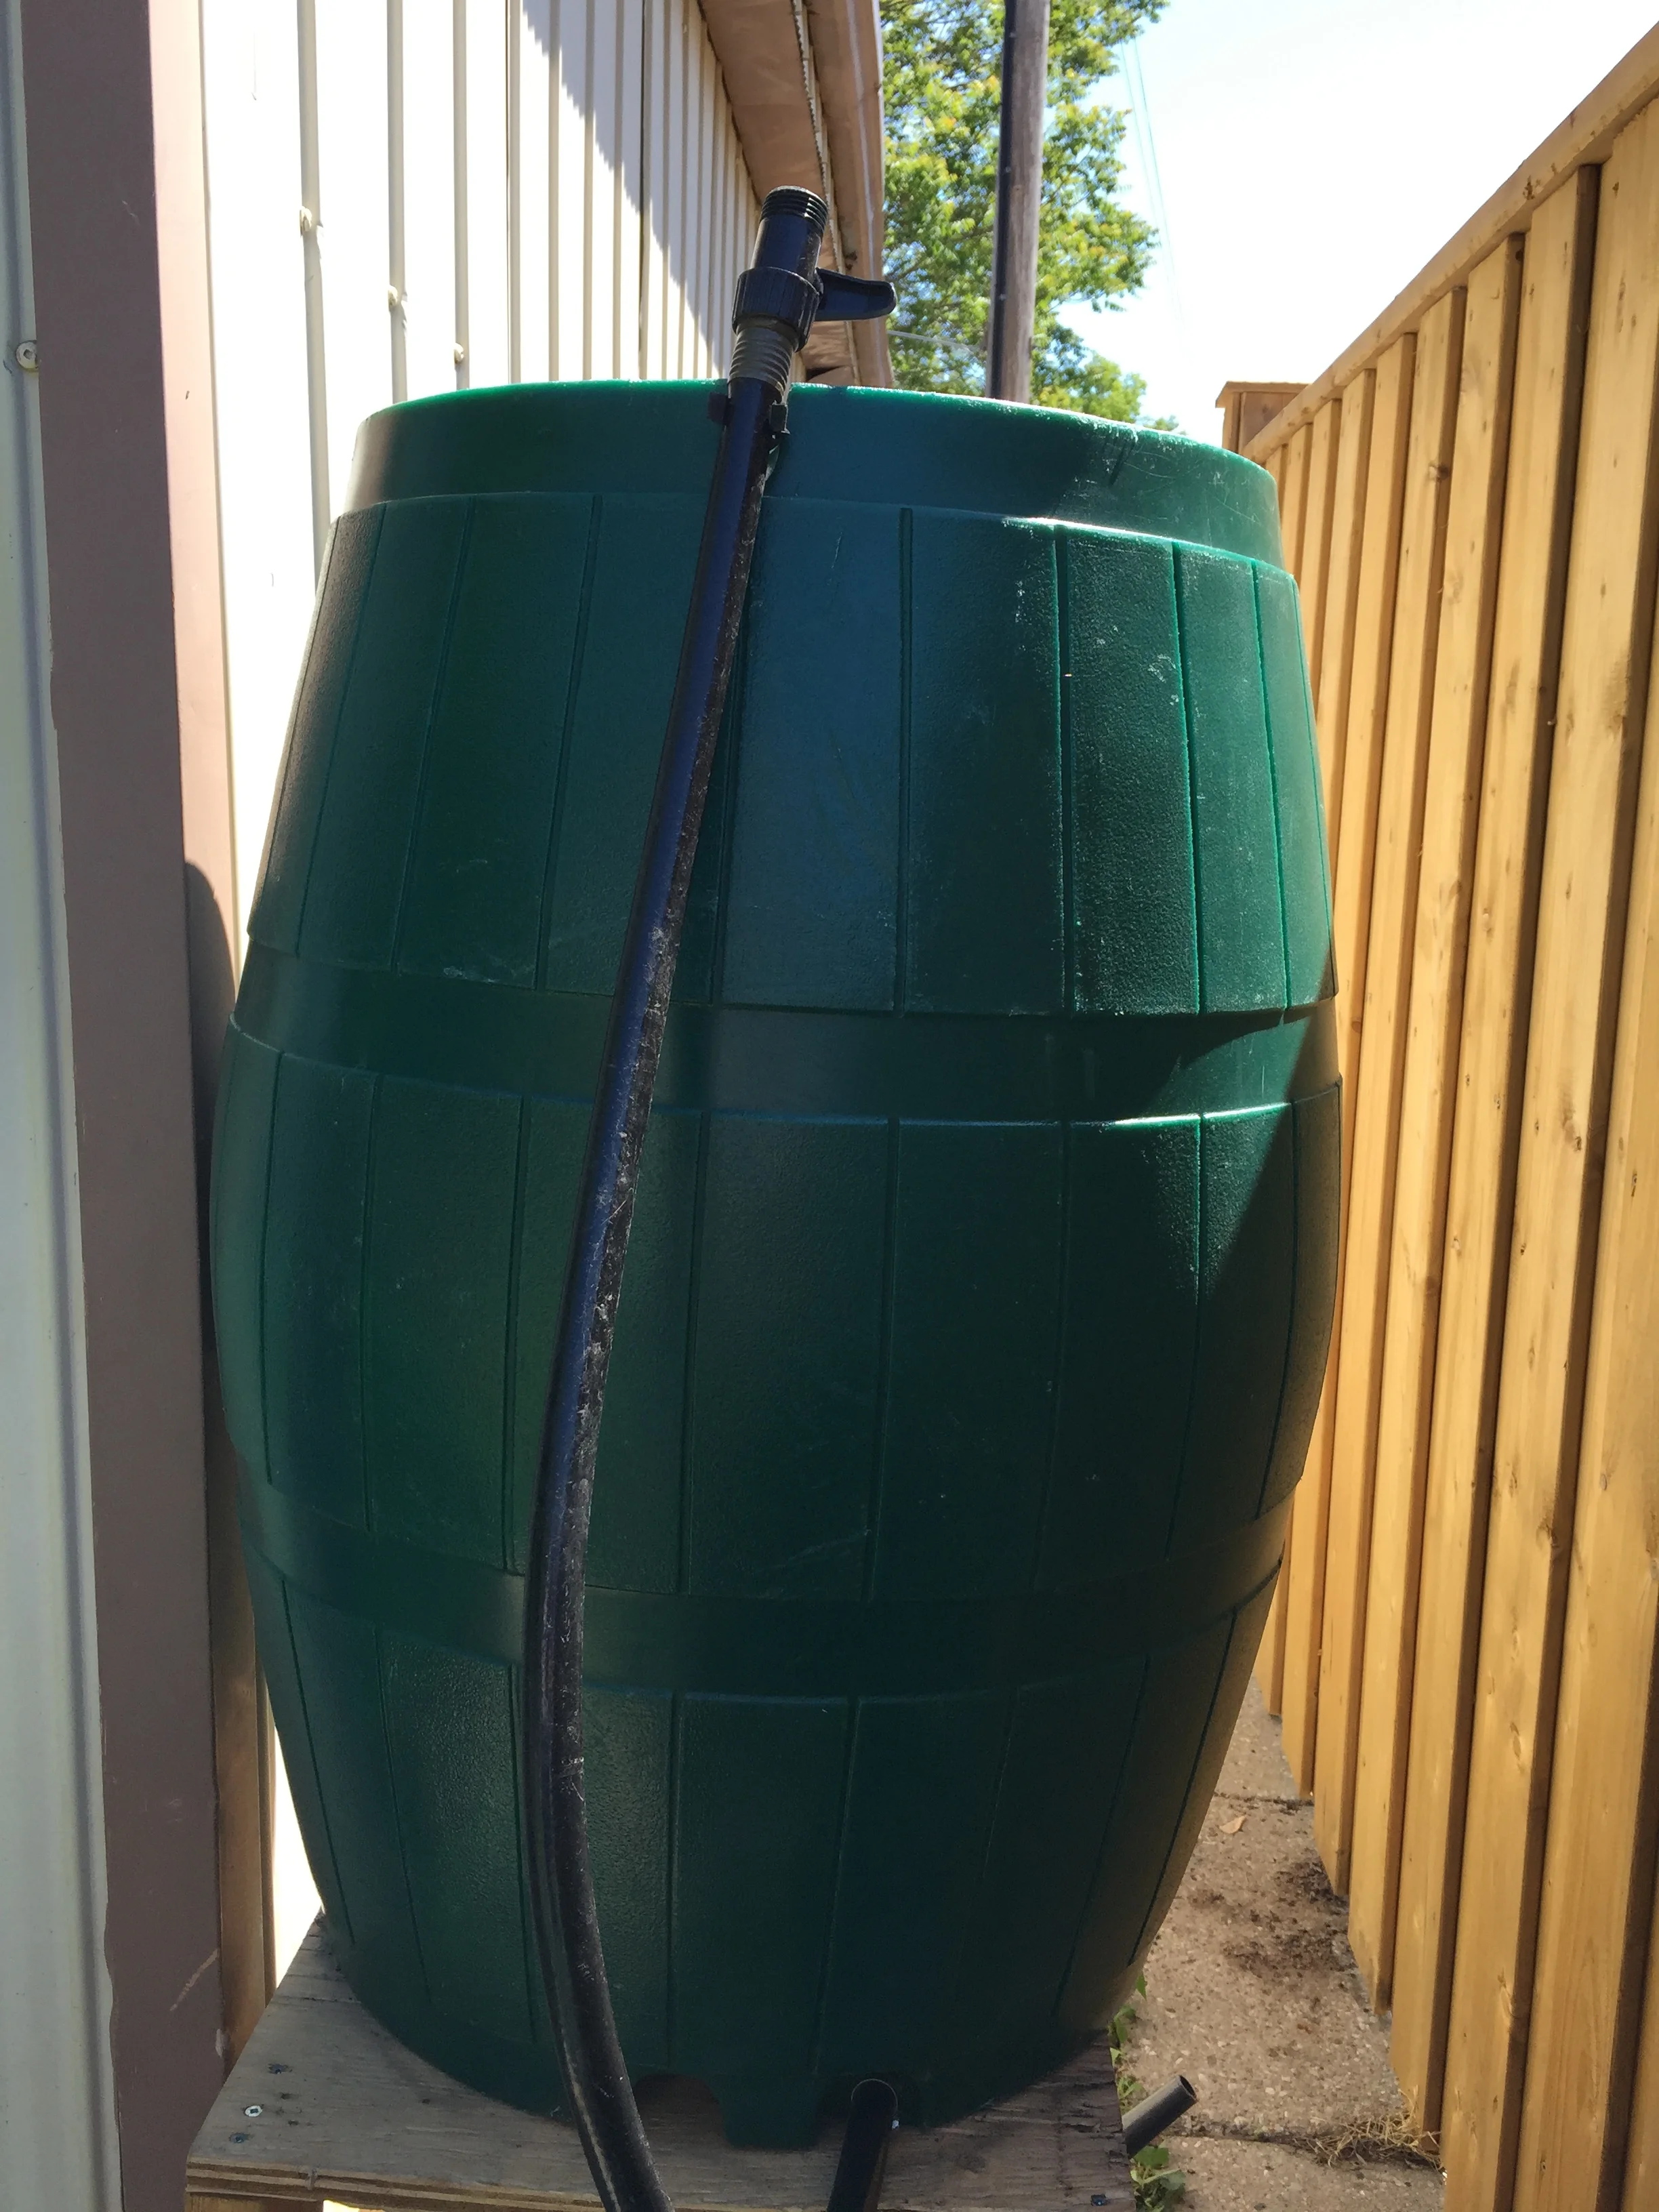
All gardens need water, so this one is a no brainer. A rain barrel is simple to set up under any eavestrough and collects rain water to use for your garden. Not only does this save money and water, but it's actually better for your plants. Rain water doesn't have the chemicals used to treat our drinking water such as chlorine and fluoride, which can impact the growth and yield of your plants.
You can get rain barrels from stores like Home Depot or Costco for $100-$350, depending on the size and material used. Craigstlist & Kijiji are also great places to check for gently used rain barrels. A word to the wise, we got ours via a community project last year for $50, so I encourage you to look online and check sales around the GTA. There are lots of special water events throughout the year, where they discount barrels to encourage people to use them. Always worth checking.
Note: If you don't have a rain barrel or space for one, consider filling a bucket or bin with hose water and allow it to sit in the sun for a few hours to help burn off the chemicals before using it to water your garden.
2. Garden Covers

There is nothing worse than going to all the work of planning and planting a beautiful garden, only to find the whole thing pillaged by pests. Garden covers allow your plants to get the sunlight, rain and fresh air they need, while preventing rodents and neighbourhood pets from using your garden as a litter box or buffet. This is especially important in the early days of planting seeds or seedlings, because these young plants are tender and sweet and animals love to snack on them. I find they're also essential in keeping plants safe from curious toddlers and clumsy preschoolers.
I love these Pop Up Plant Covers from Lee Valley that we got last year. (**Updated to note that Lee Valley is no longer selling this product. They can be found online at www.gardenguard.net) They are adjustable with zip in panels, so you can tailor the size of the cover for your specific garden, plus they fold up nice and small for winter storage. We love the way they cover our raised beds and make our garden look way more hardcore than it actually is ;) An 8 foot section costs $39.50 and additional 2.5 foot zip in sections can be purchased for $19.50.
Note: When we're out in the garden we open the ends to allow bees and other insects access to help with pollination. Especially when plants like strawberries are flowering.
3. Spiral Stakes
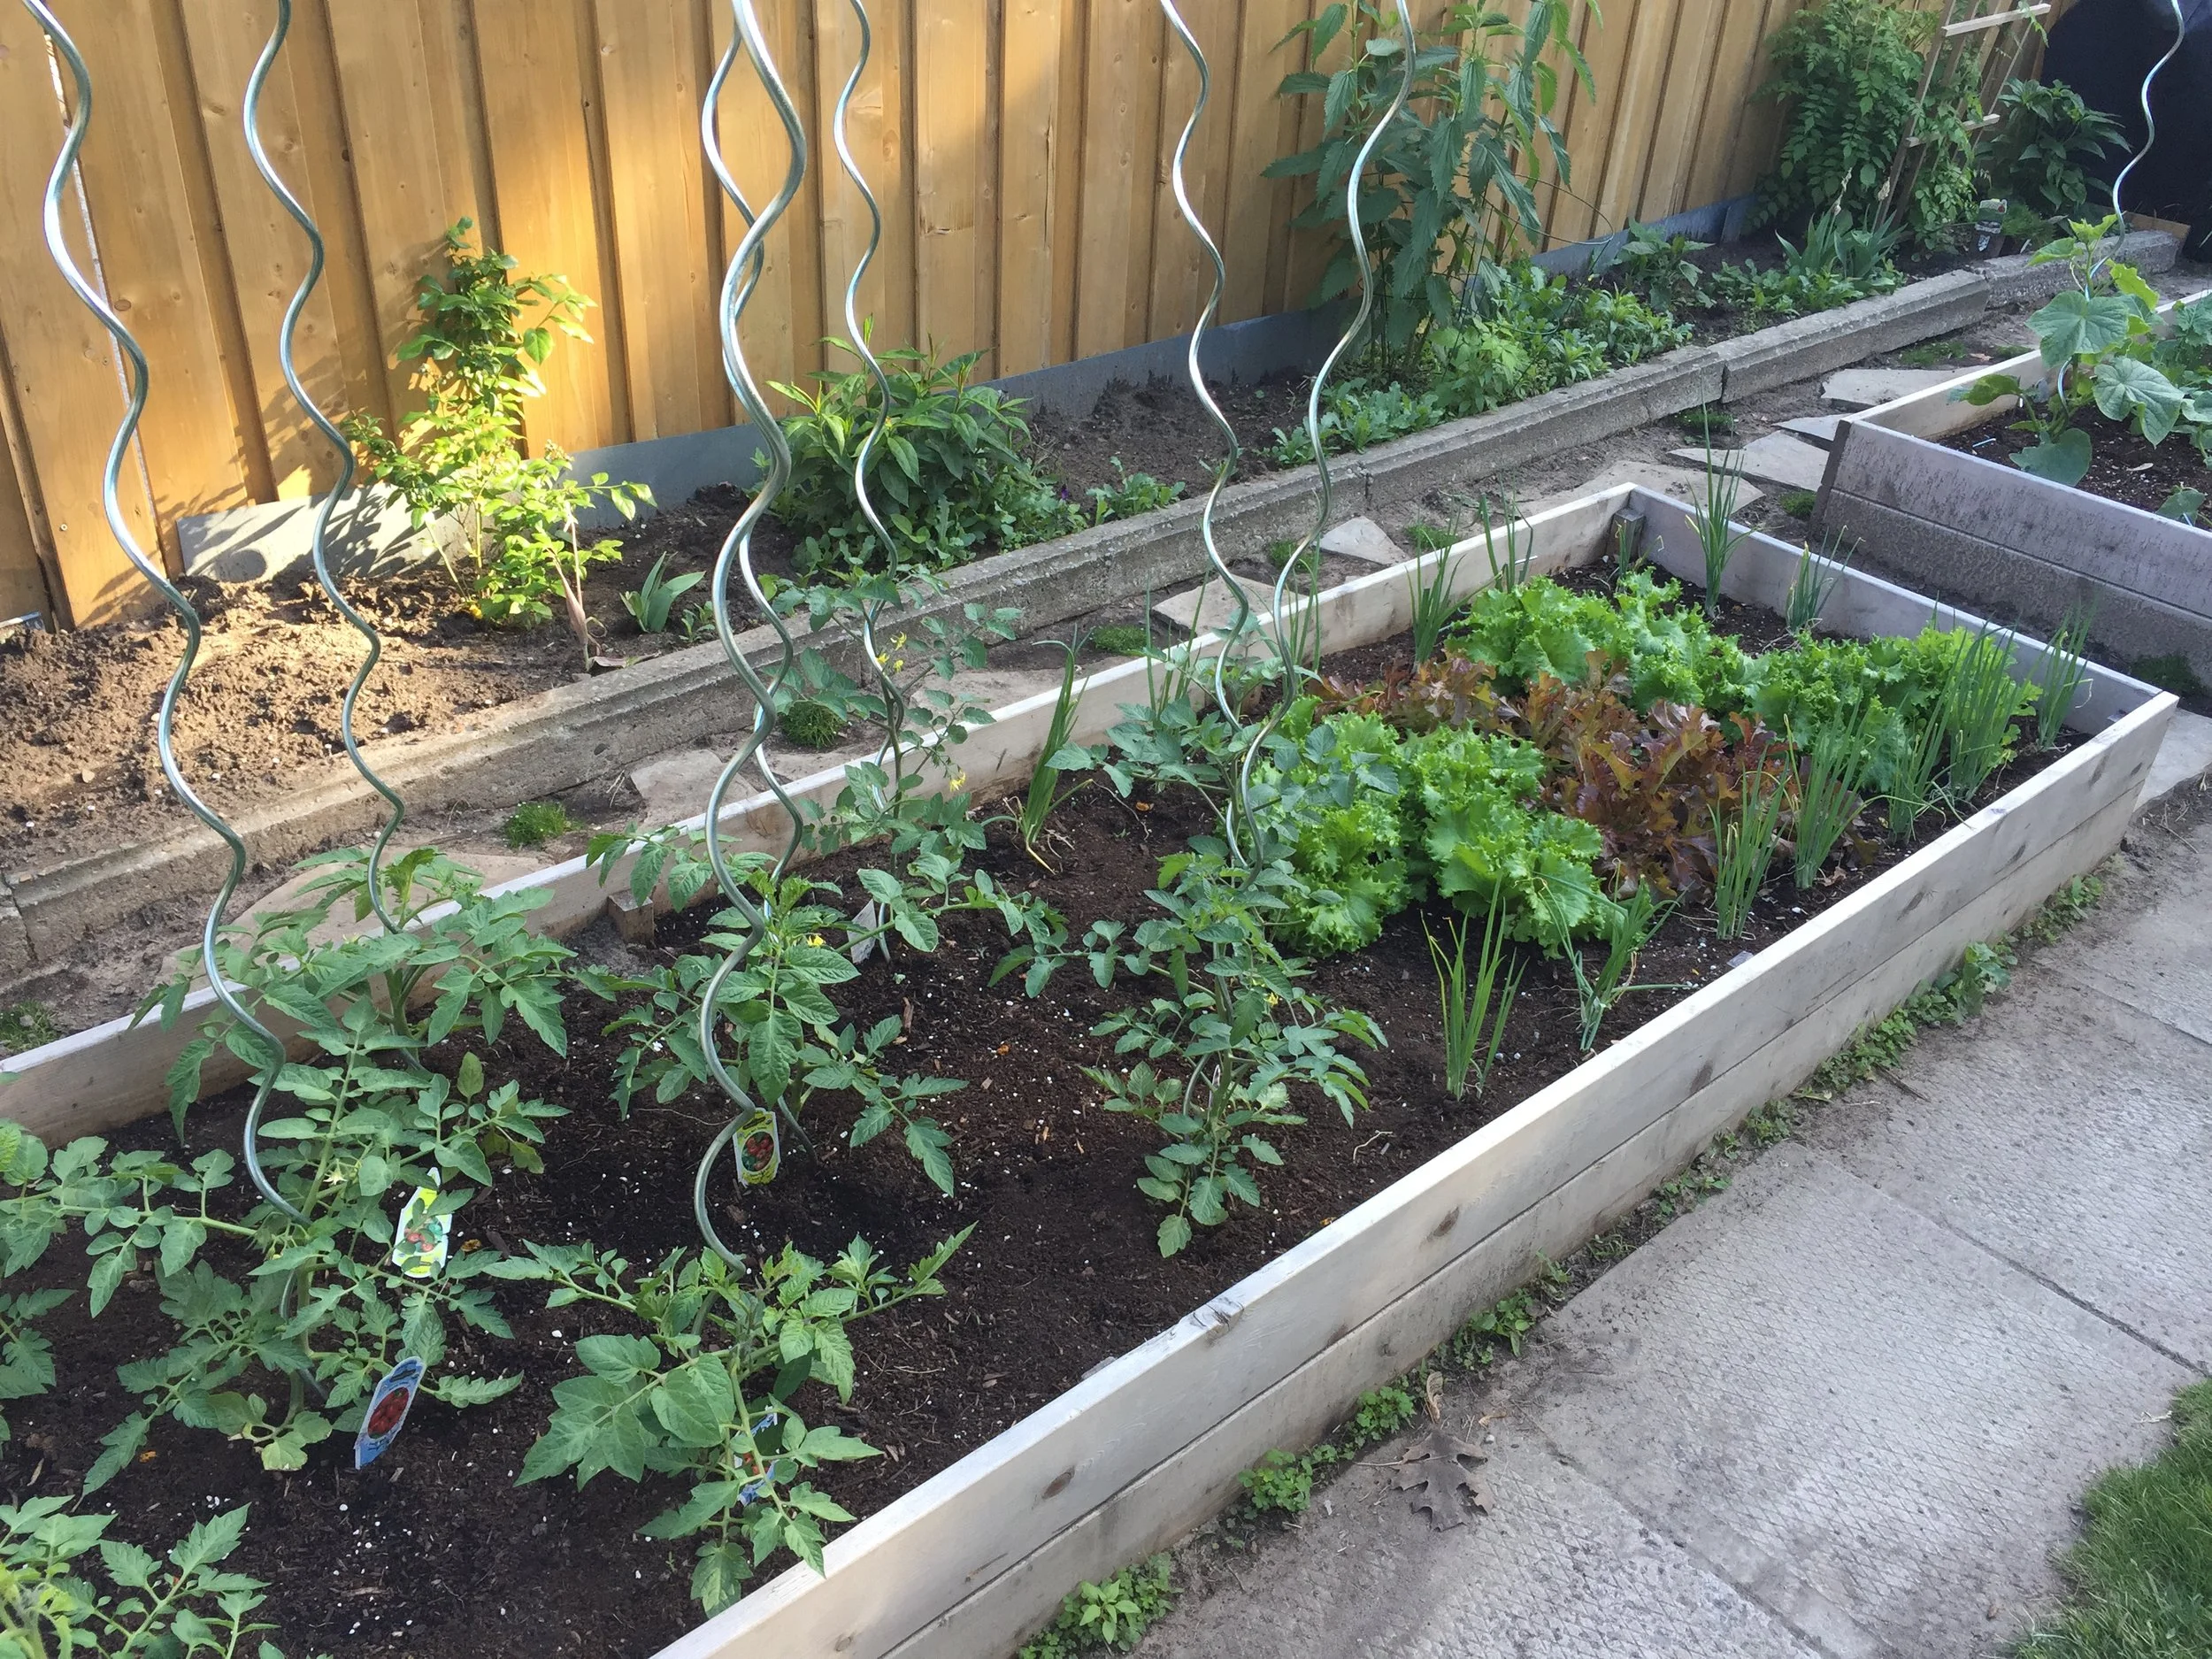
If you like to grow vine plants like Tomatoes or Cucumbers, spiral stakes are a must have. Using a stake for each plant drastically reduces the amount of space each plant takes up and allows for the fruit to hang off the vine avoiding the rot that happens when they sit along the ground.
Once again, these Tomato Spirals were a Lee Valley purchase and cost $24.50 for a set of 5 steel stakes. I have seen similar stakes for $2 at Dollaramma, but would hesitate to buy these, as you never know what type of metal was used. Since these stakes will be in your garden with rain water running over them into your soil, it's important that they don't have any harmful toxins, like lead, used in the production of them.
Note: We tried these for squash last year and found that the weight of the squash was too much and they didn't grow well. Best to allows these heavier veggies to be ground crawlers.
Hope you enjoy these must haves as much as I do. I'll be sure to share some other gardening tips and tricks over the next few weeks.
Good luck with your garden!
- Care
*This is not a sponsored post.