

From Caterpillar to Butterfly - Habitat Inspiration & A Super Simple Ikea Hack
As promised, I wanted to share some butterfly habitat inspiration as a follow up to my post about The Junction Wings Project. So here it is! Don't hesitate to post questions in the comments.
Now that you've welcomed (or will soon be welcoming) some fuzzy little caterpillars into your home, you need to start thinking about a habitat. Lucky for busy parents, your caterpillars will remain in their little cup with their food for the first week, so you don't need to rush out to prepare this right away.
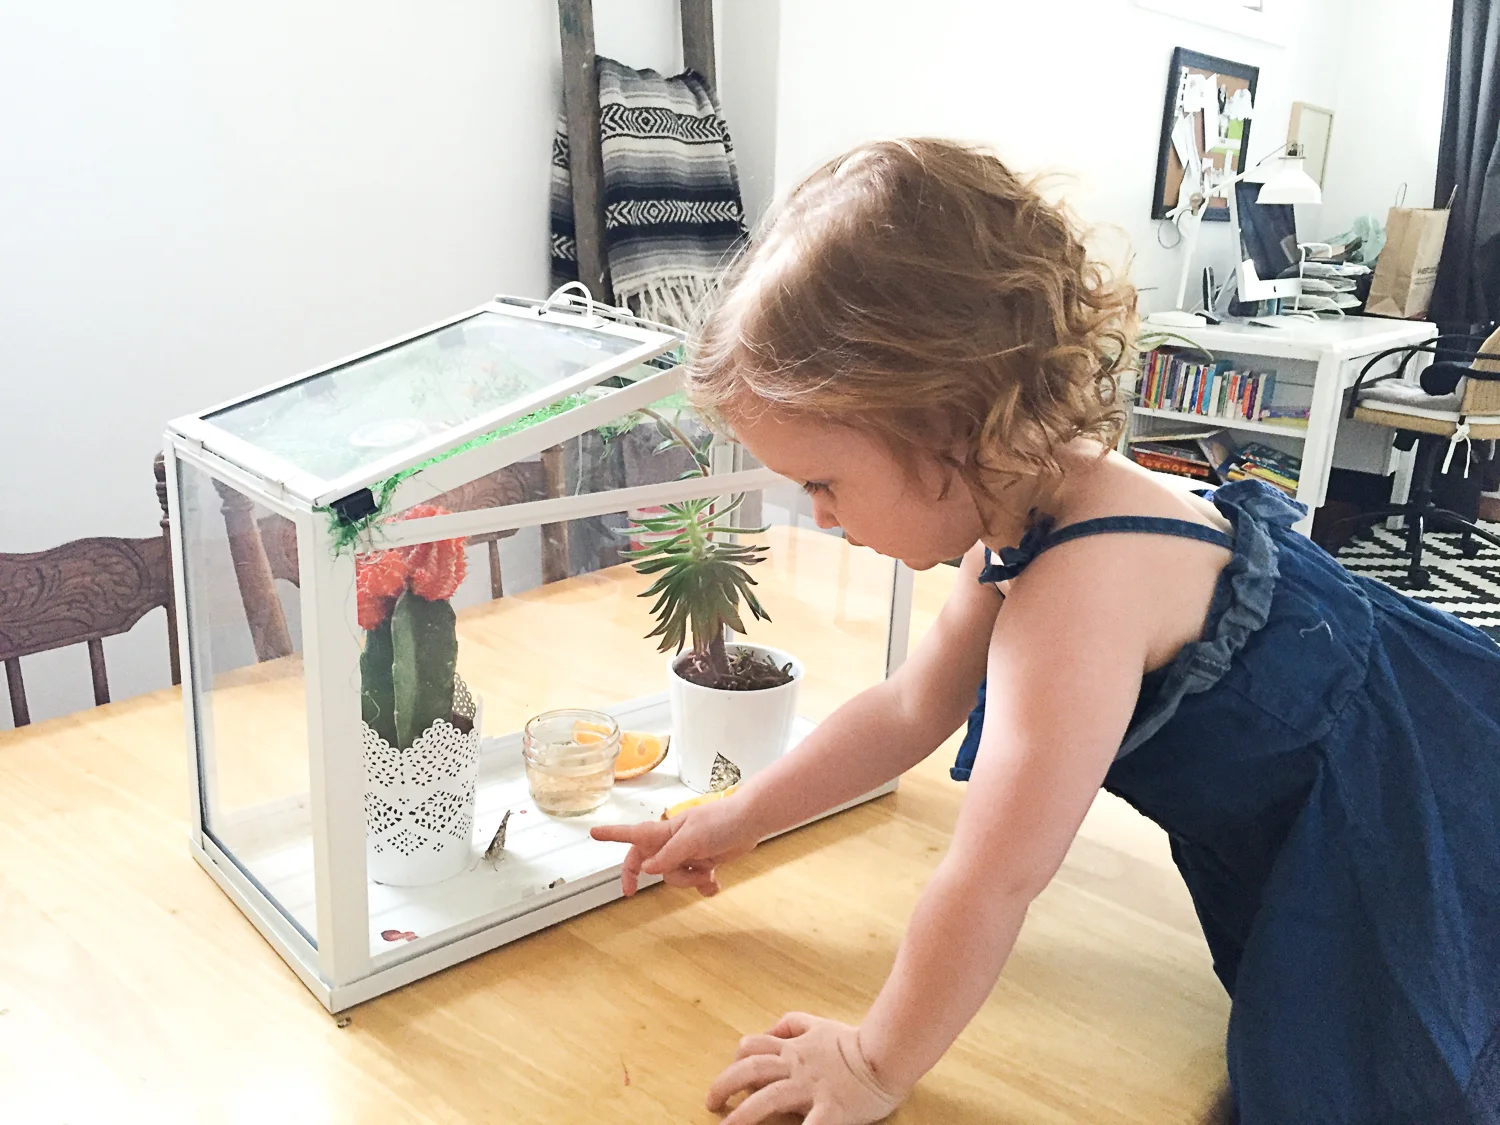
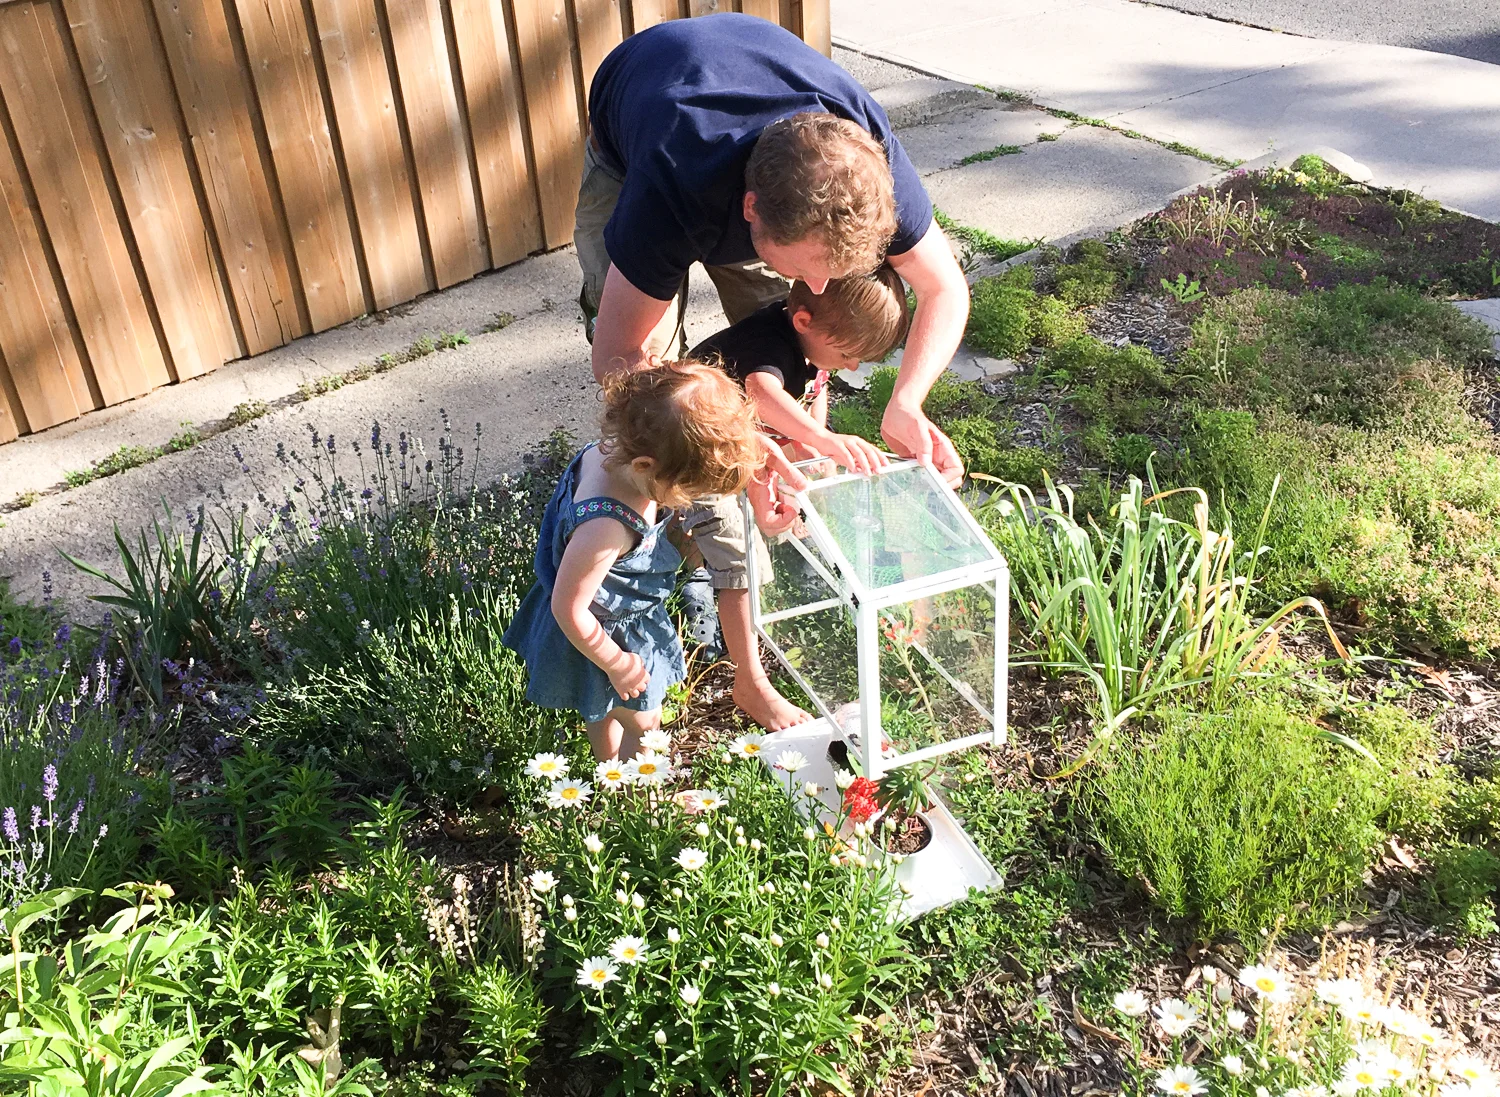
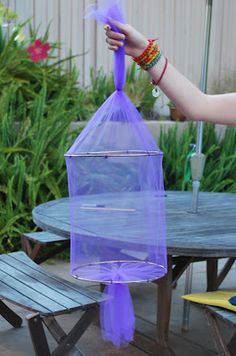
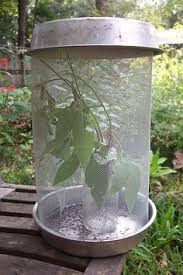
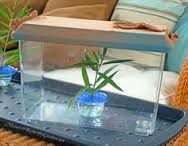
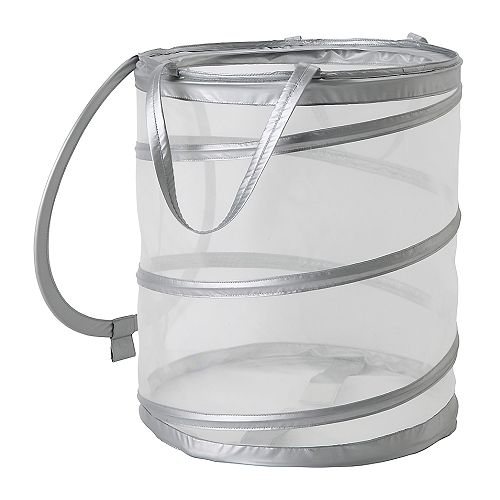
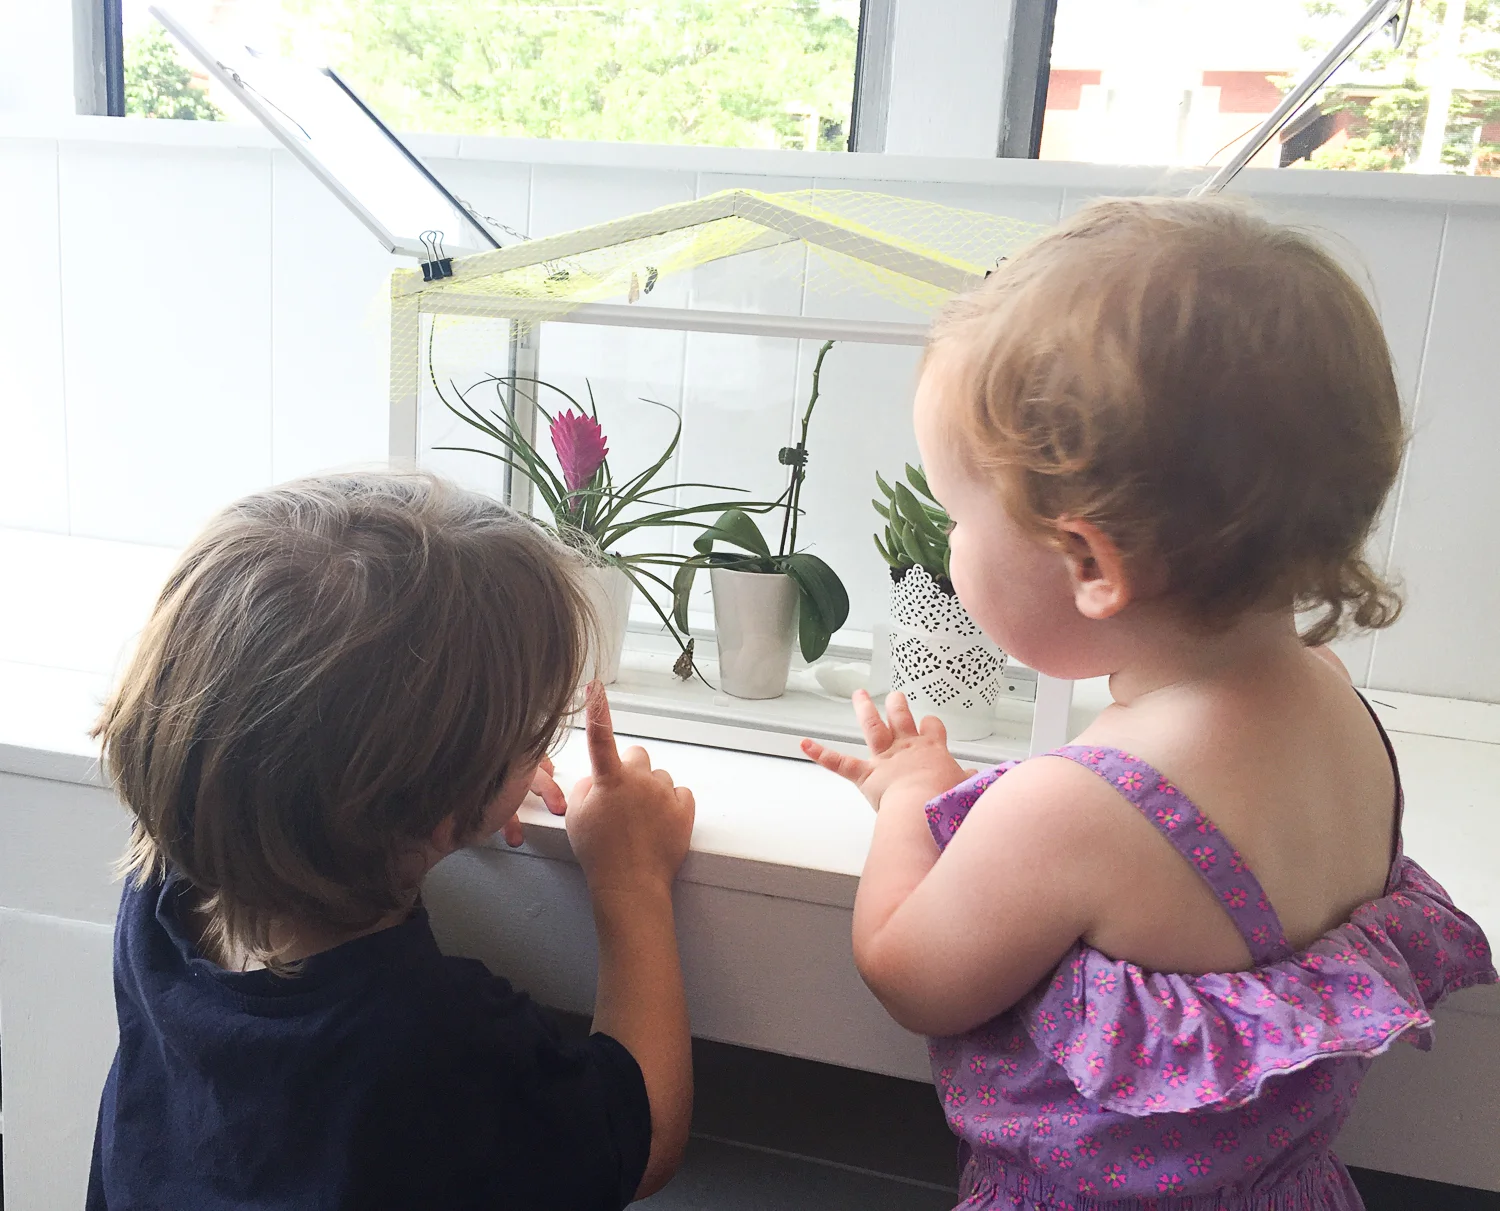
There are tons of ways to make a great butterfly enclosure, but keep in mind how old your children are and what might be needed to keep said children from killing said butterfly ;) The enclosure doesn't need to be fancy, but it needs to allow fresh flow of air, have a place for your cocoons to hang down while waiting for them to emerge, and keep your little butterflies safely inside once they hatch. You can make some simple DIY versions with mesh netting and various household items (see pics below). You can also use a mesh laundry hamper (like the one below from Ikea). Personally, having something that can't be easily crushed, and that doesn't sit on the ground, is top priority in our house. Our littlest is currently in the "destroy all things" phase, so keeping them out of her reach and safe is key.
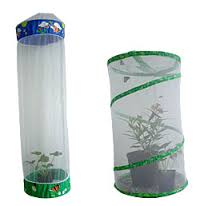
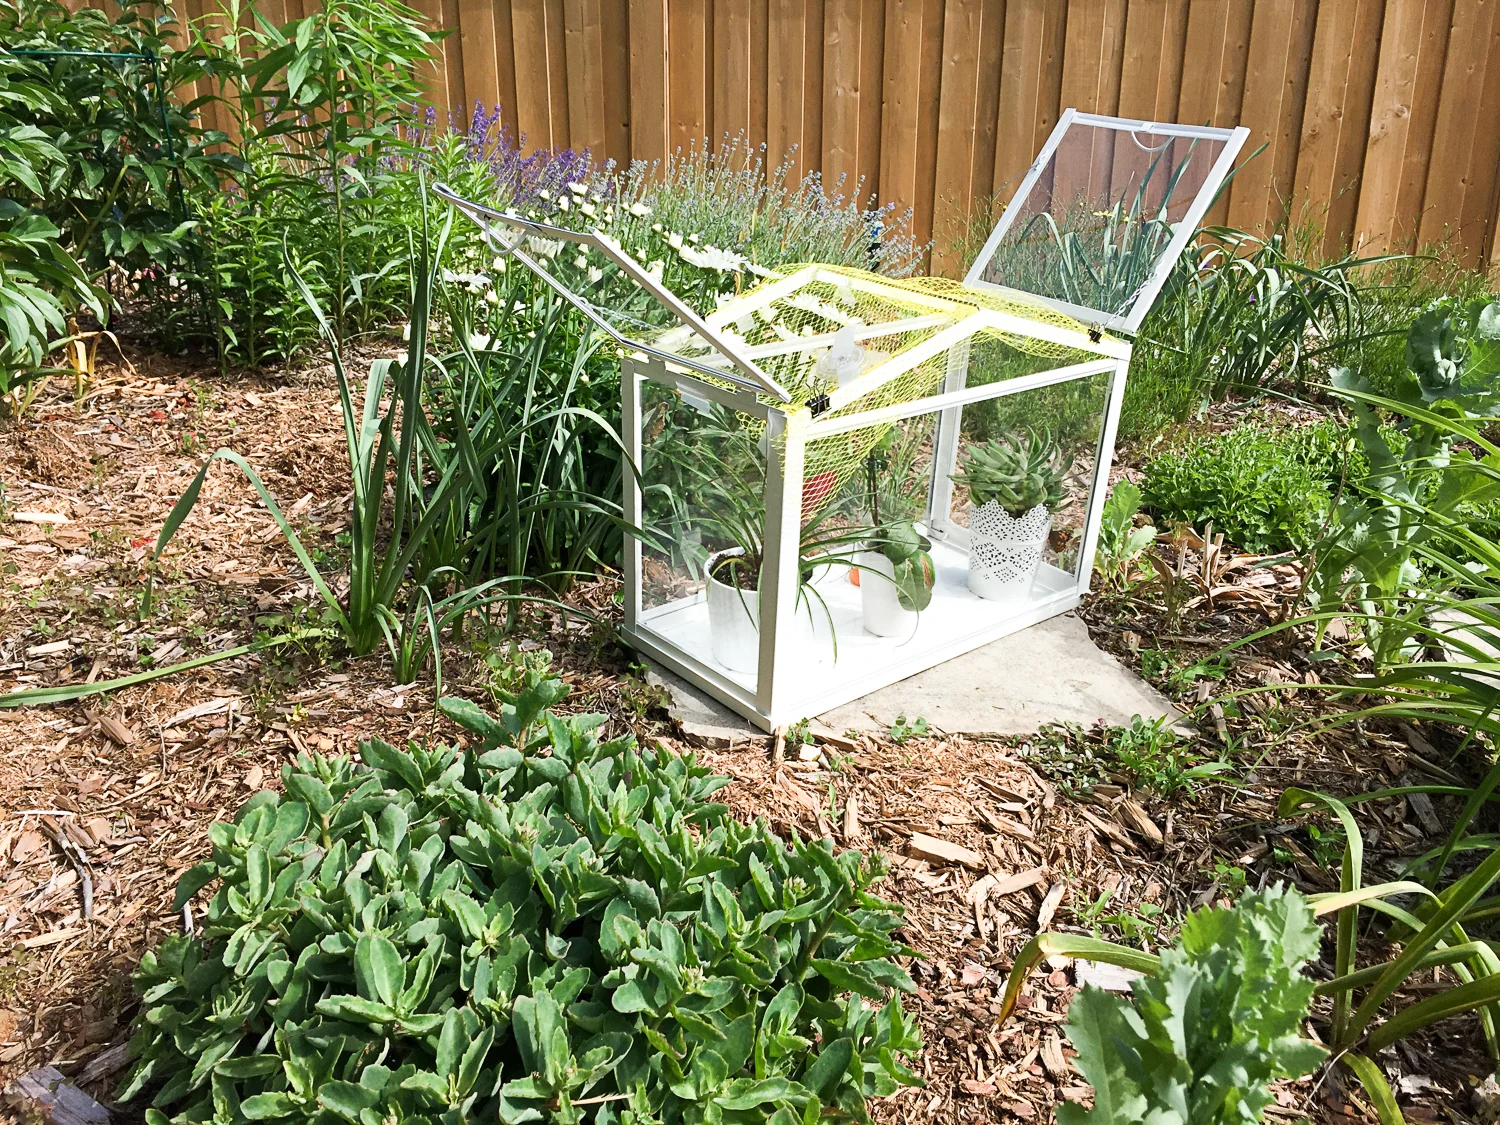
This is our 3rd season welcoming butterflies and we're still loving out Ikea mini greenhouse. We usually add a few plants and a mesh top. Last year we used simple bulldog clips to hold the mesh top in place (I used a recycled lime bag), but I found it frustrating with curious kids. This year I decided I wanted to improve the mesh top, so I removed one of the glass panels from the greenhouse lid and traced it out on a piece of cardboard (the box it comes in works great).
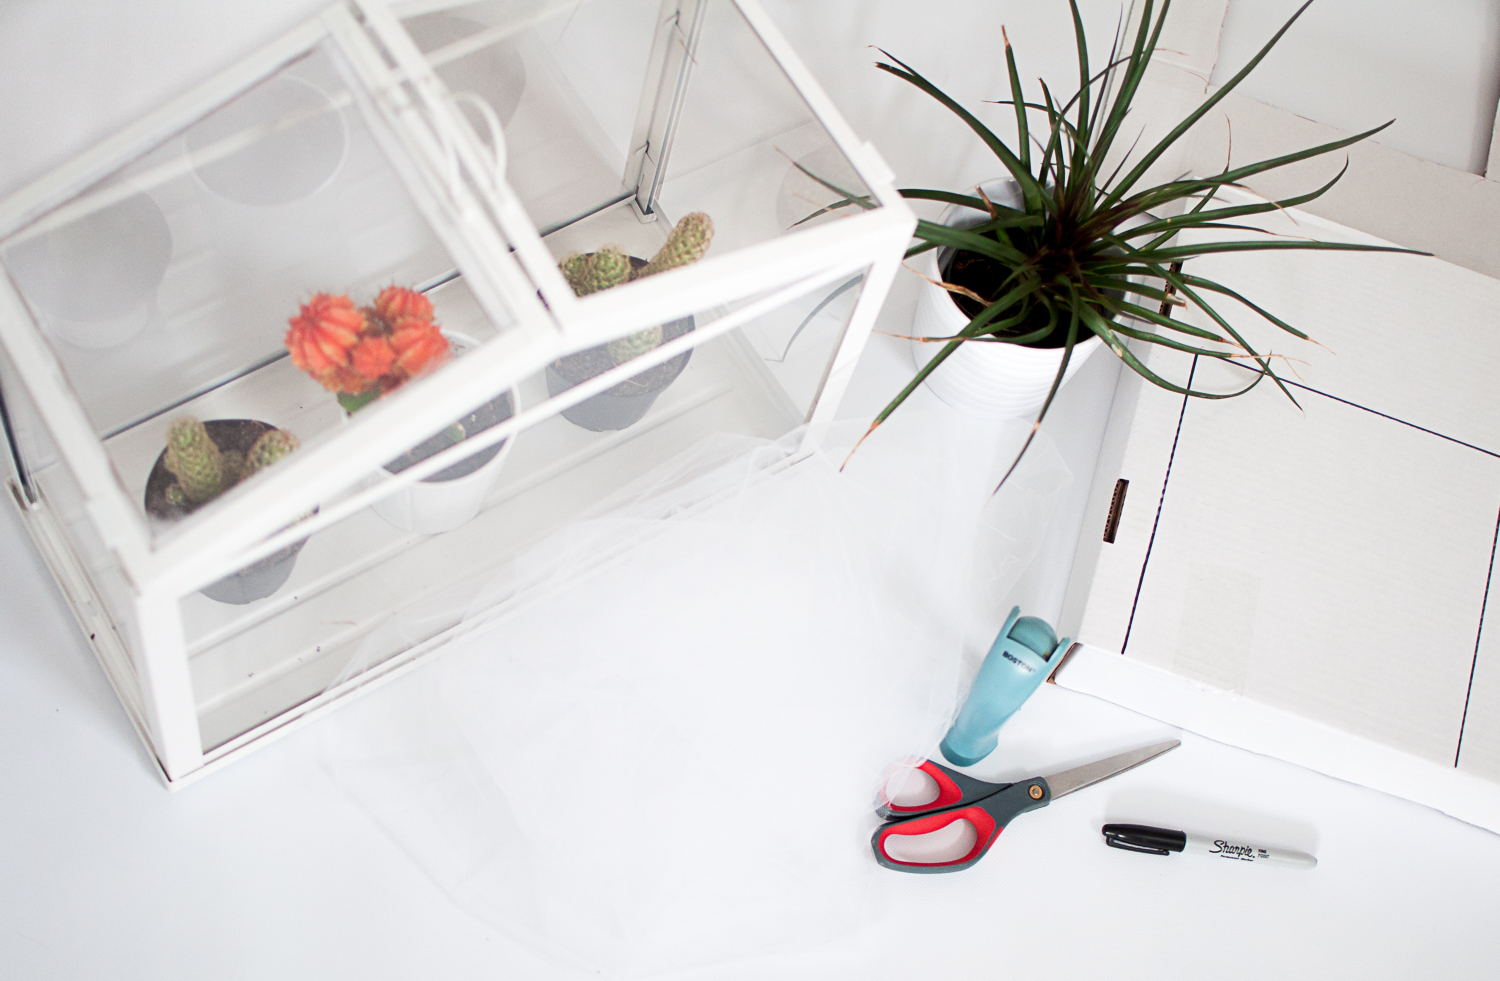
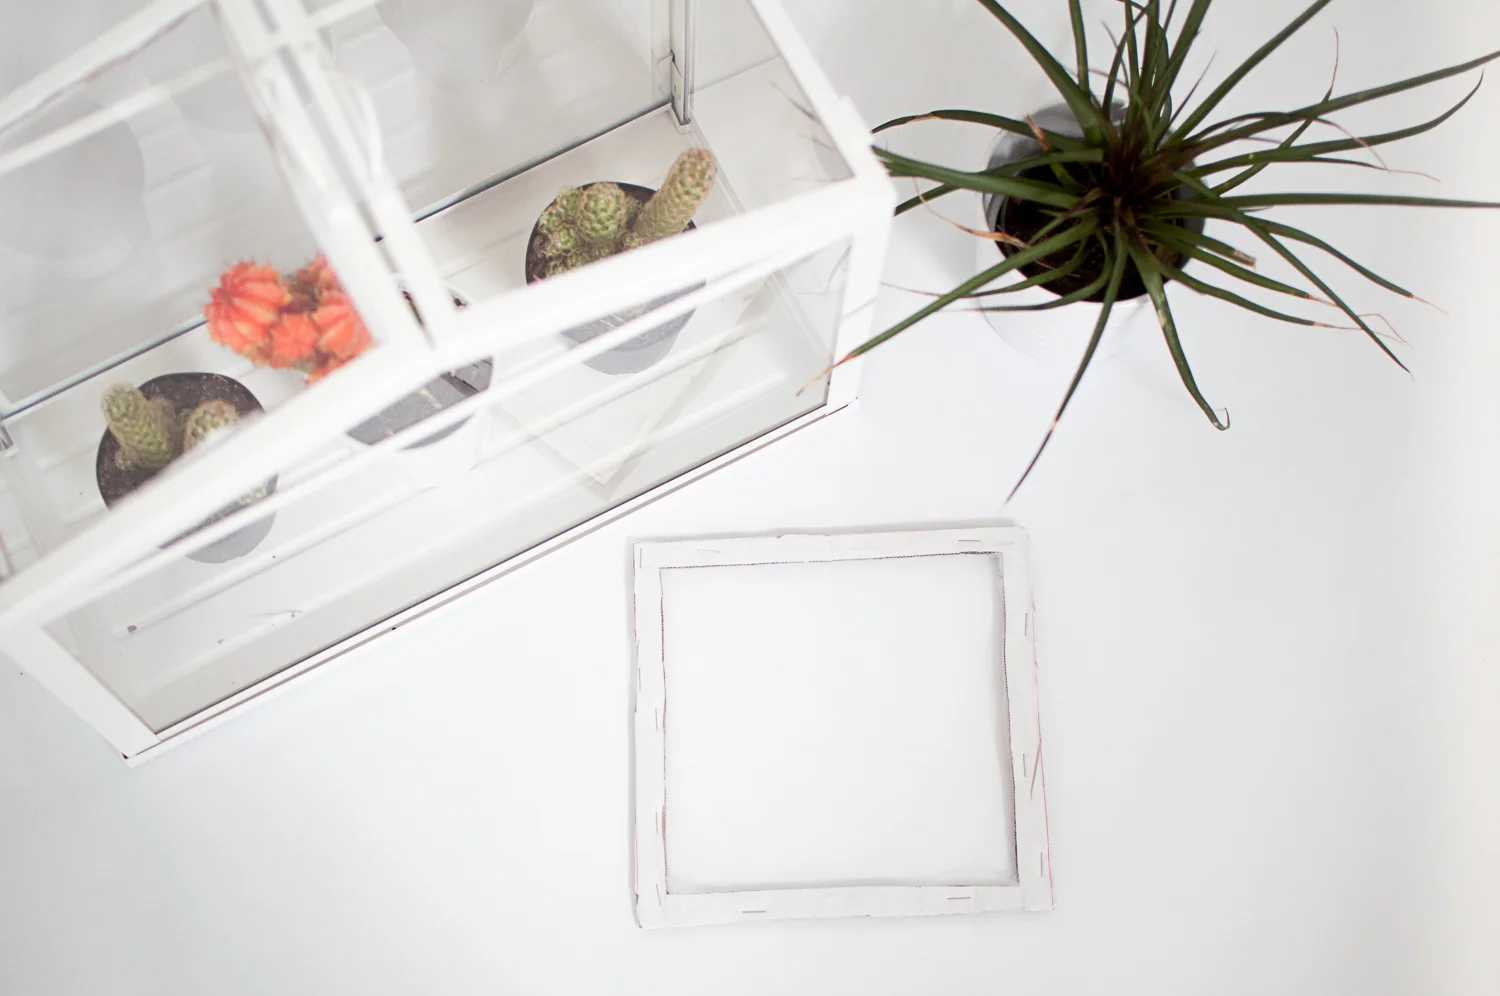
I cut out the square of cardboard and then cut out the centre of the square leaving only a 1cm wide outer edge frame. I then wrapped some organza (any type of soft mesh or screen will work. If you don't have a scrap laying around, your local hardware, fabric or dollar store will probably have something appropriate) over the cardboard frame and stapled it into place. The screen frame then slid nicely back into place in the top of the greenhouse. You could do both sides, but we're going to leave 1 glass and 1 mesh. Once the cocoons are ready and attached to the lids of their cups I will cut an X in the mesh and carefully lower the cocoons through. The plastic lids of the containers sit in the holes of the mesh so the cocoons can hang down into the greenhouse awaiting their arrival.
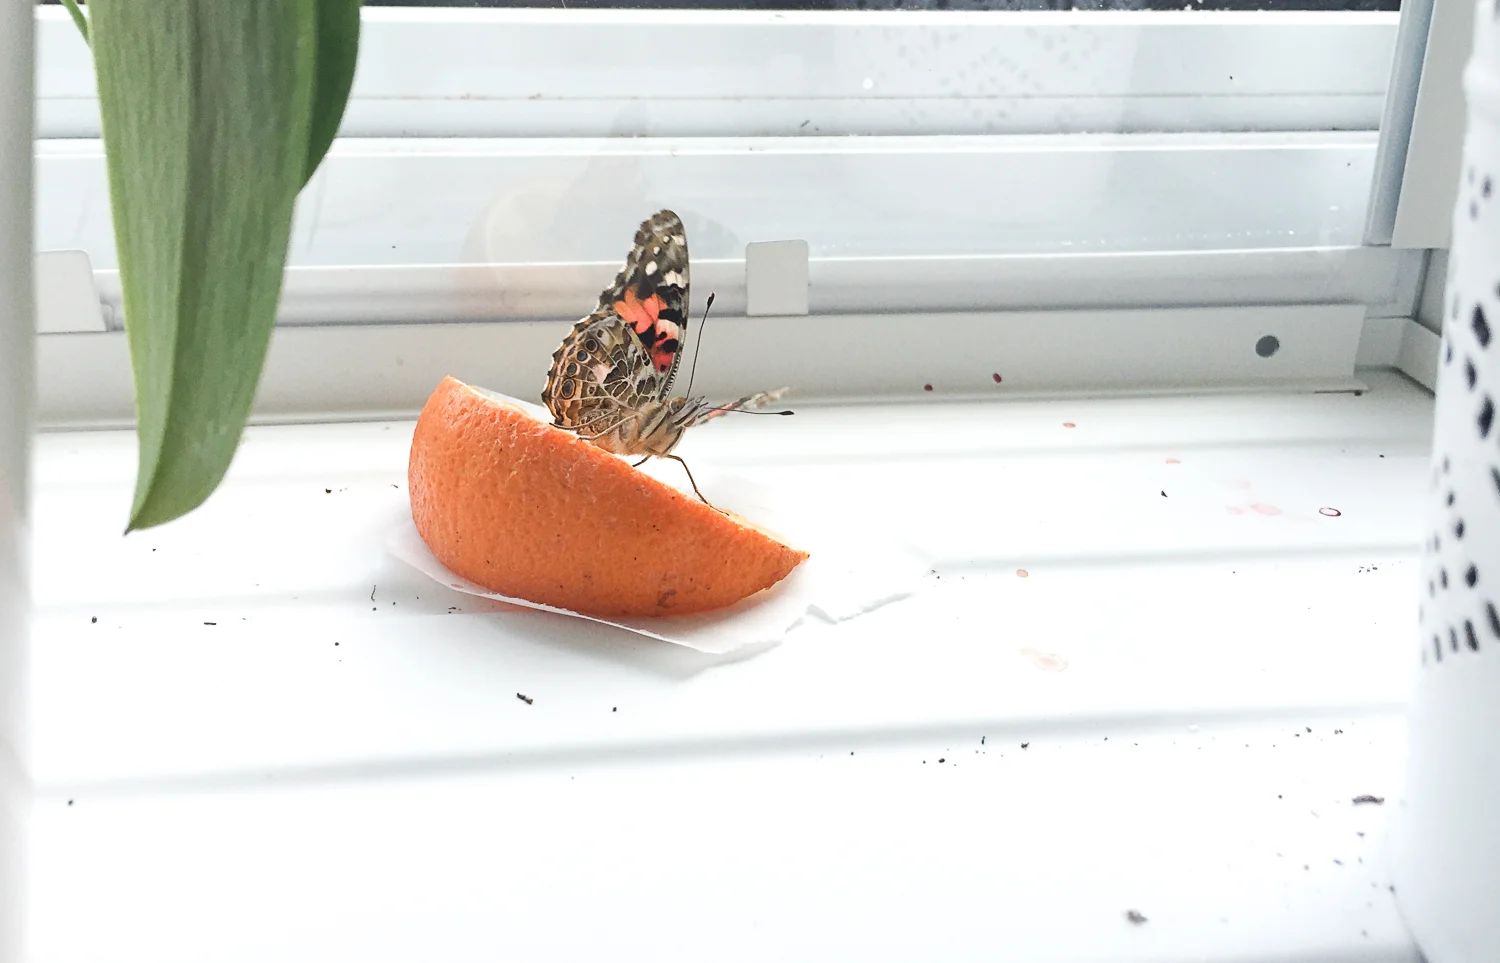
Once your butterflies hatch they will need to remain in your habitat for up to a week to dry out their wings and gain strength. Don't worry, the instructions that come with your caterpillar will give you all the details on the food options eg. sugar water & sliced fruit. Once your butterfly is flying around it's ready to be freed into the wild. We love letting our butterflies go in our garden every year.


Here is some more butterfly habitat inspiration:

Hope you have fun making a habitat for your little critters. Don't forget to share your adventures with #junctionwings.
Care

Introducing With Care - Education & Inspiration From Pregnancy Through Parenthood (Formerly Fifty-Seven)
Some of you might have noticed changes on my social media and website over the last few months as I was getting ready to launch With Care. Little hints that something new and exciting was coming. As you can imagine things don't happen quickly with several munchkins in tow, so thanks for your patience.
I'm so excited to announce the official arrival of With Care - Education & Inspiration from Pregnancy Through Parenthood.

Some of you might have noticed changes on my social media and website over the last few months as I was getting ready to launch With Care. Little hints that something new and exciting was coming. As you can imagine things don't happen quickly with several munchkins in tow, so thanks for your patience.
For the last few years I have been running my classes and workshops through my business Fifty-Seven, and recently moved my blog to With Care. Although I felt like I had built up a community brand with Fifty-Seven, I felt a pull toward something else. Offering all of my Classes & Workshops, Community Events, Amazing Partnerships, Blog Posts and Videos in one place seemed like a dream. Well, I finally decided to do the work and make that dream a reality. After a long and gruelling rebrand I'm so happy with how everything has come together. One of my favourite parts is my logo, which was created by tracing my mom's handwriting. I love having a little piece of her with me on this journey.
So what is With Care? Living a life With Care means choosing products and services wisely, with the earth and your family's health and wellness in mind. It means becoming educated and informed so you can make choices that work for your individual family. It means creating a home and life that makes your family thrive. I'm here to provide a little education & inspiration to help you do that.
I would love if you would take a minute check out With Care and follow me on social media - Instagram, YouTube, Facebook, Twitter & Pinterest. I have lots of amazing Giveaways, informative posts and videos, as well as amazing classes and workshops coming up this spring and summer. You can also stay up to date by signing up for my newsletter. As always feel free to get in touch if you have any questions or topics you would like covered, or if you need any assistance registering for classes or booking a private in-home session.
I want to take this opportunity to say a huge thank you to my community. Thanks to all of the amazing families and businesses that I have worked with over the last 4 years. I can't wait to see where the next 4 take me.
I hope you enjoy what's to come With Care.
Warmly,
Care xo
*I'd also like to send a huge Thank You to everyone who has made this project possible. My amazing friend Laurence, my cousin Sarah who made my logo, Danielle for my beautiful promotonal materials, and 2 of my favourite photographers Silvia (Anchor Studios - Pregnancy & Outdoor Photos) & Carrie (Four Bees - Newborn Photos) for these beautiful images.

From Caterpillar to Butterfly - Take Part in Junction Wings: Deadline April 30th!
Every spring our family takes part in the most fun community fundraiser ever - Junction Wings! Basically it's the story of The Very Hungry Caterpillar (without the inappropriate food choices) come to life in your very own home.
Every spring our family takes part in the most fun community fundraiser ever - Junction Wings! Basically it's the story of The Very Hungry Caterpillar (without the inappropriate food choices) come to life in your very own home.
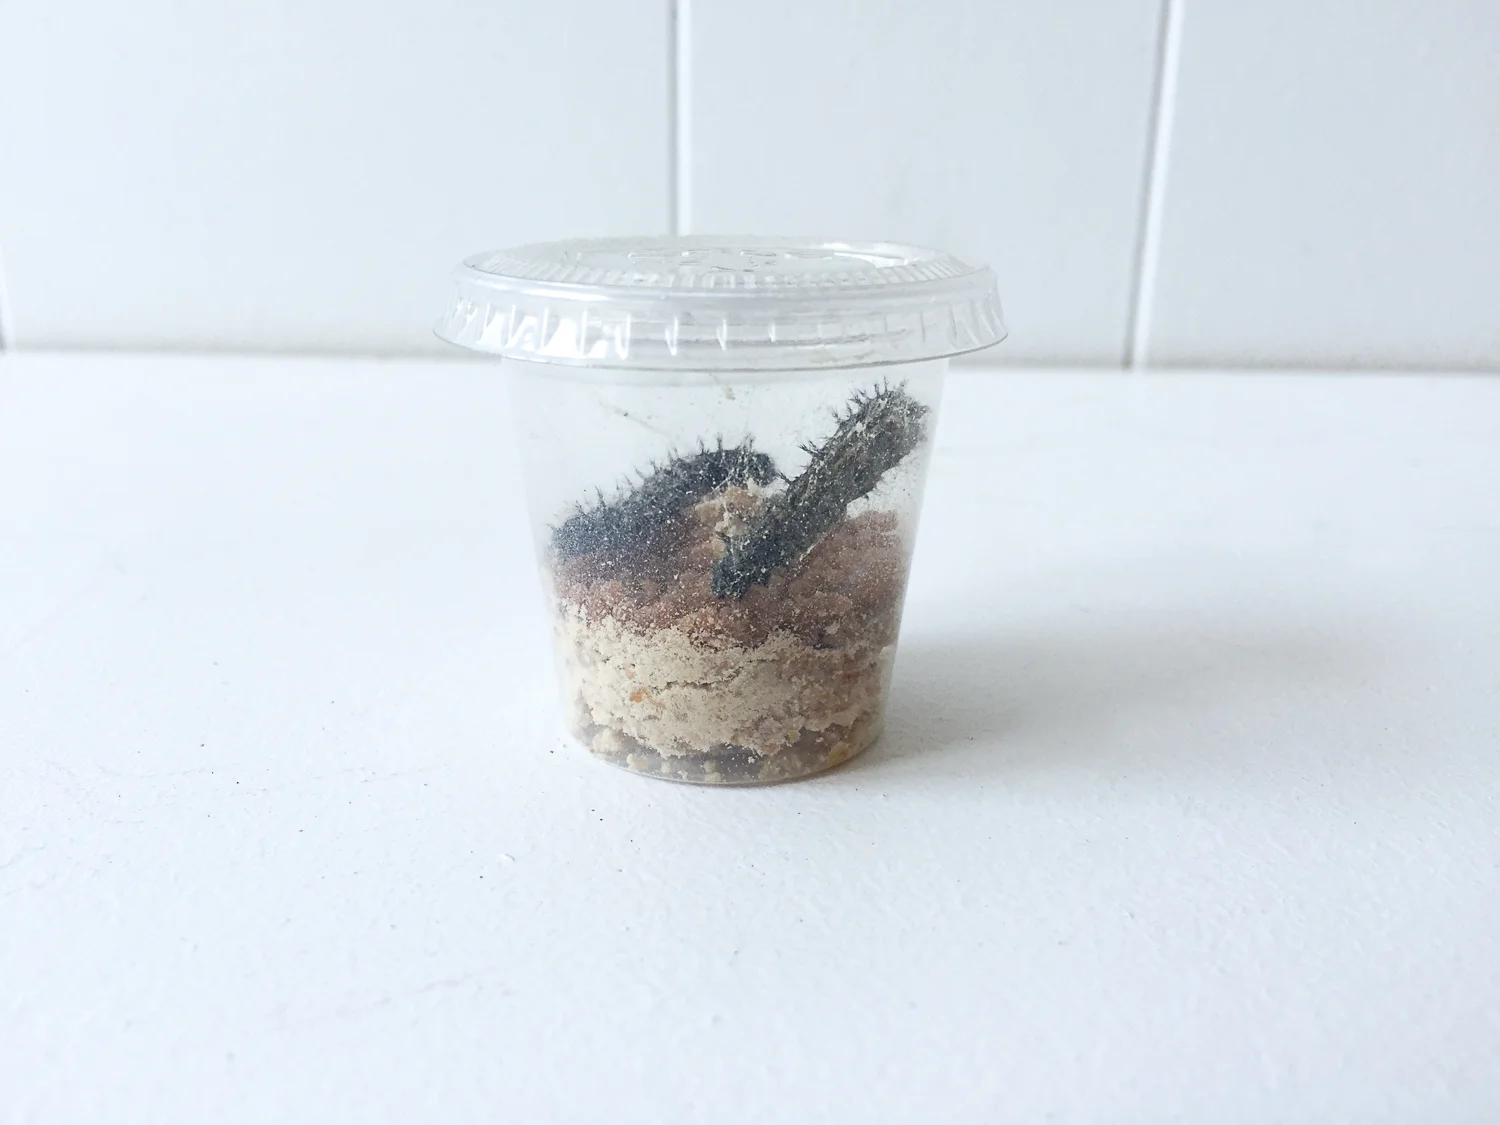
For only $10 you get a caterpillar in a little container with some caterpillar food (we always get a few. Think of it as an insurance policy so you can avoid a disappointed kid). Your fuzzy friend(s) will remain in the little cup eating until they're nice and big and tired. Then it will attach to the lid of the container and spin it's cocoon. At this time you can move the container lid with the attached cocoon to an appropriate butterfly habitat (stay tuned on a post about butterfly enclosures coming soon).
About 10 days later a beautiful painted lady butterfly emerges.

Your butterfly will need to remain in the butterfly habitat for a few days while it's wings dry out and it gains strength.
Then it can be released outside. The whole experience is so magical and such a fun activity to do with your kids. We look forward to this event every year and are so excited that it's almost time to bring a few hungry caterpillars home.
If you live in the city and are willing to drive to the Junction to pick up your little fuzzy friend(s), you are more than welcome to take part in this event. Simply Buy Your Caterpillars Here by 9pm on Sunday April 30th, and stay tuned for pick up dates and locations in May.
Can't wait to share our creative caterpillar names this year. Past years have included : Carolyn Sinclair, Banana and Chickaletta. Who knows what winners the kids will chose this year. Stay tuned, and make sure to share your caterpillar adventures (#junctionwings) so we can all follow along.
Care

Have A Bump Or A Baby? Don't Miss The Bump To Baby Show 2017!
Spring is here and that means it's baby show season! With so many shows and so little time, it can be tough to decide which ones make the cut. If you want to skip the huge crowds, long line ups and over zealous vendors, you need to check out The Bump to Baby Show.
Spring is here and that means it's baby show season! With so many shows and so little time, it can be tough to decide which ones make the cut. If you want to skip the huge crowds, long line ups and over zealous vendors, you need to check out The Bump to Baby Show. This highly curated event held at the beautiful Wychwood Barns brings together the best vendors from around our city, all with a focus on helping parents make healthy choices for their families. Plus it's FREE!! You can't get much better than that.
In addition to an amazing marketplace (*Full List of 60 Marketplace Vendors) the show has expert speakers and fun family friendly events. I am so honoured to be one of the speakers at the show, alongside my amazing colleague Taya Griffin (Lactation Consultant) & Joy McCarthy of Joyous Health.
Attendees can check out a Prenatal Yoga Class with & She Moves (pre-registered event), a Family Yoga Class with Spynga, a fun Puppet Show with The Waldorf Academy, as well as a music class for kids ages 0-4 years with Music Together. Check out the Play & Learn page for full schedule, details and registration.
The Bump to Baby Show is like no other in the city. So if you're expecting a little one, or have a young family, don't forget to add this amazing event to your calendar.
Hope to see you on May 7th between 10am and 4pm for the family friendly baby show you can't miss.
Care

Save The Earth One Lunch At A Time - Plus Save 22% on PlanetBox Today Only!
With Earth Day coming up this weekend it feels like the perfect time to share one of my absolute favourite eco-friendly products. One that my family couldn't live without, and that I highly recommend to everyone (big or small) who packs a lunch. It's Planetbox!
With Earth Day coming up this weekend it feels like the perfect time to share one of my absolute favourite eco-friendly products. One that my family couldn't live without, and that I highly recommend to everyone (big or small) who packs a lunch. It's Planetbox!
I have been obsessed with PlanetBox since I bought a Rover lunch box for Ben almost 2 years ago when he was set to start Junior Kindergarten. I wanted a safe, eco-friendly lunch box that would make packing lunches simple, and be easy for him to handle at school. When I found PlanetBox I was immediately impressed. Ben has loved his Rover, so we knew we would need another one with Lucy set to start school this fall.
I always tell people that PlanetBox lunch boxes are an initial investment, but so worth the money. Here's why:
- They are so easy to clean! - This has to be a priority when you have a kid...or 3 ;) PlanetBox lunch boxes are dishwasher safe, but we just wipe and rinse it with warm soapy water after school and let it dry in the rack (unless it was a particularly messy meal)
- They are perfect for litter-less lunches - Many schools now request this
- They are easy to open - This is especially important for little hands
- They last for years - Their high quality stainless steal is actually warranted for 5 years!
- They save so much frustration - Avoid the daily chaotic search through dozens of containers and lids. Simplicity makes life much easier, especially as a parent.
- They are safe - non-toxic, non-leaching, safe from BPA, phthalates, and lead
- They are customizable - This matters less to me, but Lucy had a blast picking out her magnets and bag combo and was so excited to see her choices when they arrived. When her brother saw it he announced that he wanted a pink bag too. After almost 2 years of daily use, his Rover lunch box is still in great shape, but his bag has taken a beating (to be expected with a 4-6 year old who drags it through the halls at school), so I think we will replace it. If pink is what he wants, pink is what he'll get.
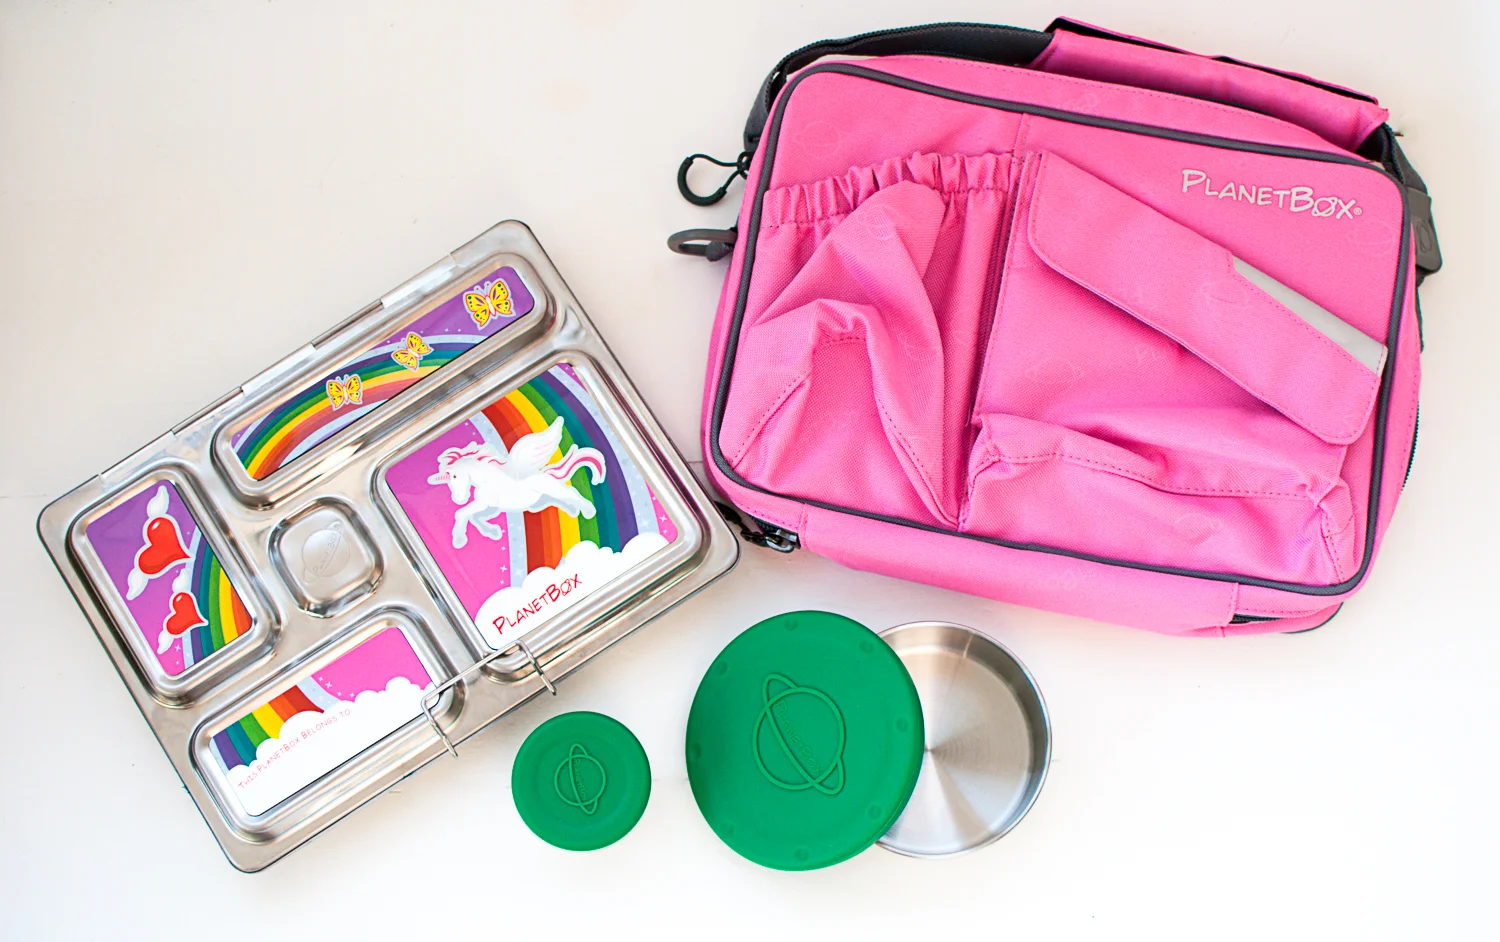
If you have little one heading off to school this fall don't wait! **Use Code Earth22 for 22% off Rover, Shuttle or Launch lunch boxes Today Only (April 20th *accessories excluded). ORDER HERE
Once your order arrives don't forget to give your little one some opportunities to practice with their lunch box, so they can feel confident at school. We'll be planning some backyard picnics with Lucy's new PlanetBox this summer. I'll be sure to share some of our healthy lunch ideas on instagram too.
Care
p.s. If you want to check out another amazing eco-friendly product see my post from 2 years ago about Abeego Bees Wax Food Wrap
*We purchased our original planet box but were gifted a 2nd one from Planetbox for Lucy in exchange for promotion. In no way does this change my opinions about this product. It is hands down one of my favourites.

My Top 6 Must Haves For Camping With Kids - Part 1 of 2
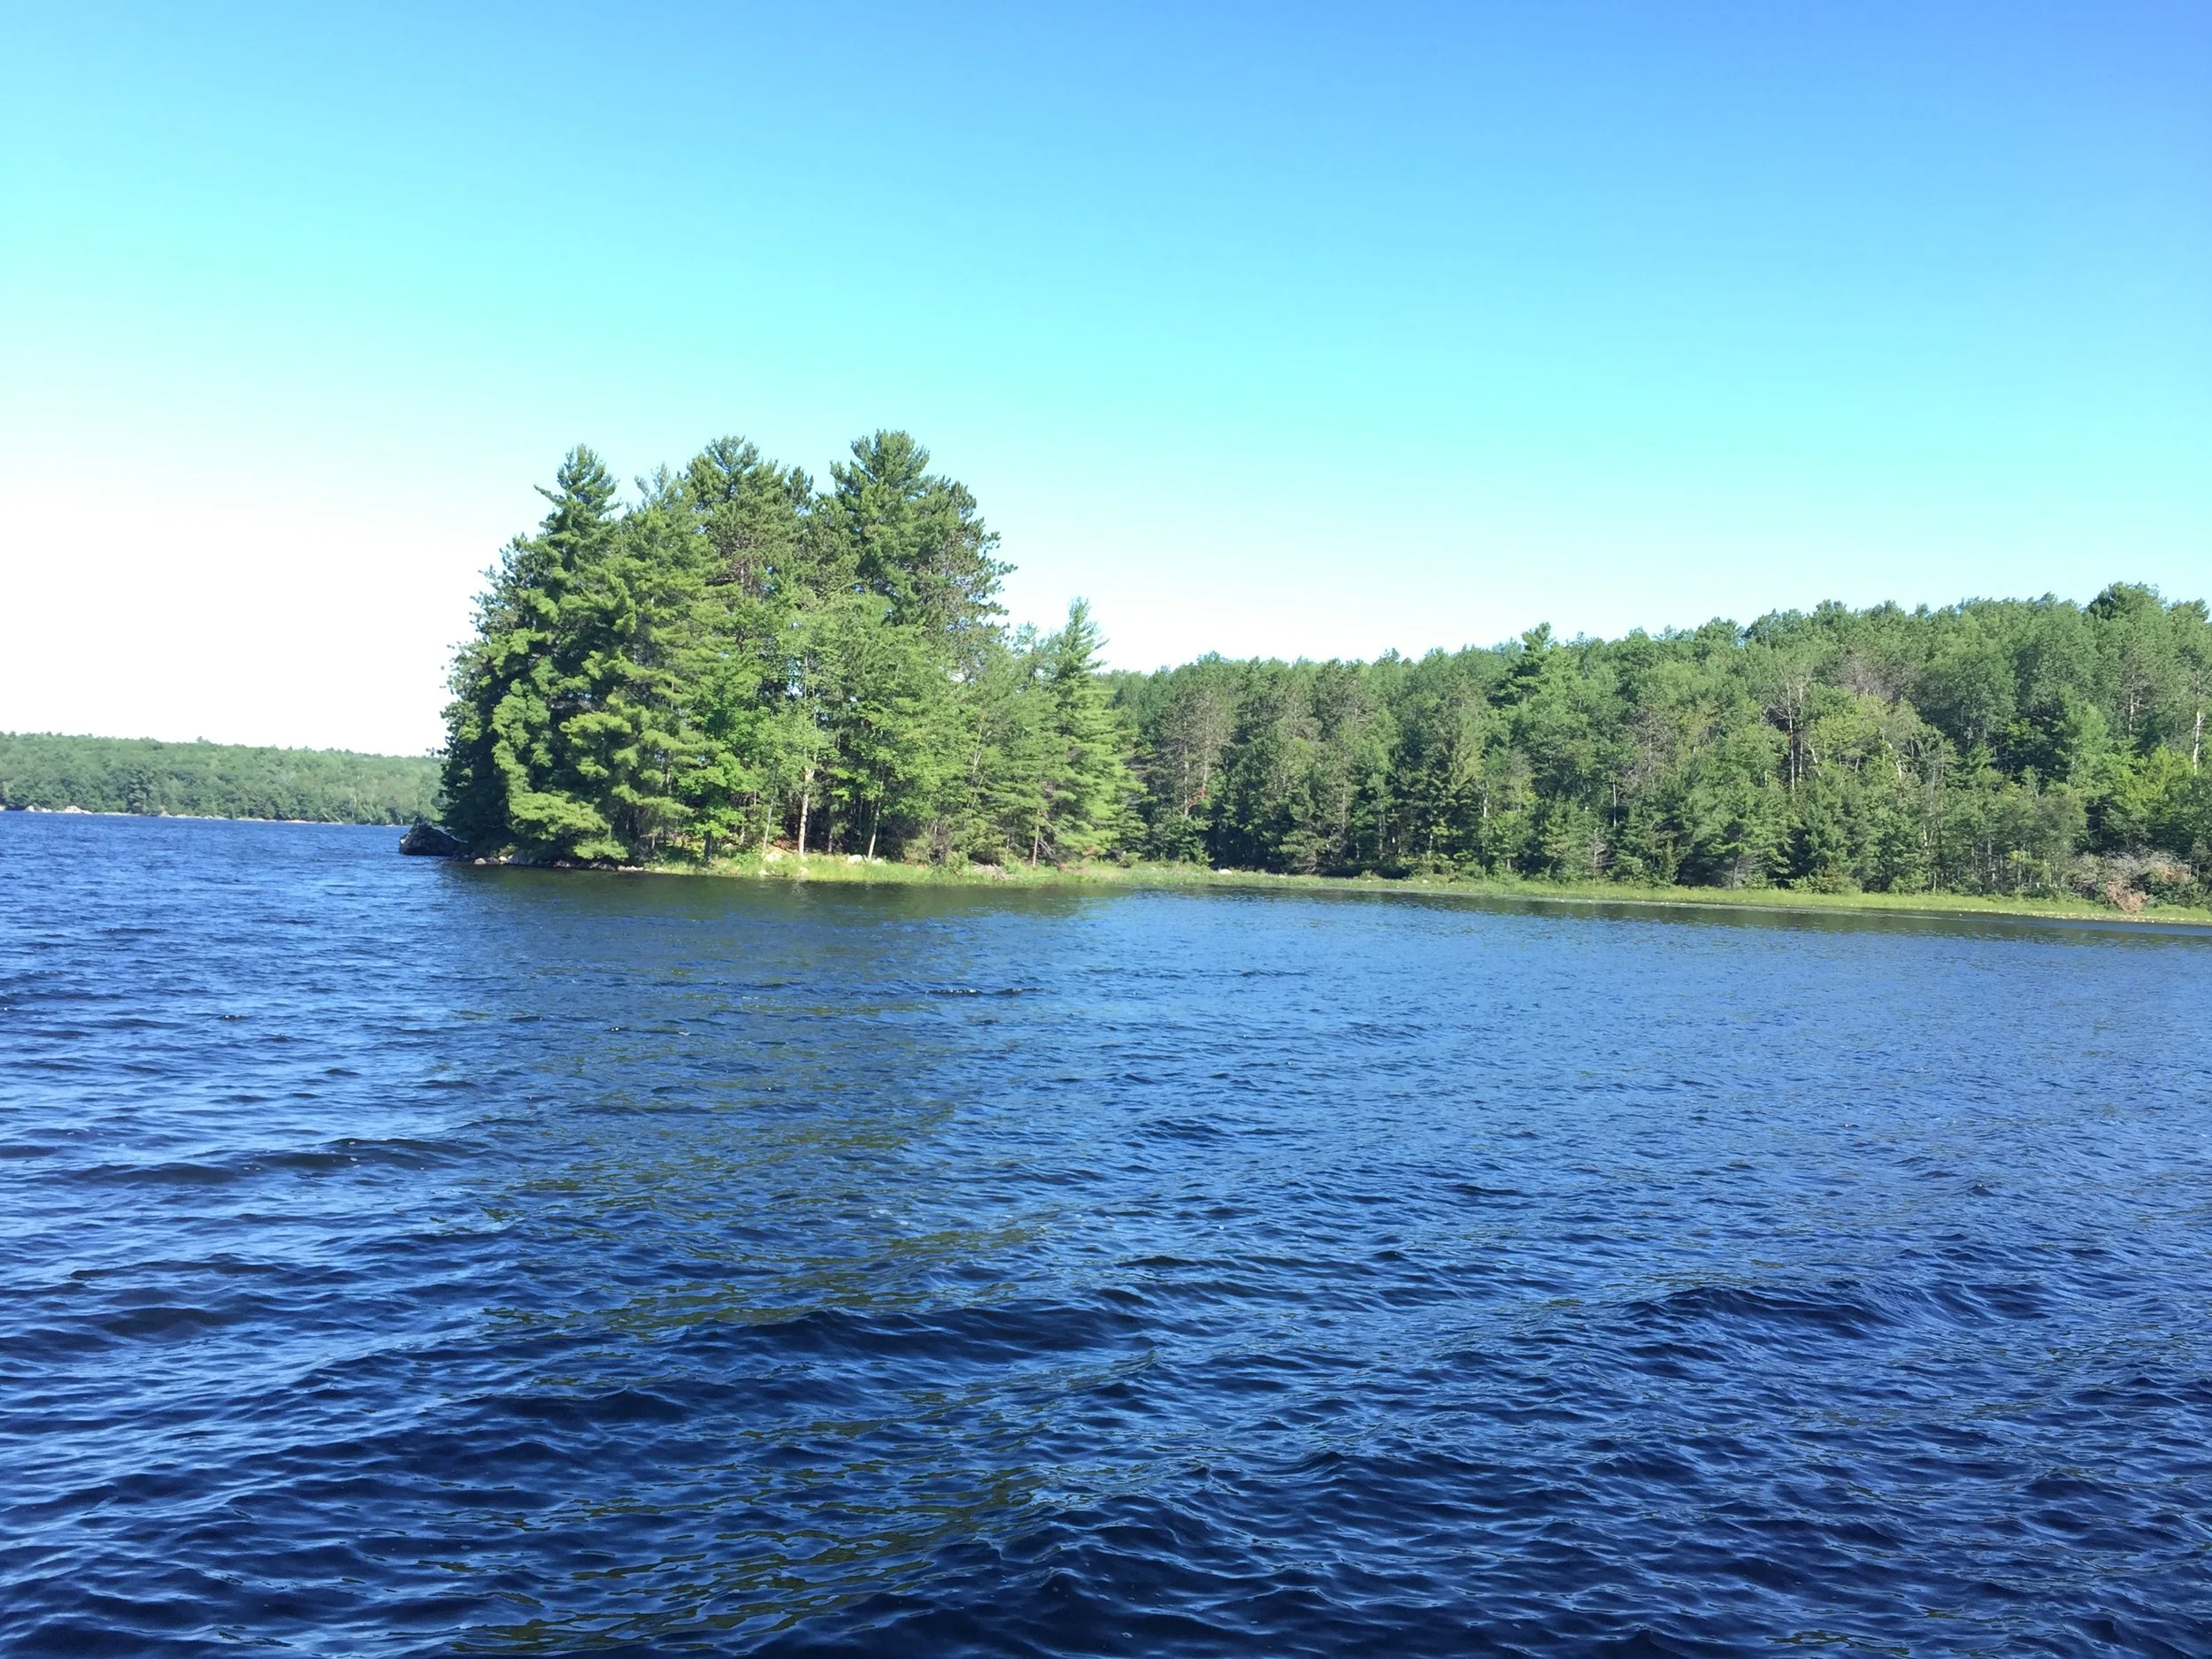
My hubby and I both grew up loving camping, and have been camping together since we started dating 10 years ago. We have now successfully completed canoe trips while 34 weeks pregnant with a toddler in tow, and recently this July with our 2 little ones, ages 4 years and 21 months.
My hubby and I both grew up loving camping, and have been camping together since we started dating 10 years ago. We have now successfully completed canoe trips while 34 weeks pregnant with a toddler in tow, and recently this July with our 2 little ones, ages 4 years and 21 months. I recognize that camping is not for everyone, but for those of us who love it, there is nothing better than introducing your kids to the great outdoors through a fun family camping trip.

Camping is always a messy adventure, but one we would never trade. Heading into the backcountry gives us a much needed break from technology and work. Time to slow down, enjoy nature, and spend a few days connecting with our kids & the simple pleasures of life. Some of our best family memories have been made camping, and it's amazing to hear our little guy already counting down the days to next summer's trip. He's a camper at heart and it makes his daddy and I so proud.
In order to enjoy camping it's important to prepare in advance and pack well. There are lots of camping packing lists available online (I promise to share mine one day soon), but I want to focus instead on a few key pieces of equipment that I believe can make your family camping experience a great one.
My Top 6 Must Haves for Camping with Kids:
1. Family Size Mattress - Sleep is central to having fun with kids, no matter where you are, so don't forget this key piece of equipment. Last summer we upgraded and purchased the MEC Super Reactor Double Size Mattress and we LOVE it! No more rolling off of our single sized mattresses onto the floor of the tent and no more cold drafts. Plus it rolls up and stores relatively small for a family size mattress (red cylindrical bag in photo) and offers excellent comfort. So worth it!
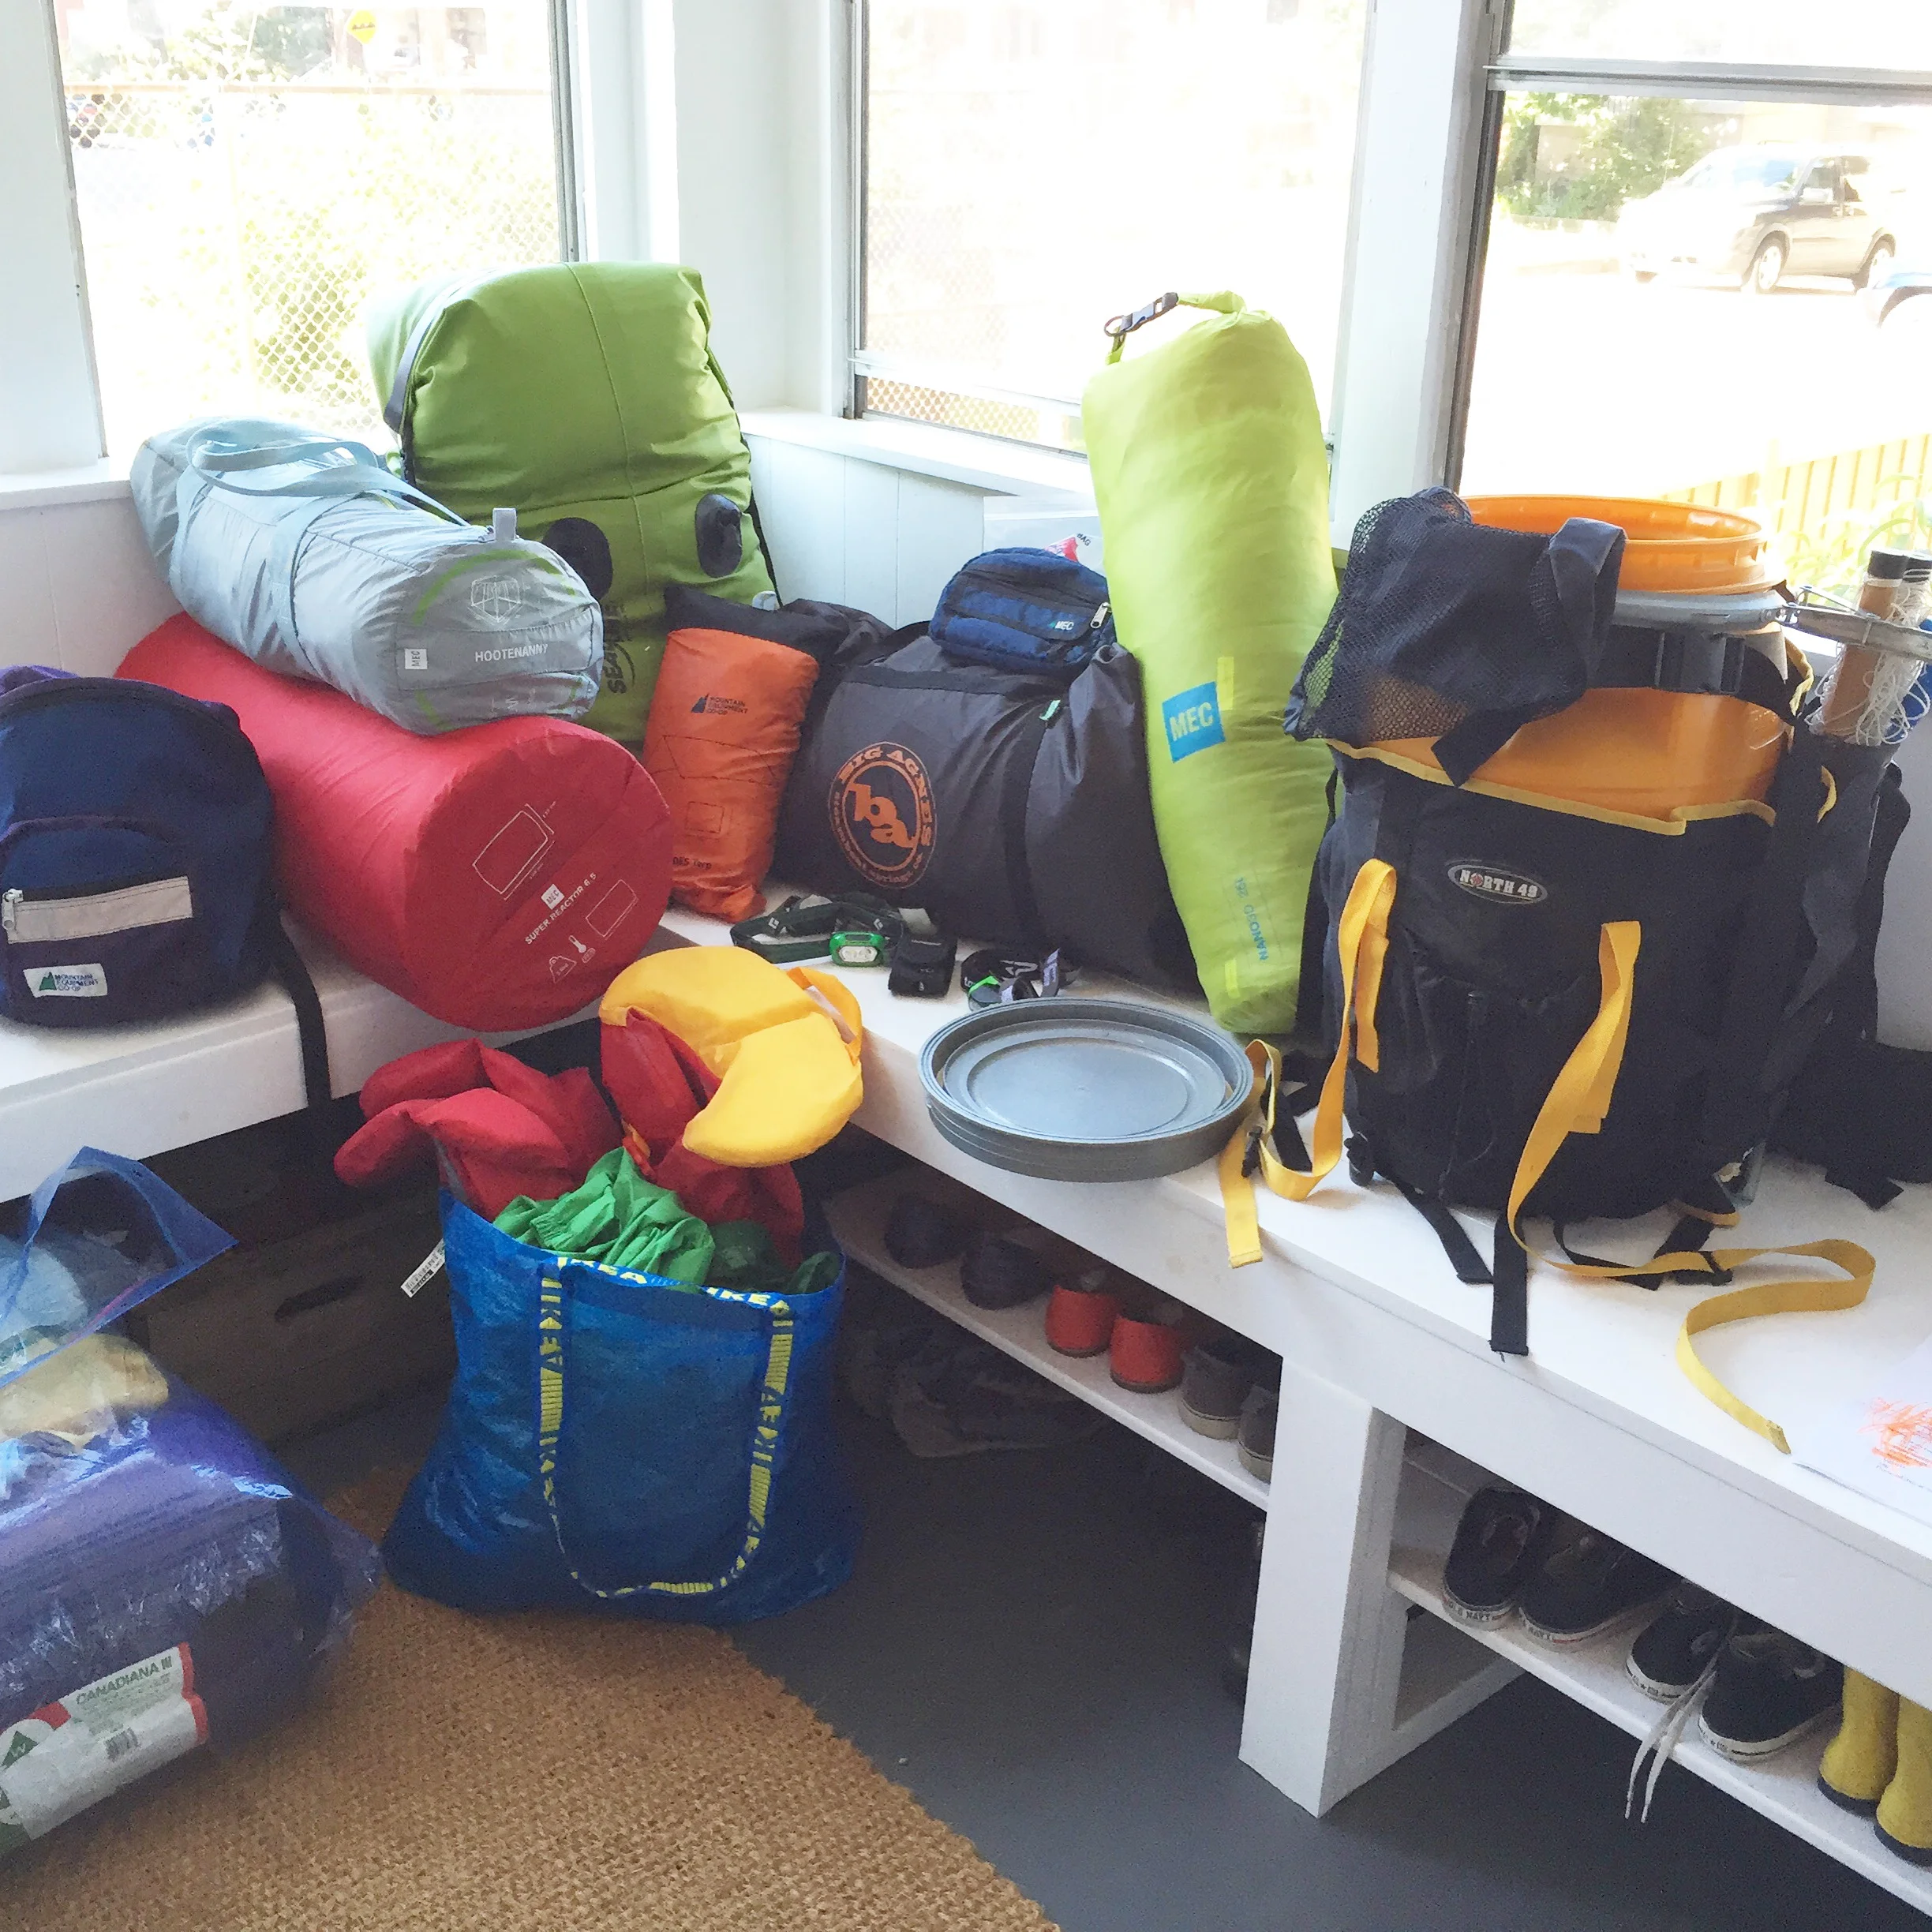
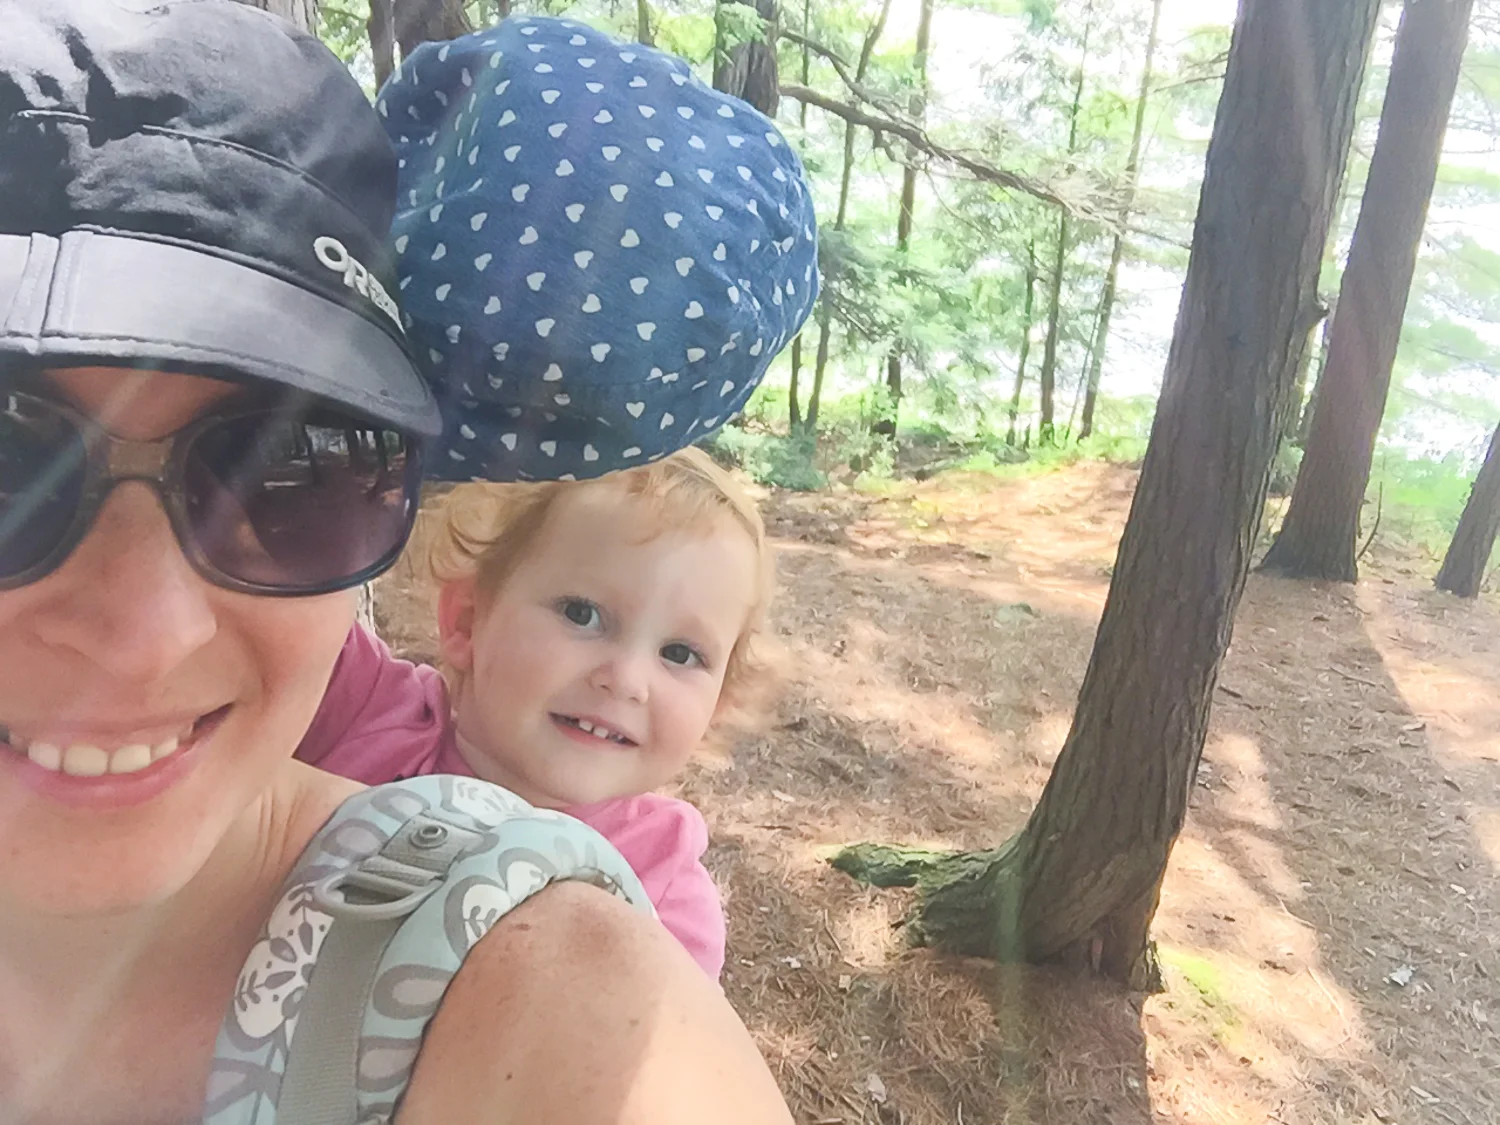
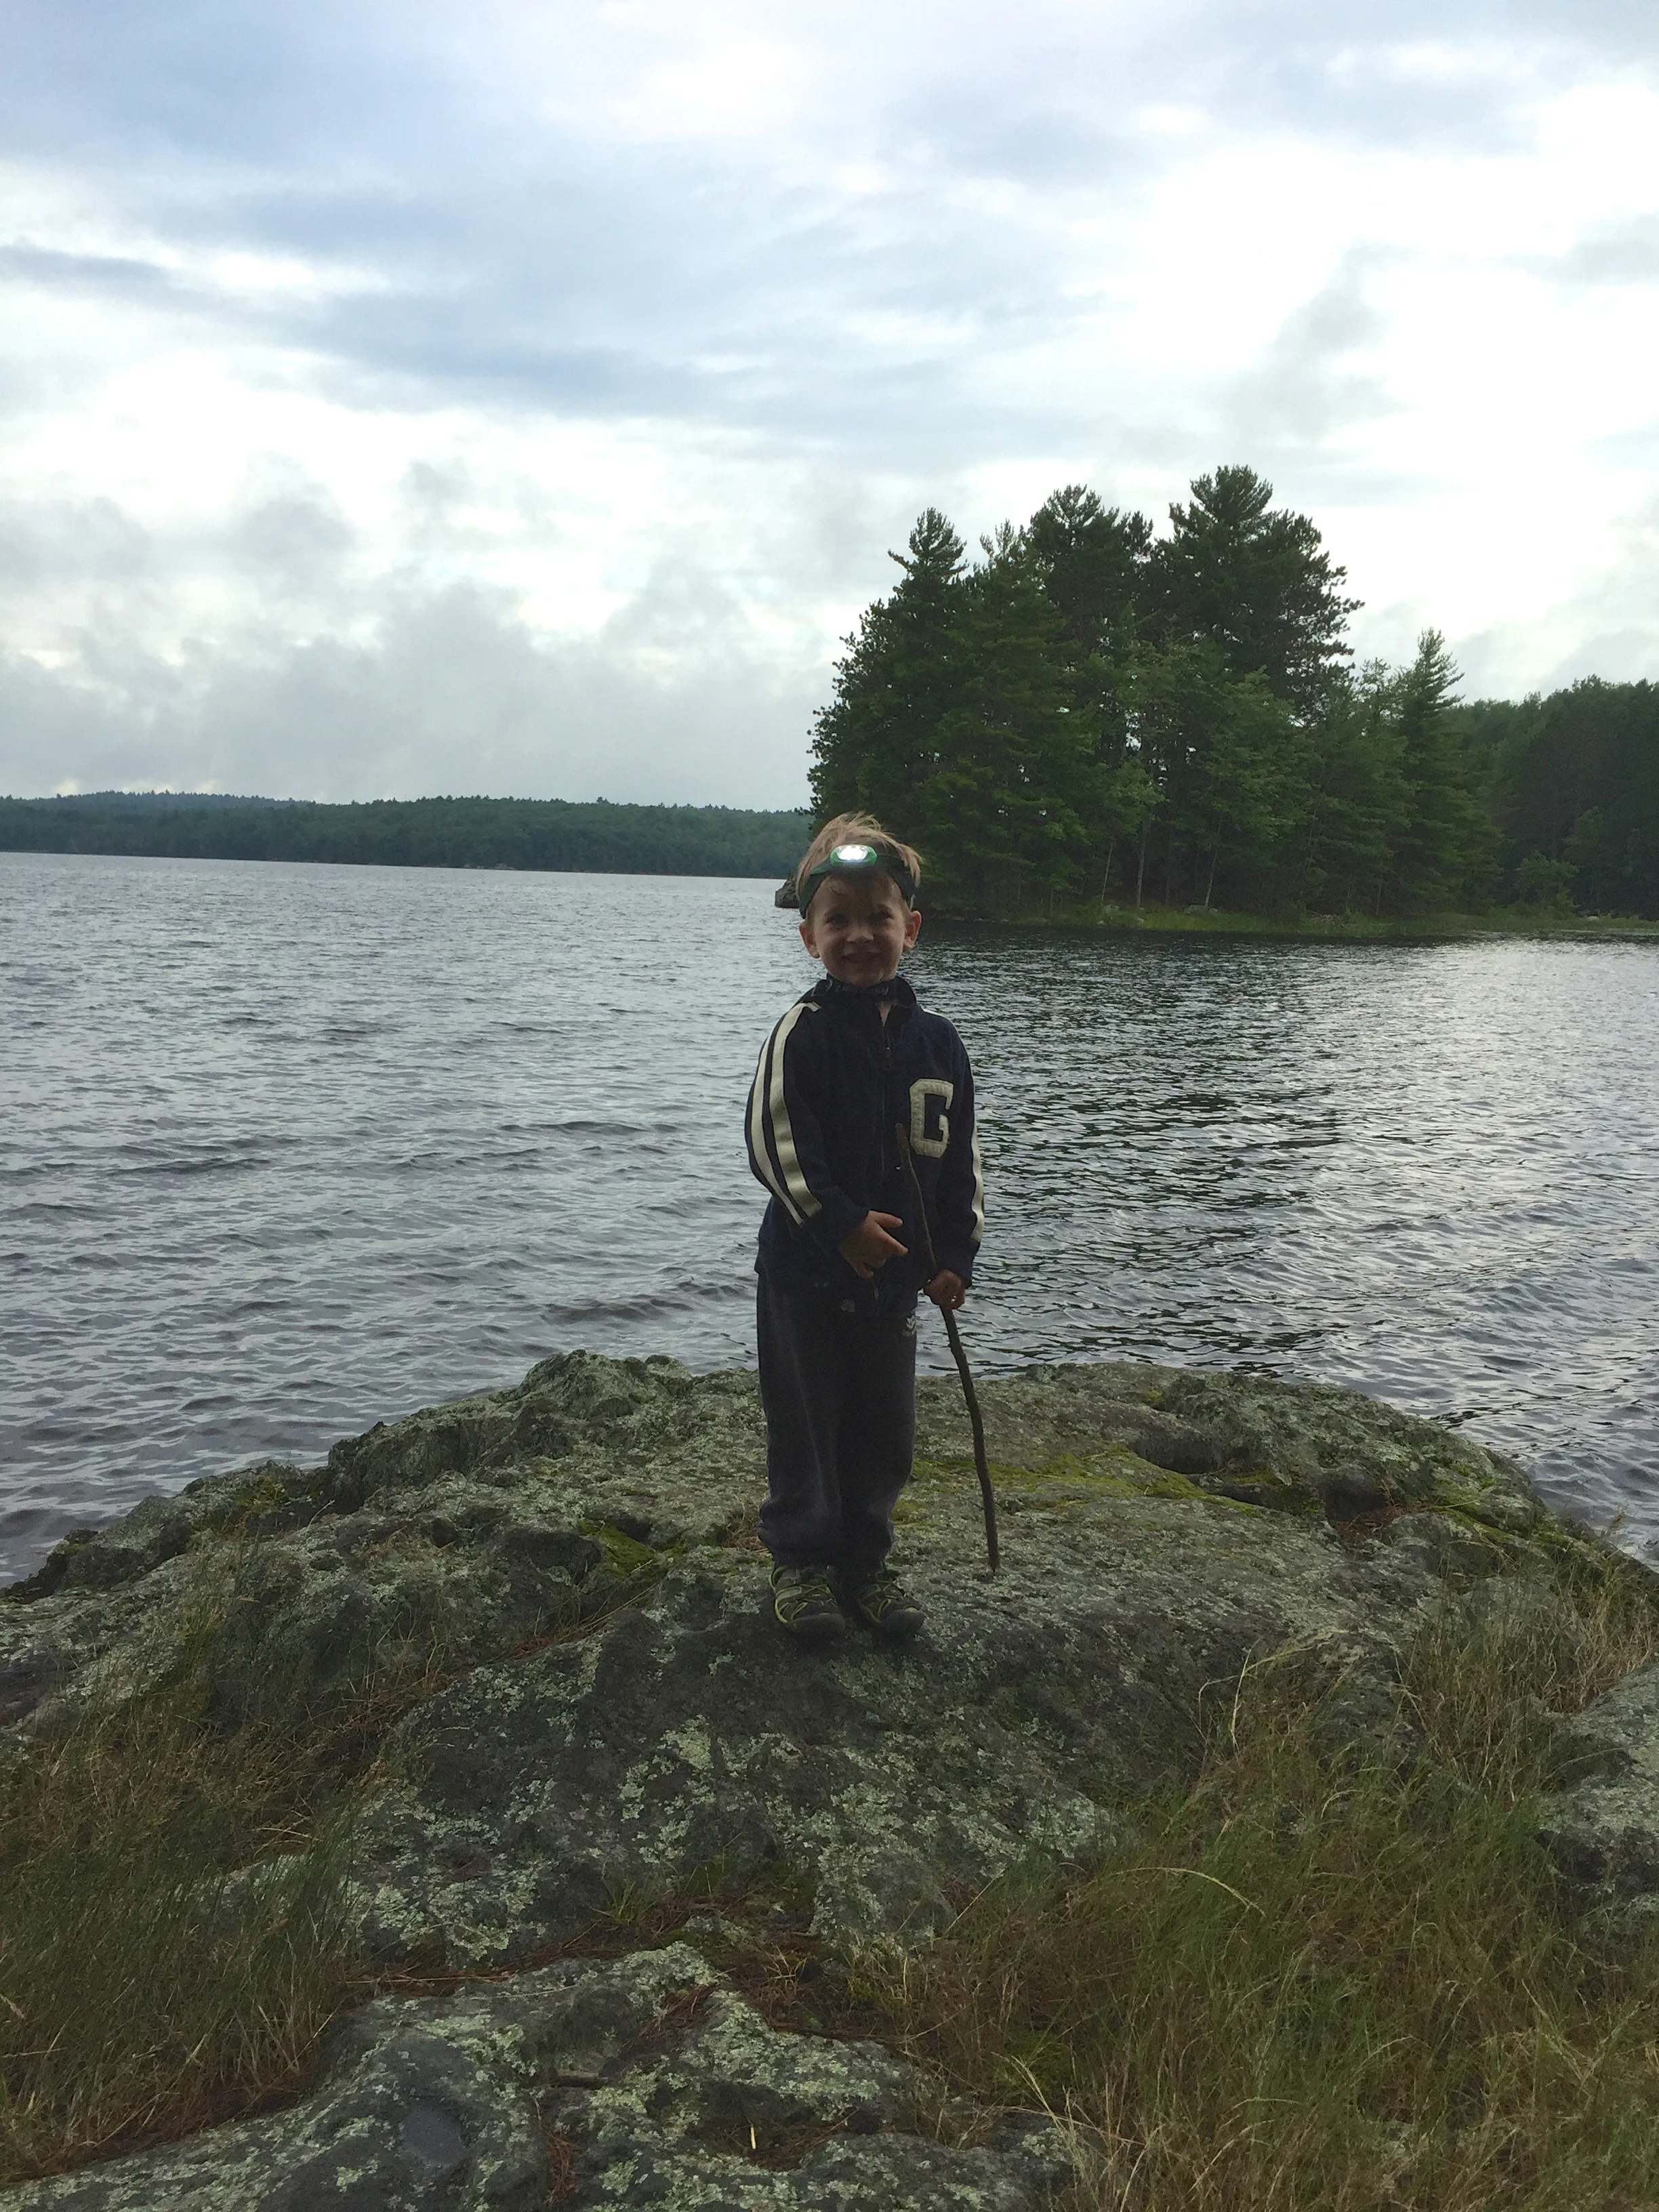
2. Baby Carrier - Tossing your kiddo up onto your front or back (depending on age, carrier, skill etc) can be a great way to keep them safe while walking a portage, around water or to keep them away from fire or sharps at mealtime prep. If your little one is used to being rocked to sleep at night, walking along the water with the sounds of the waves is a great way to lull them to sleep before transferring them into your tent. *Please make sure to wear supportive shoes while babywearing, especially on uneven ground, to avoid falls.
3. Bug Shelter - Ontario summers are pretty buggy and little ones can have a terrible reaction to bug bites (as we found out this summer with our little Lucy). In order to enjoy our meals and have a place to escape the bugs we always bring our MEC Hootenanny Bug Shelter. It was a big purchase initially, but one that has definitely been worth it on our recent trips. I can't even imagine how many bites Lucy would have had without it!

4. Headlamps - It's freaking dark in the wilderness at night (unless you happen to go camping during a full moon), so be prepared with some good lighting. Headlamps make everything easier, especially when you're dealing with messy kids. Having handsfree while changing a dirty diaper in the dark, or trekking out to the bathroom with a little one at night is so essential. Plus kids LOVE them! *Make sure to check your batteries before each trip and pack a few extras just in case.
5. Booster Seat - Feeding little ones can be a difficult task while camping, so to make it easier bring along a collapsable booster seat. They clip easily onto picnic tables found at most camp sites and mean you can keep baby off your lap while eating so you can enjoy your meal too! Lucy loved it on last years trip.

6. Rainy Day Activities - Although you hope to get perfect weather while camping it can't be guaranteed, so make sure to pack some fun rainy day activities. MEC has some amazing resources on their Camp Big site for families, including some great colouring & activity pages you can print and bring along. Some other great activities that we like to pack include travel board games, cards, board books, play doh and a few toy cars packed in the car caddy I made Ben years ago. You don't need to go overboard but definitely want to be prepared.

I hope my Top 6 Must Haves for Camping With Kids help you in your camping adventures this summer!
Check out Part 2 of this series My 7 Tips & Tricks For Camping With Kids, plus get my Complete Family Camping List & my Downloadable Family 1st Aid Kit List
- Care

Family Photo Session GIVEAWAY!!
Want a chance to WIN a Professional Family Photo Session? Check it out!
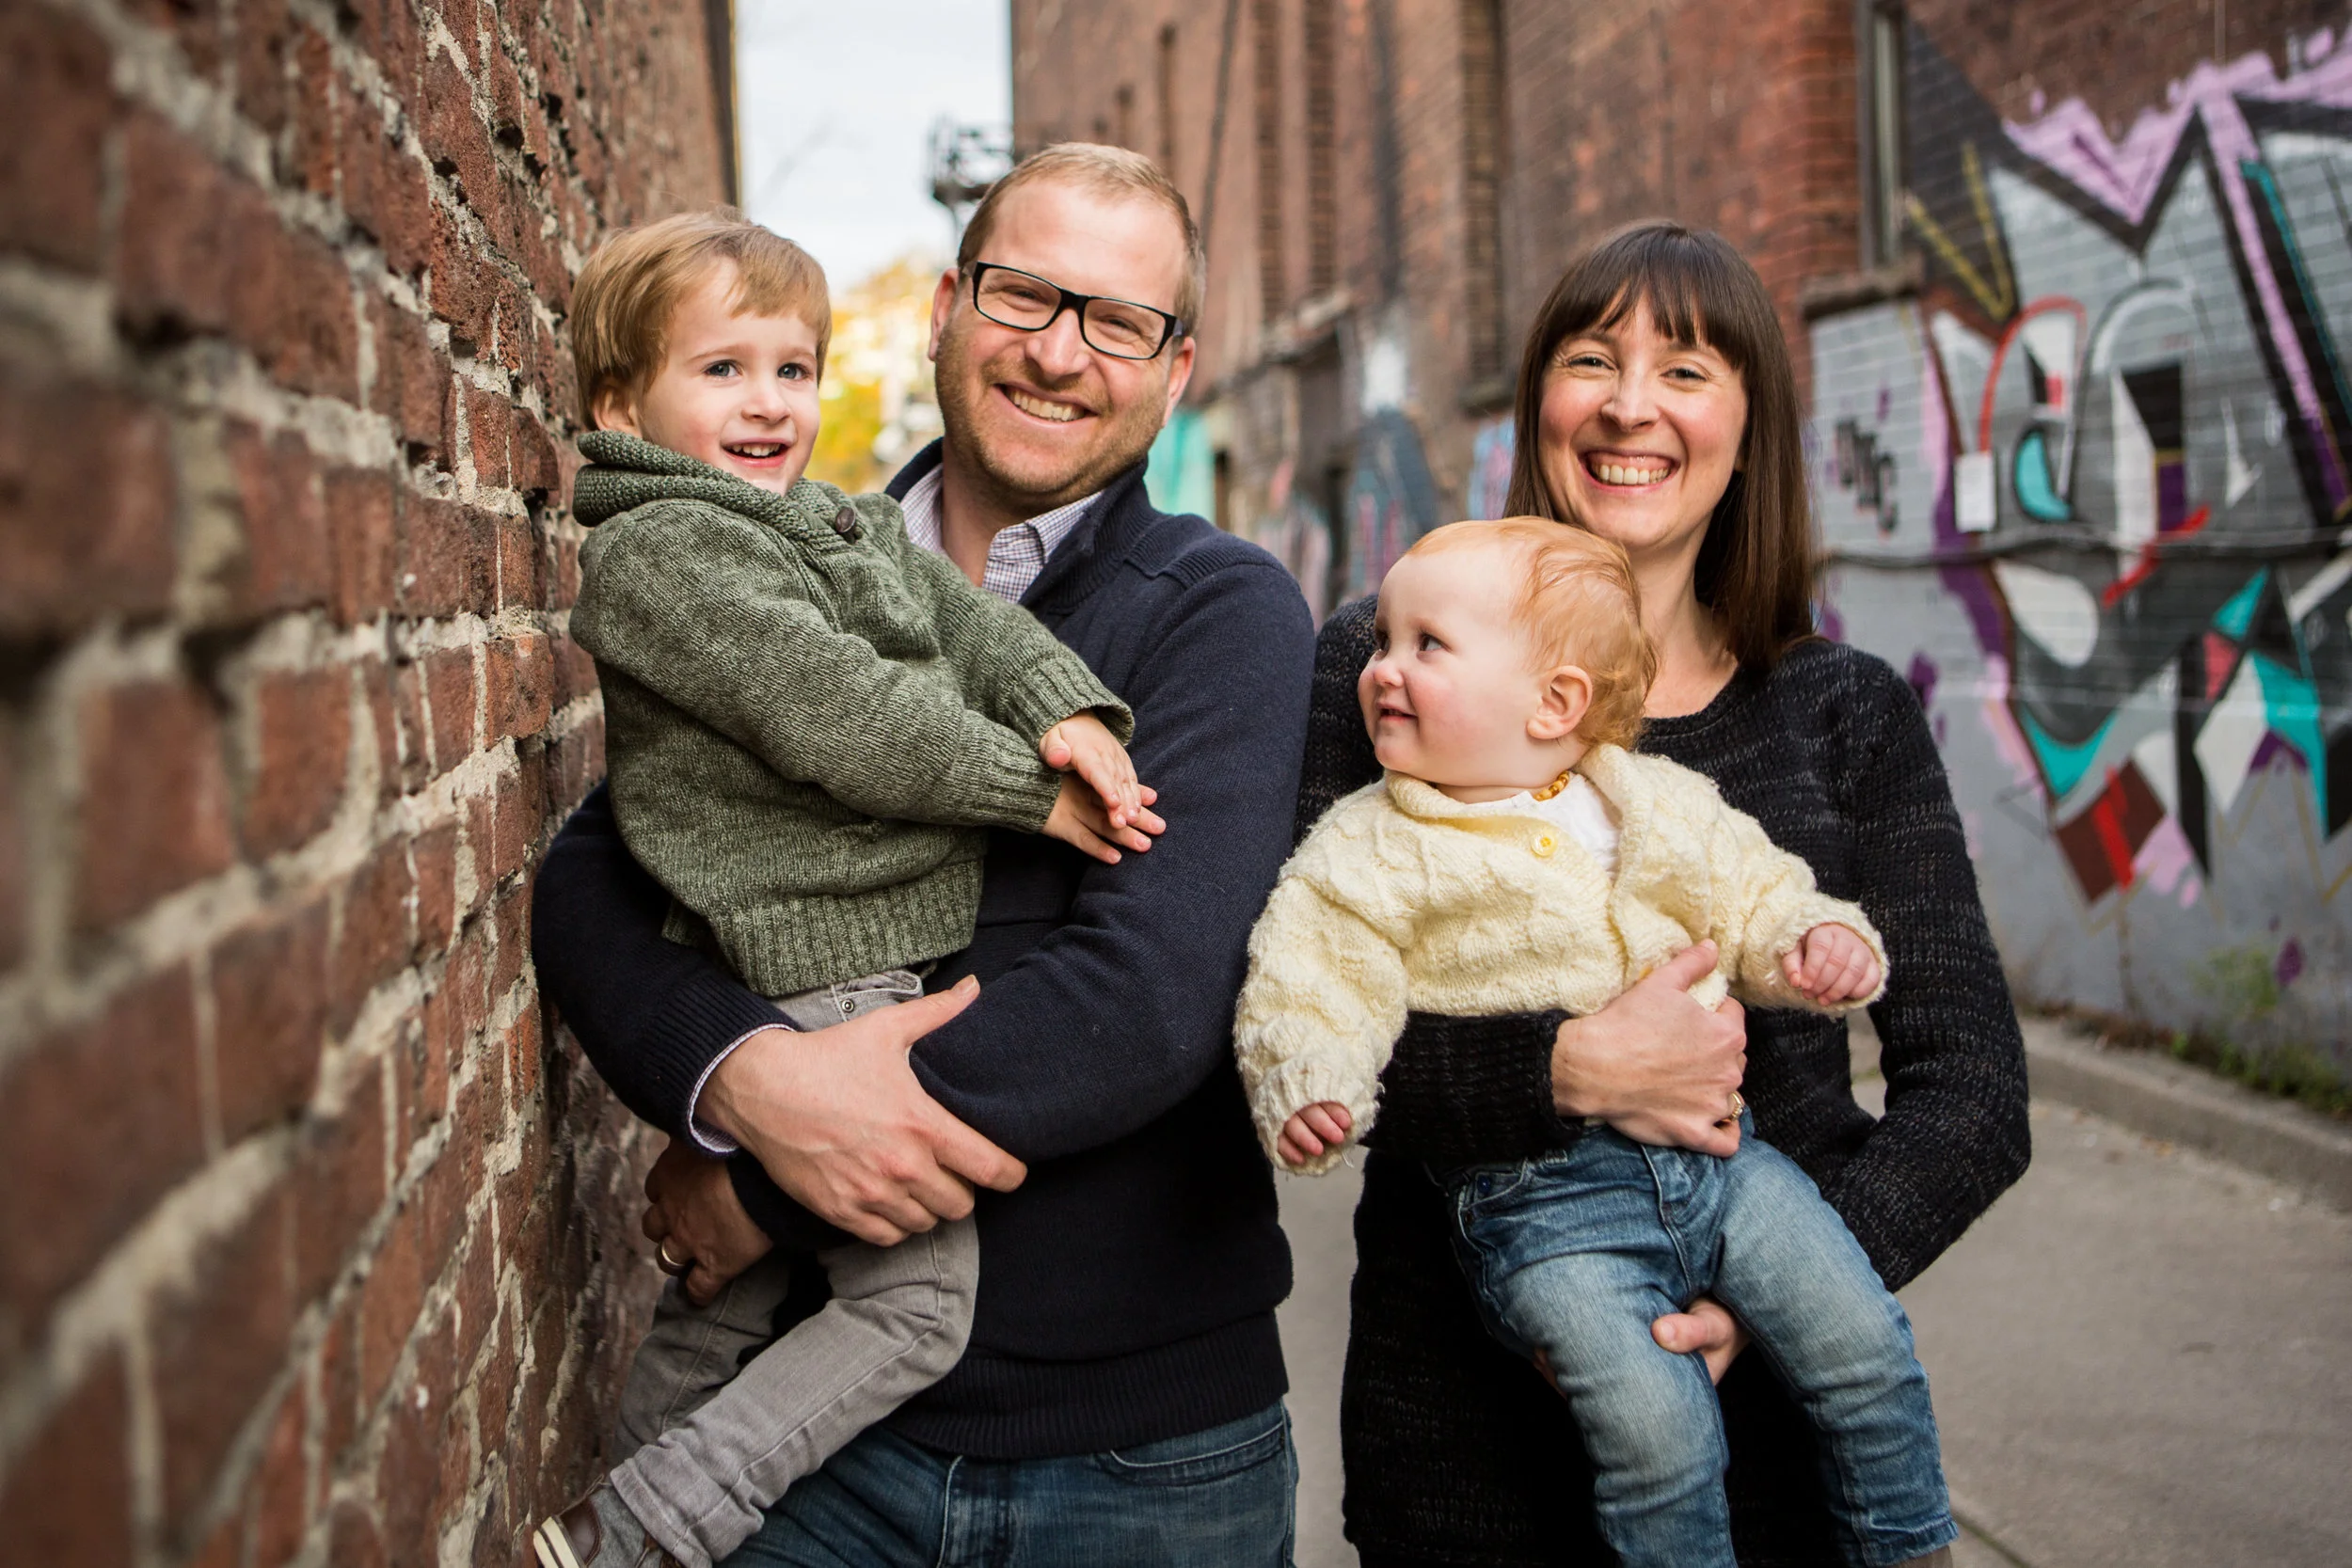
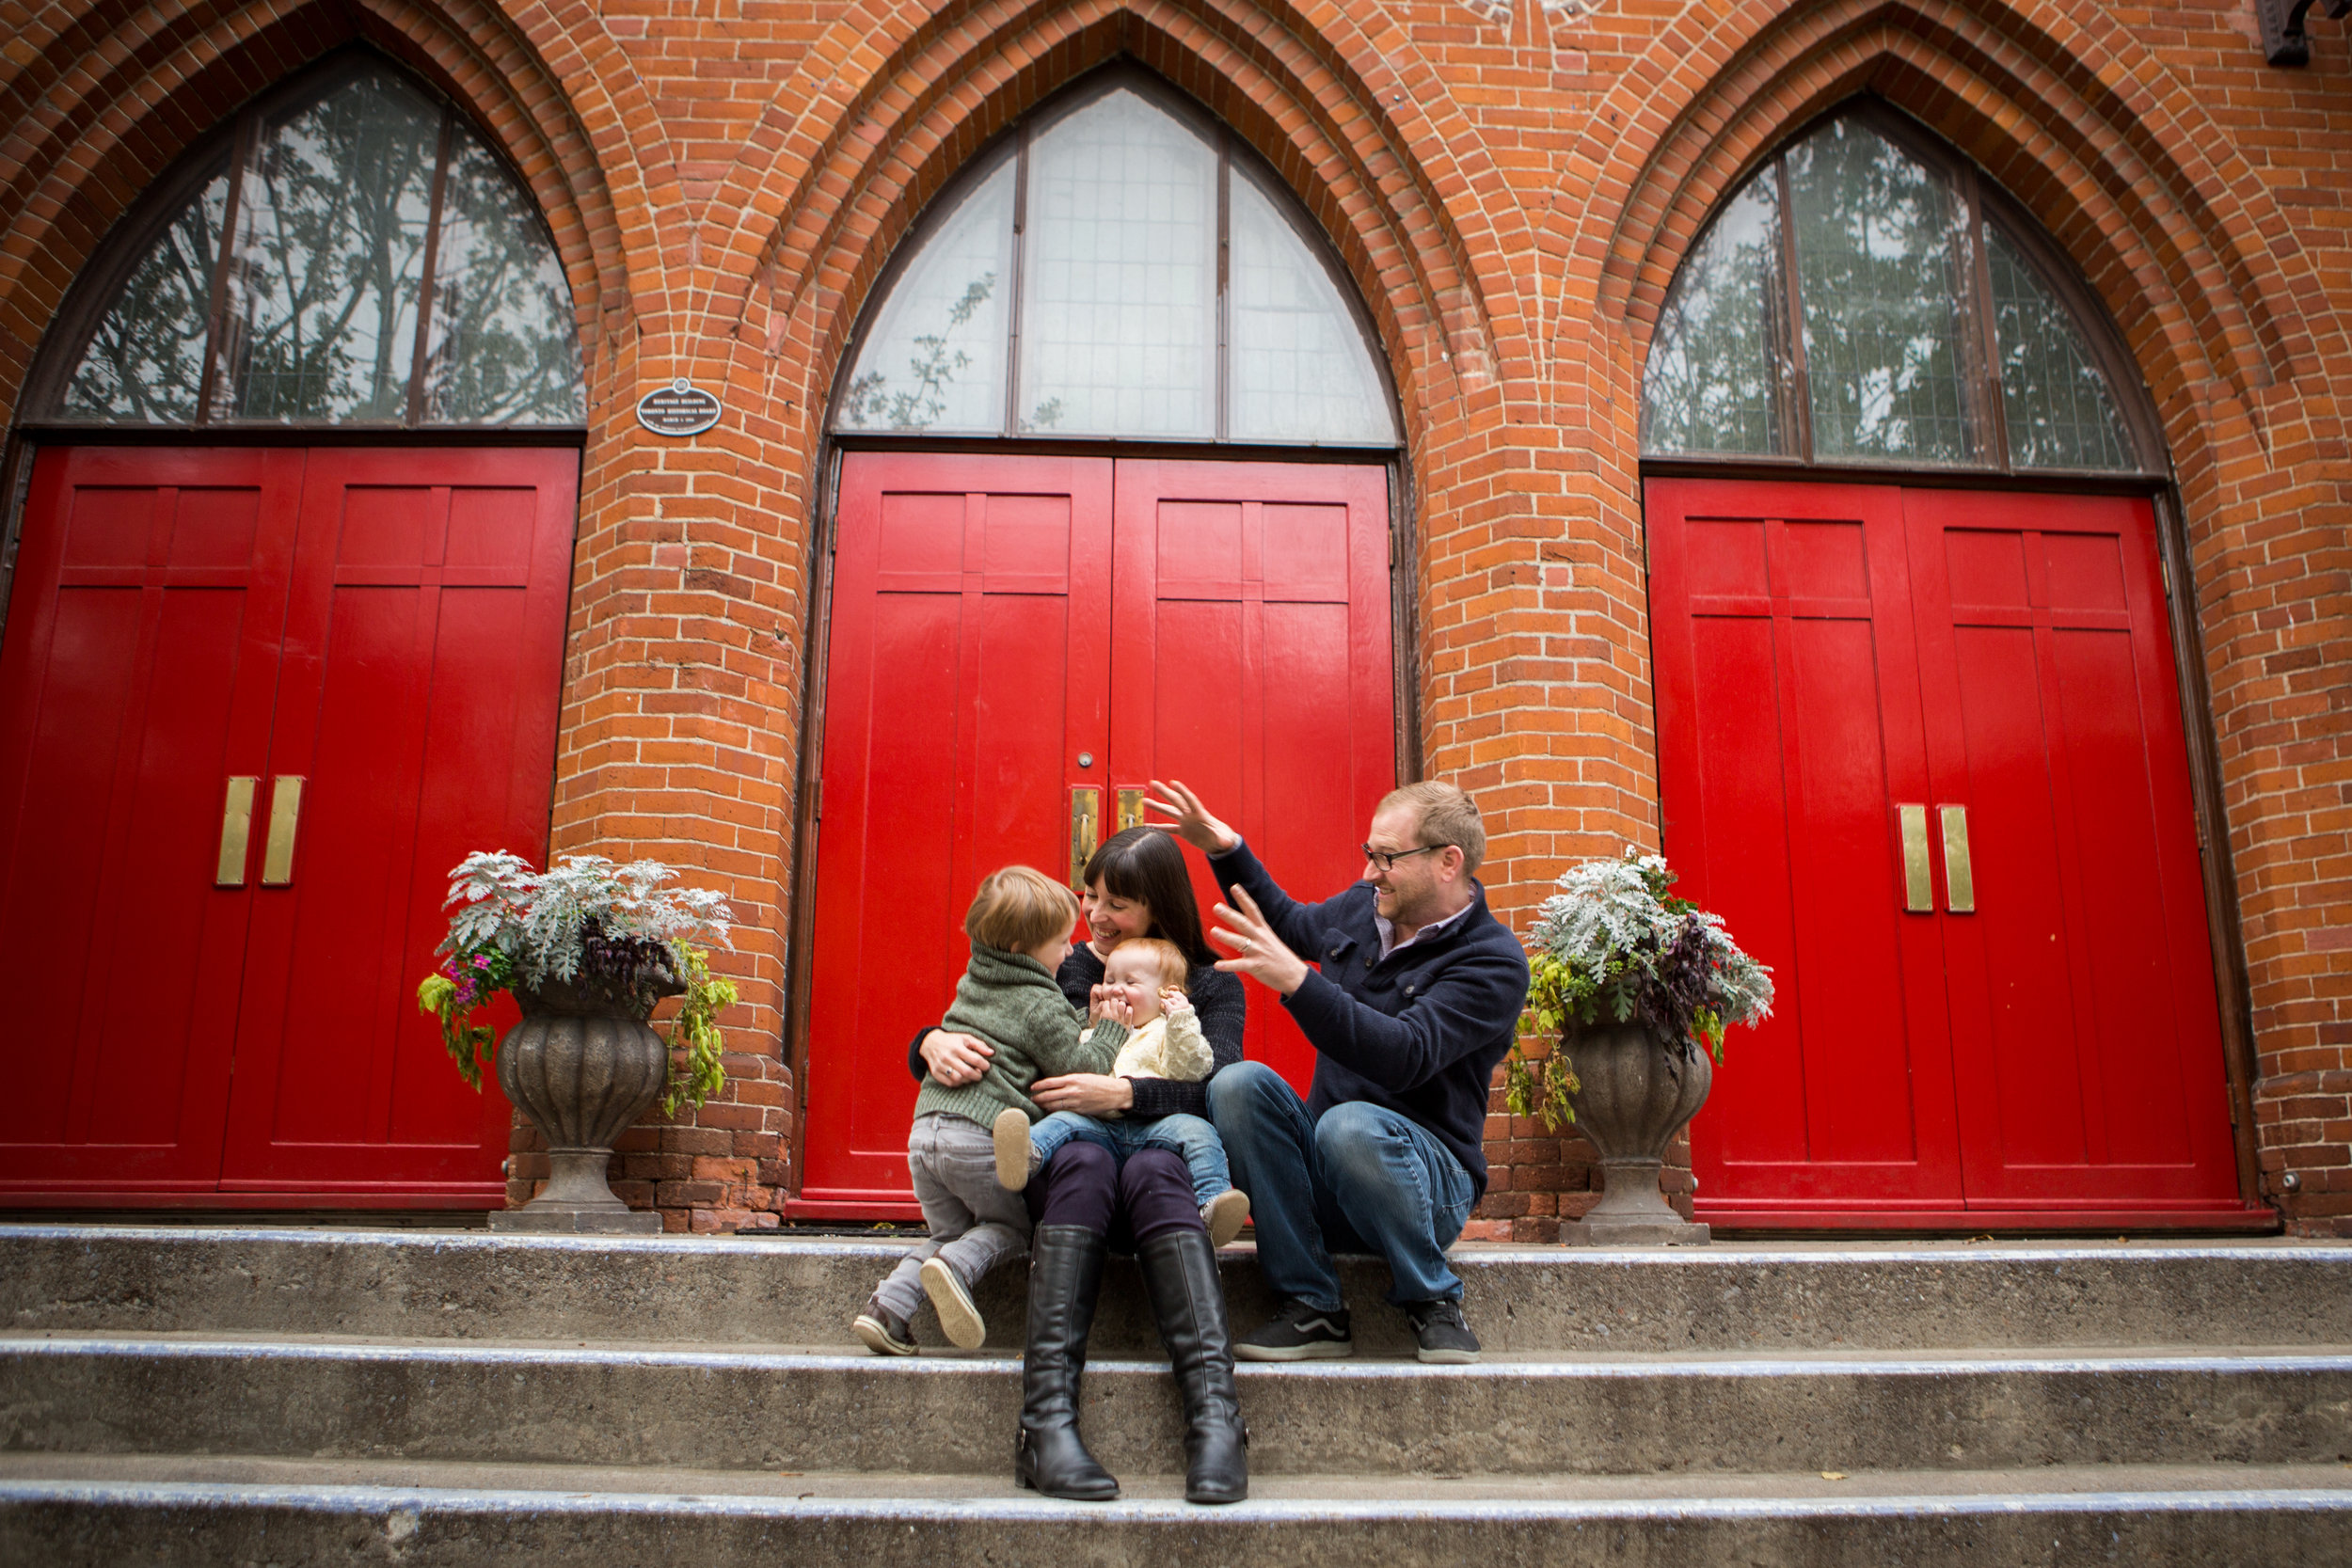
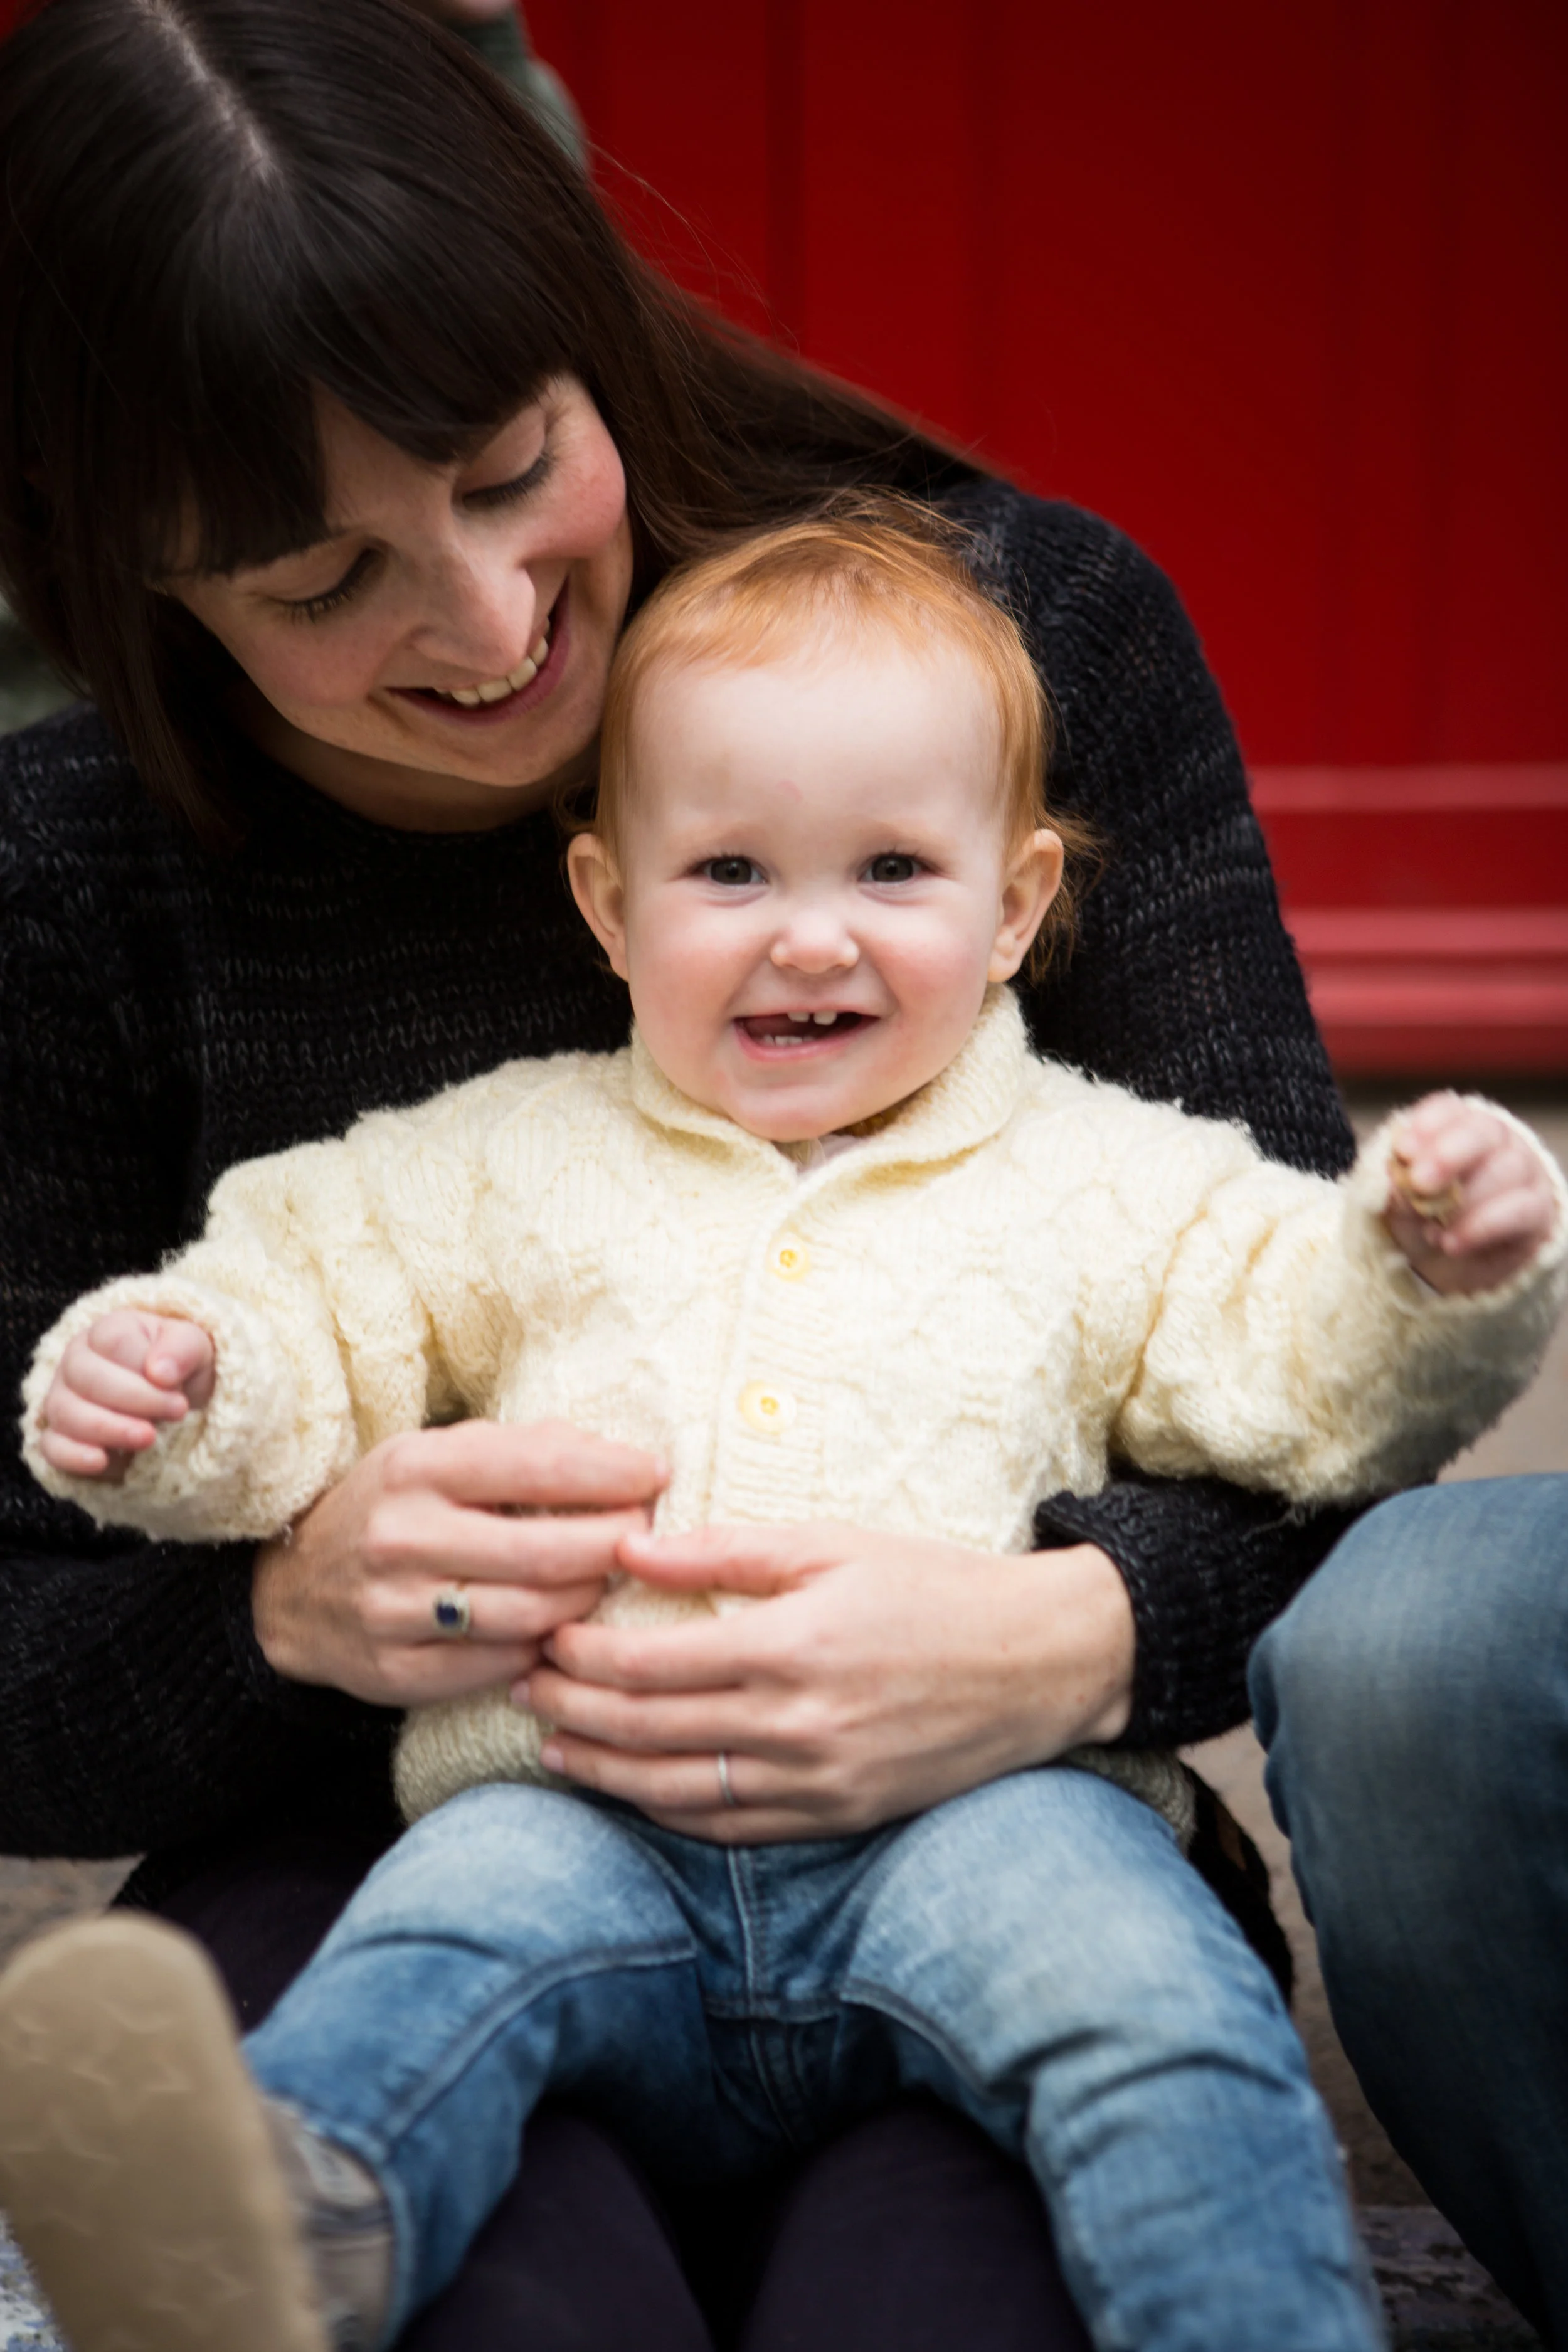
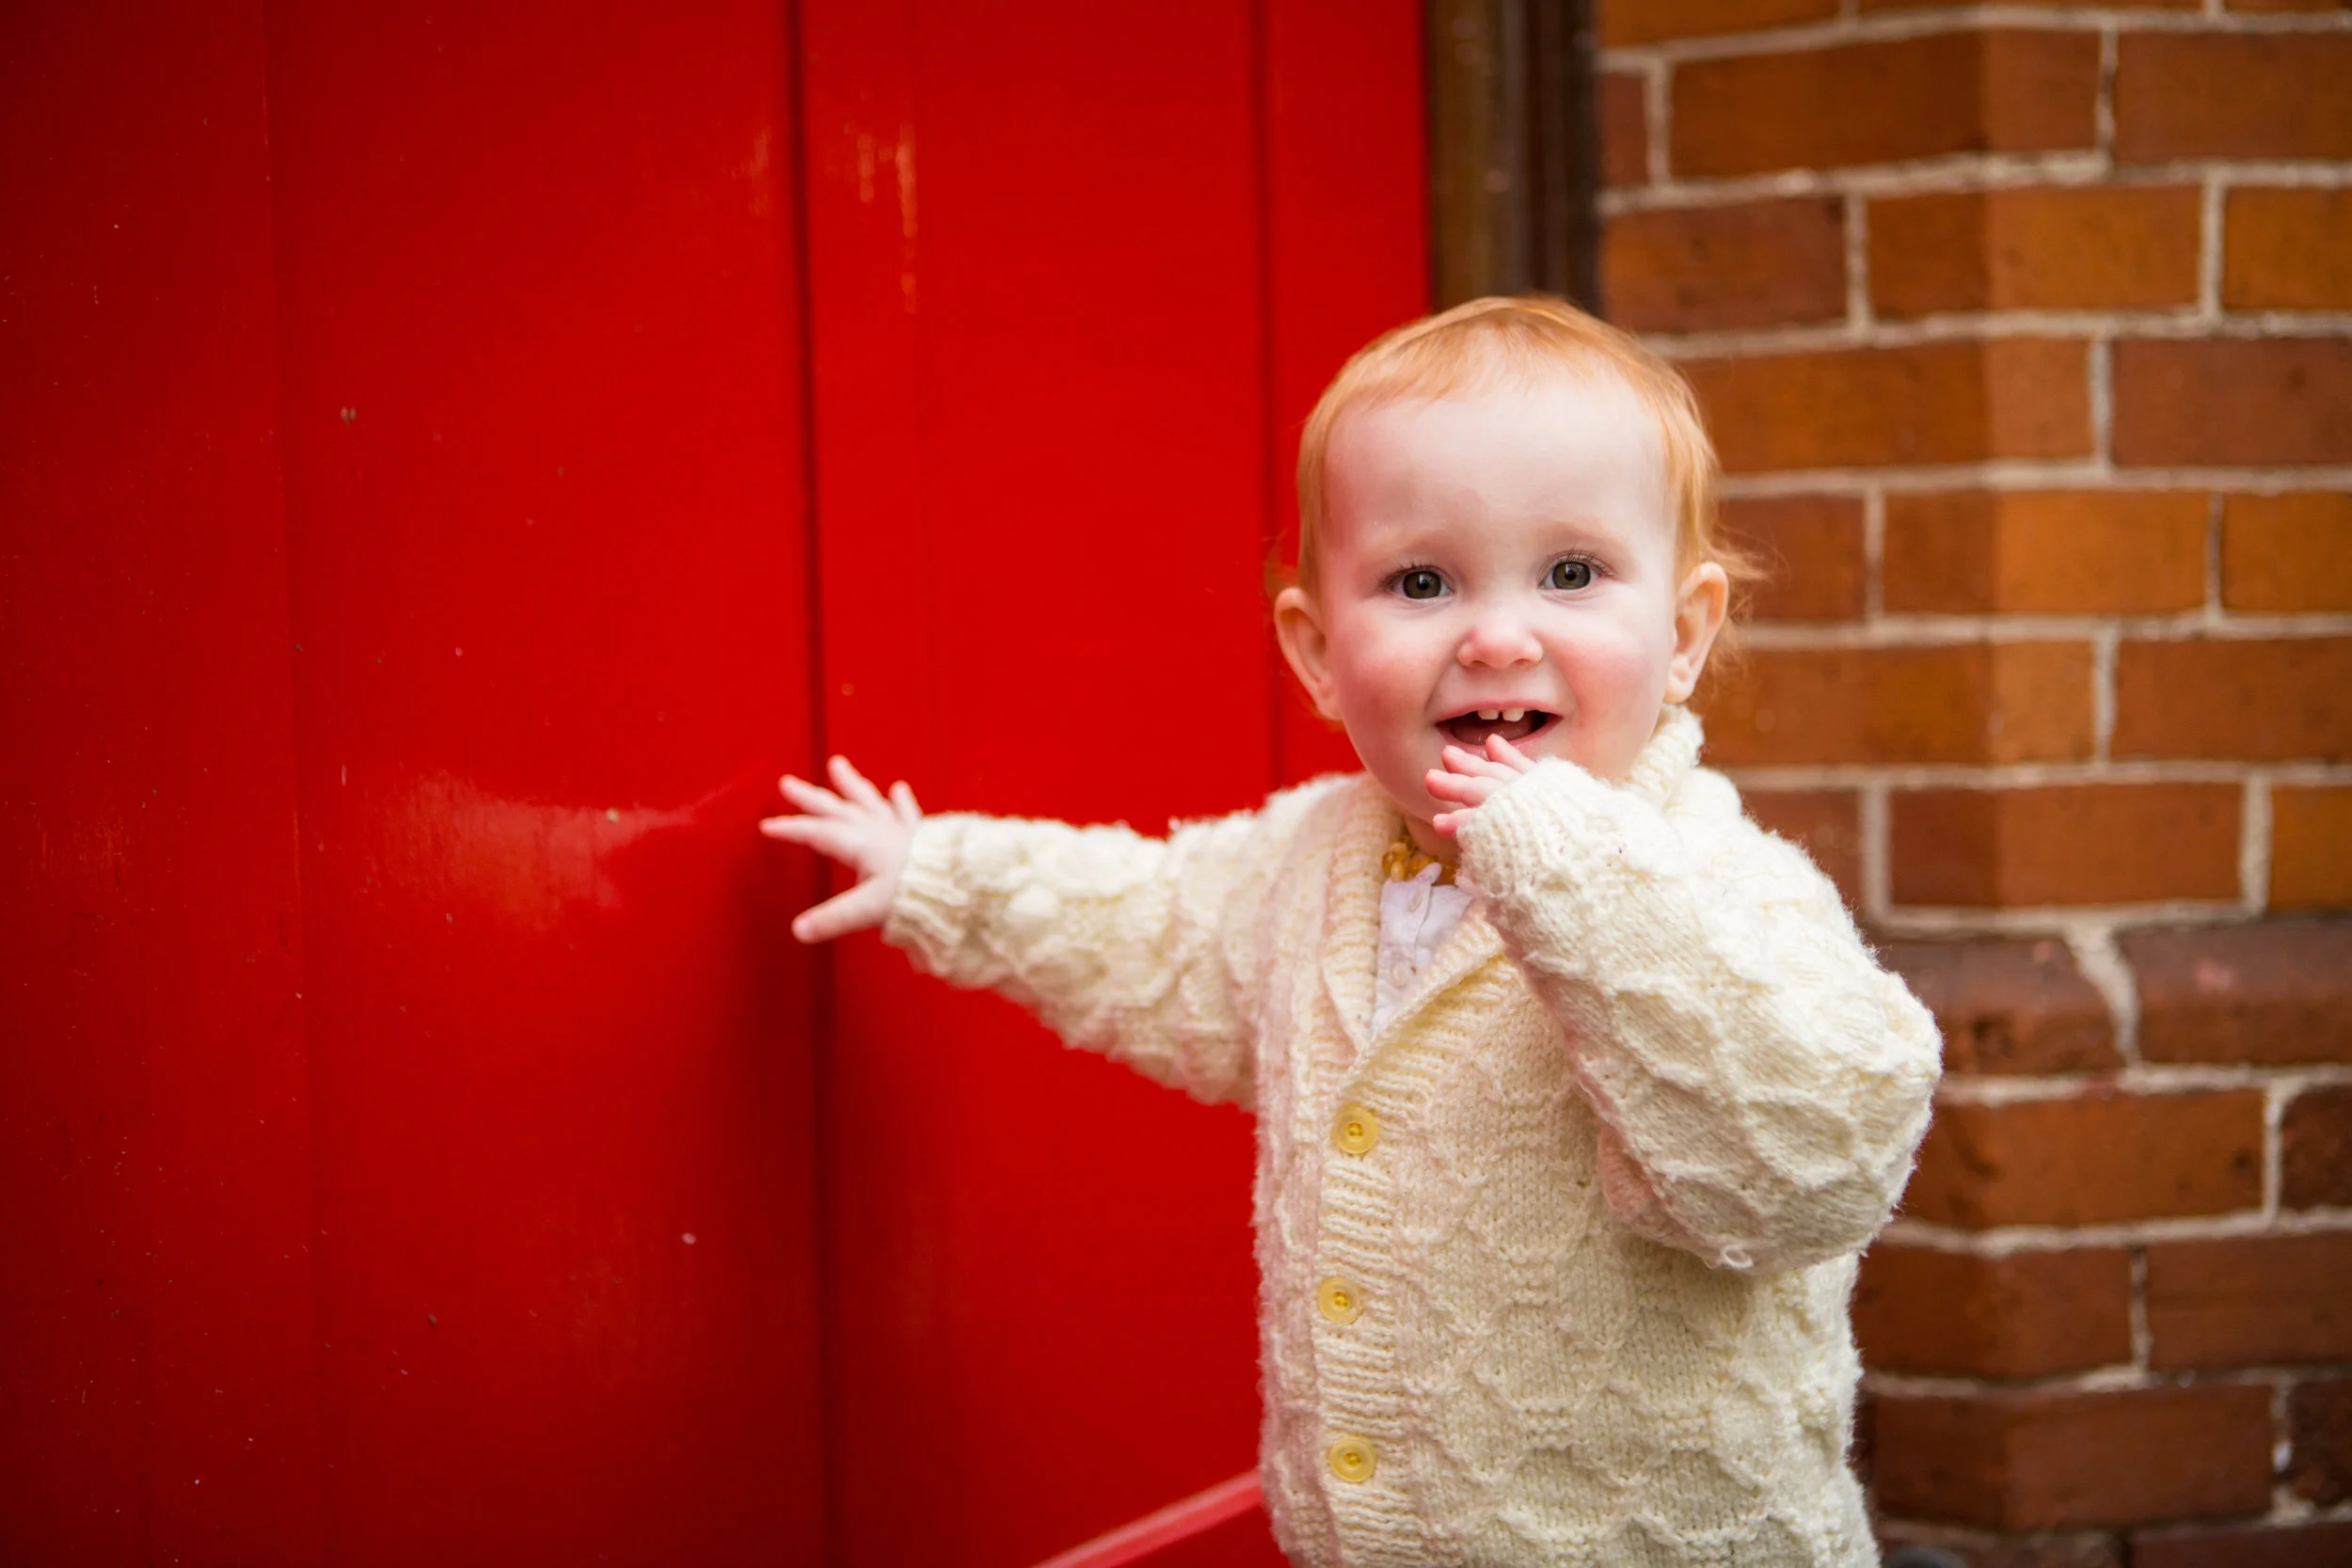
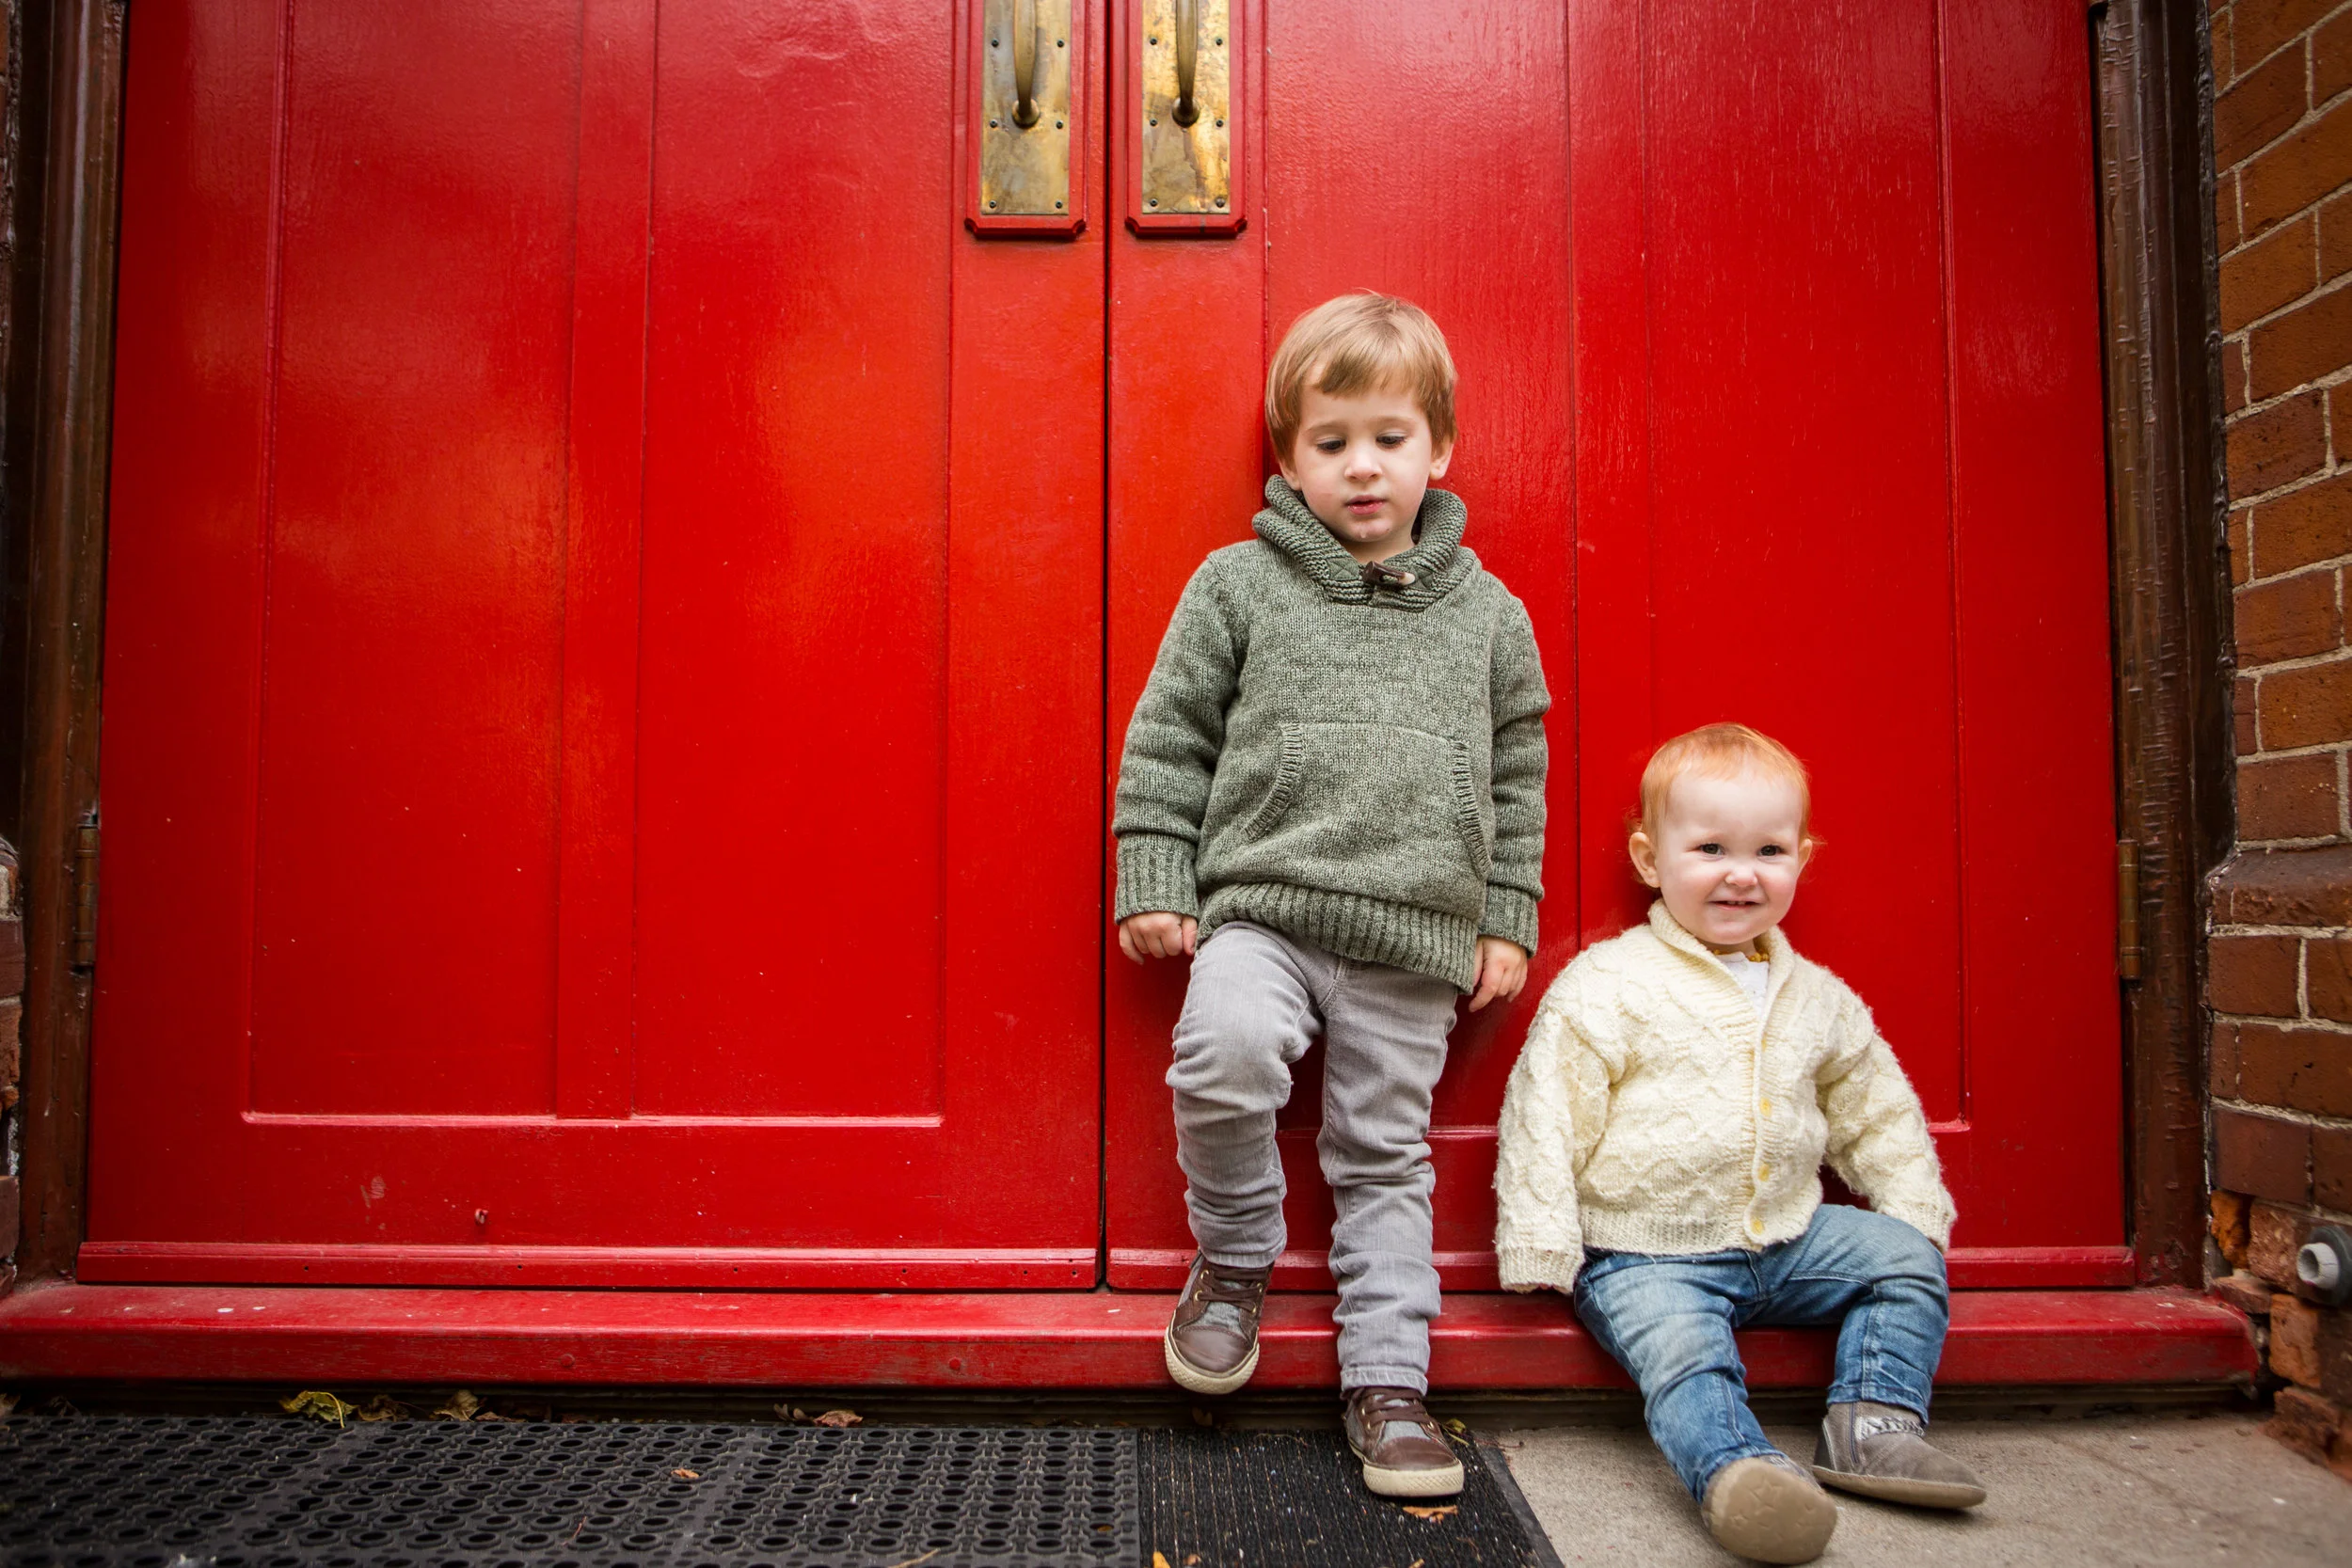
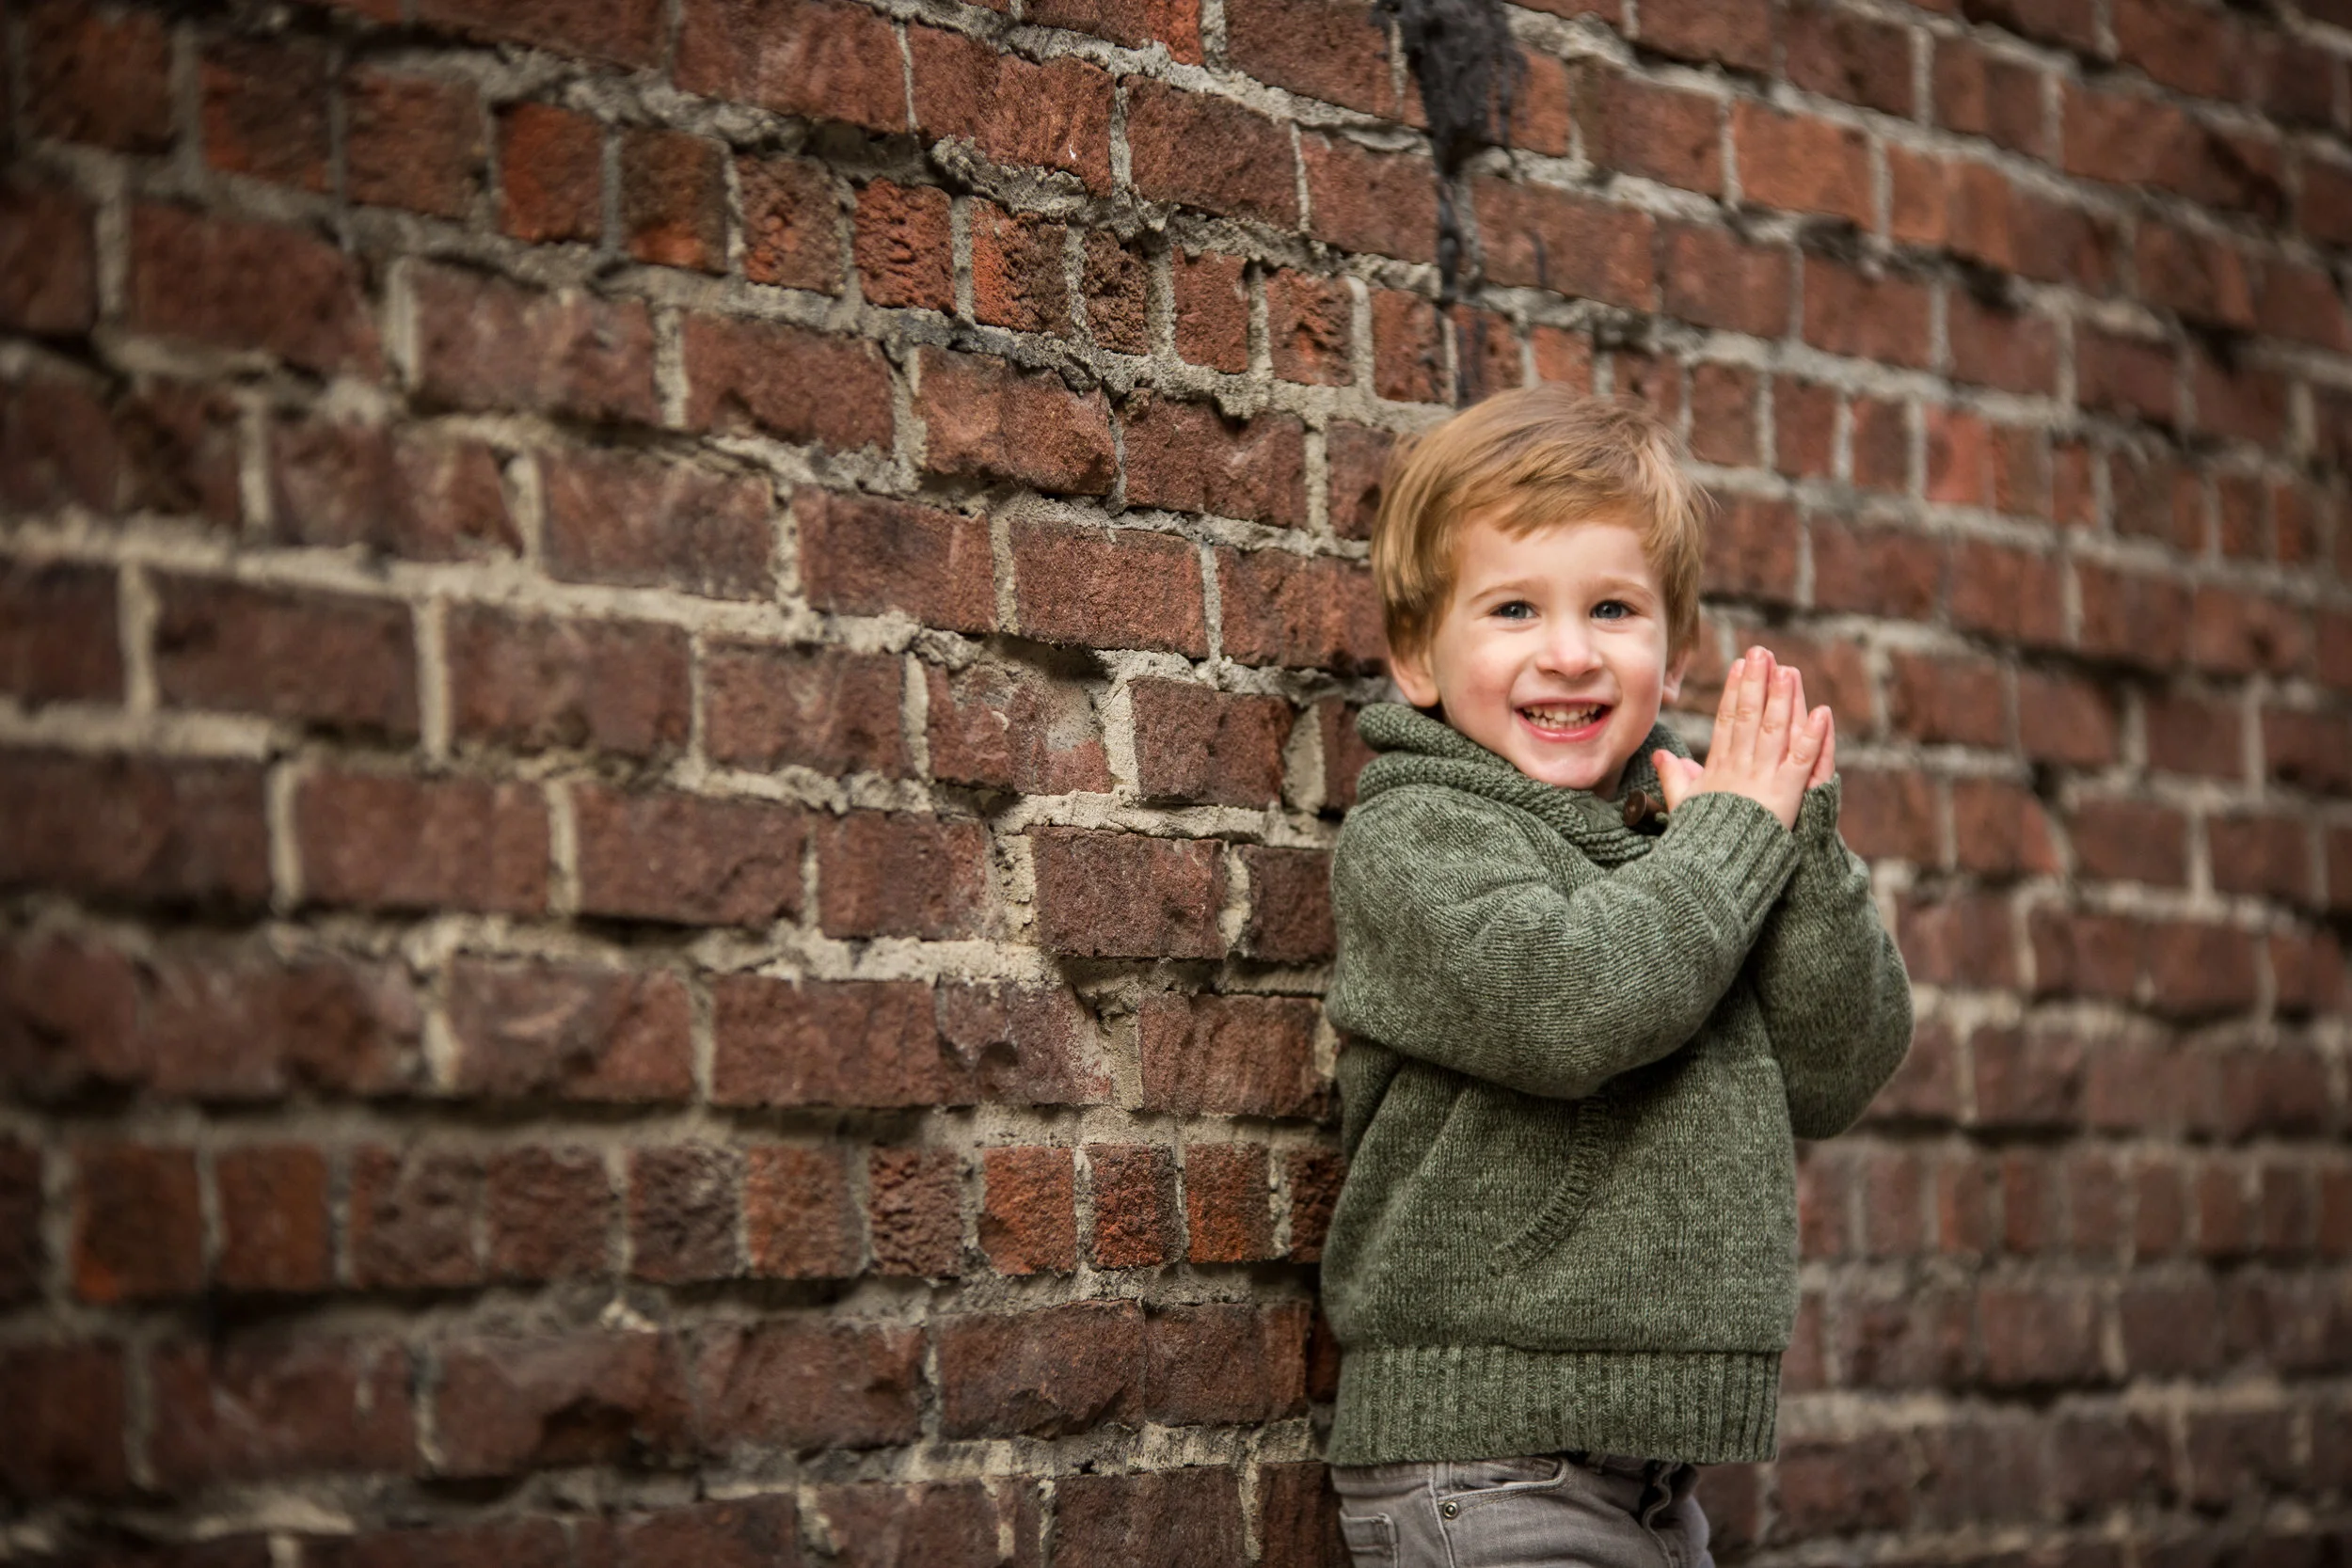
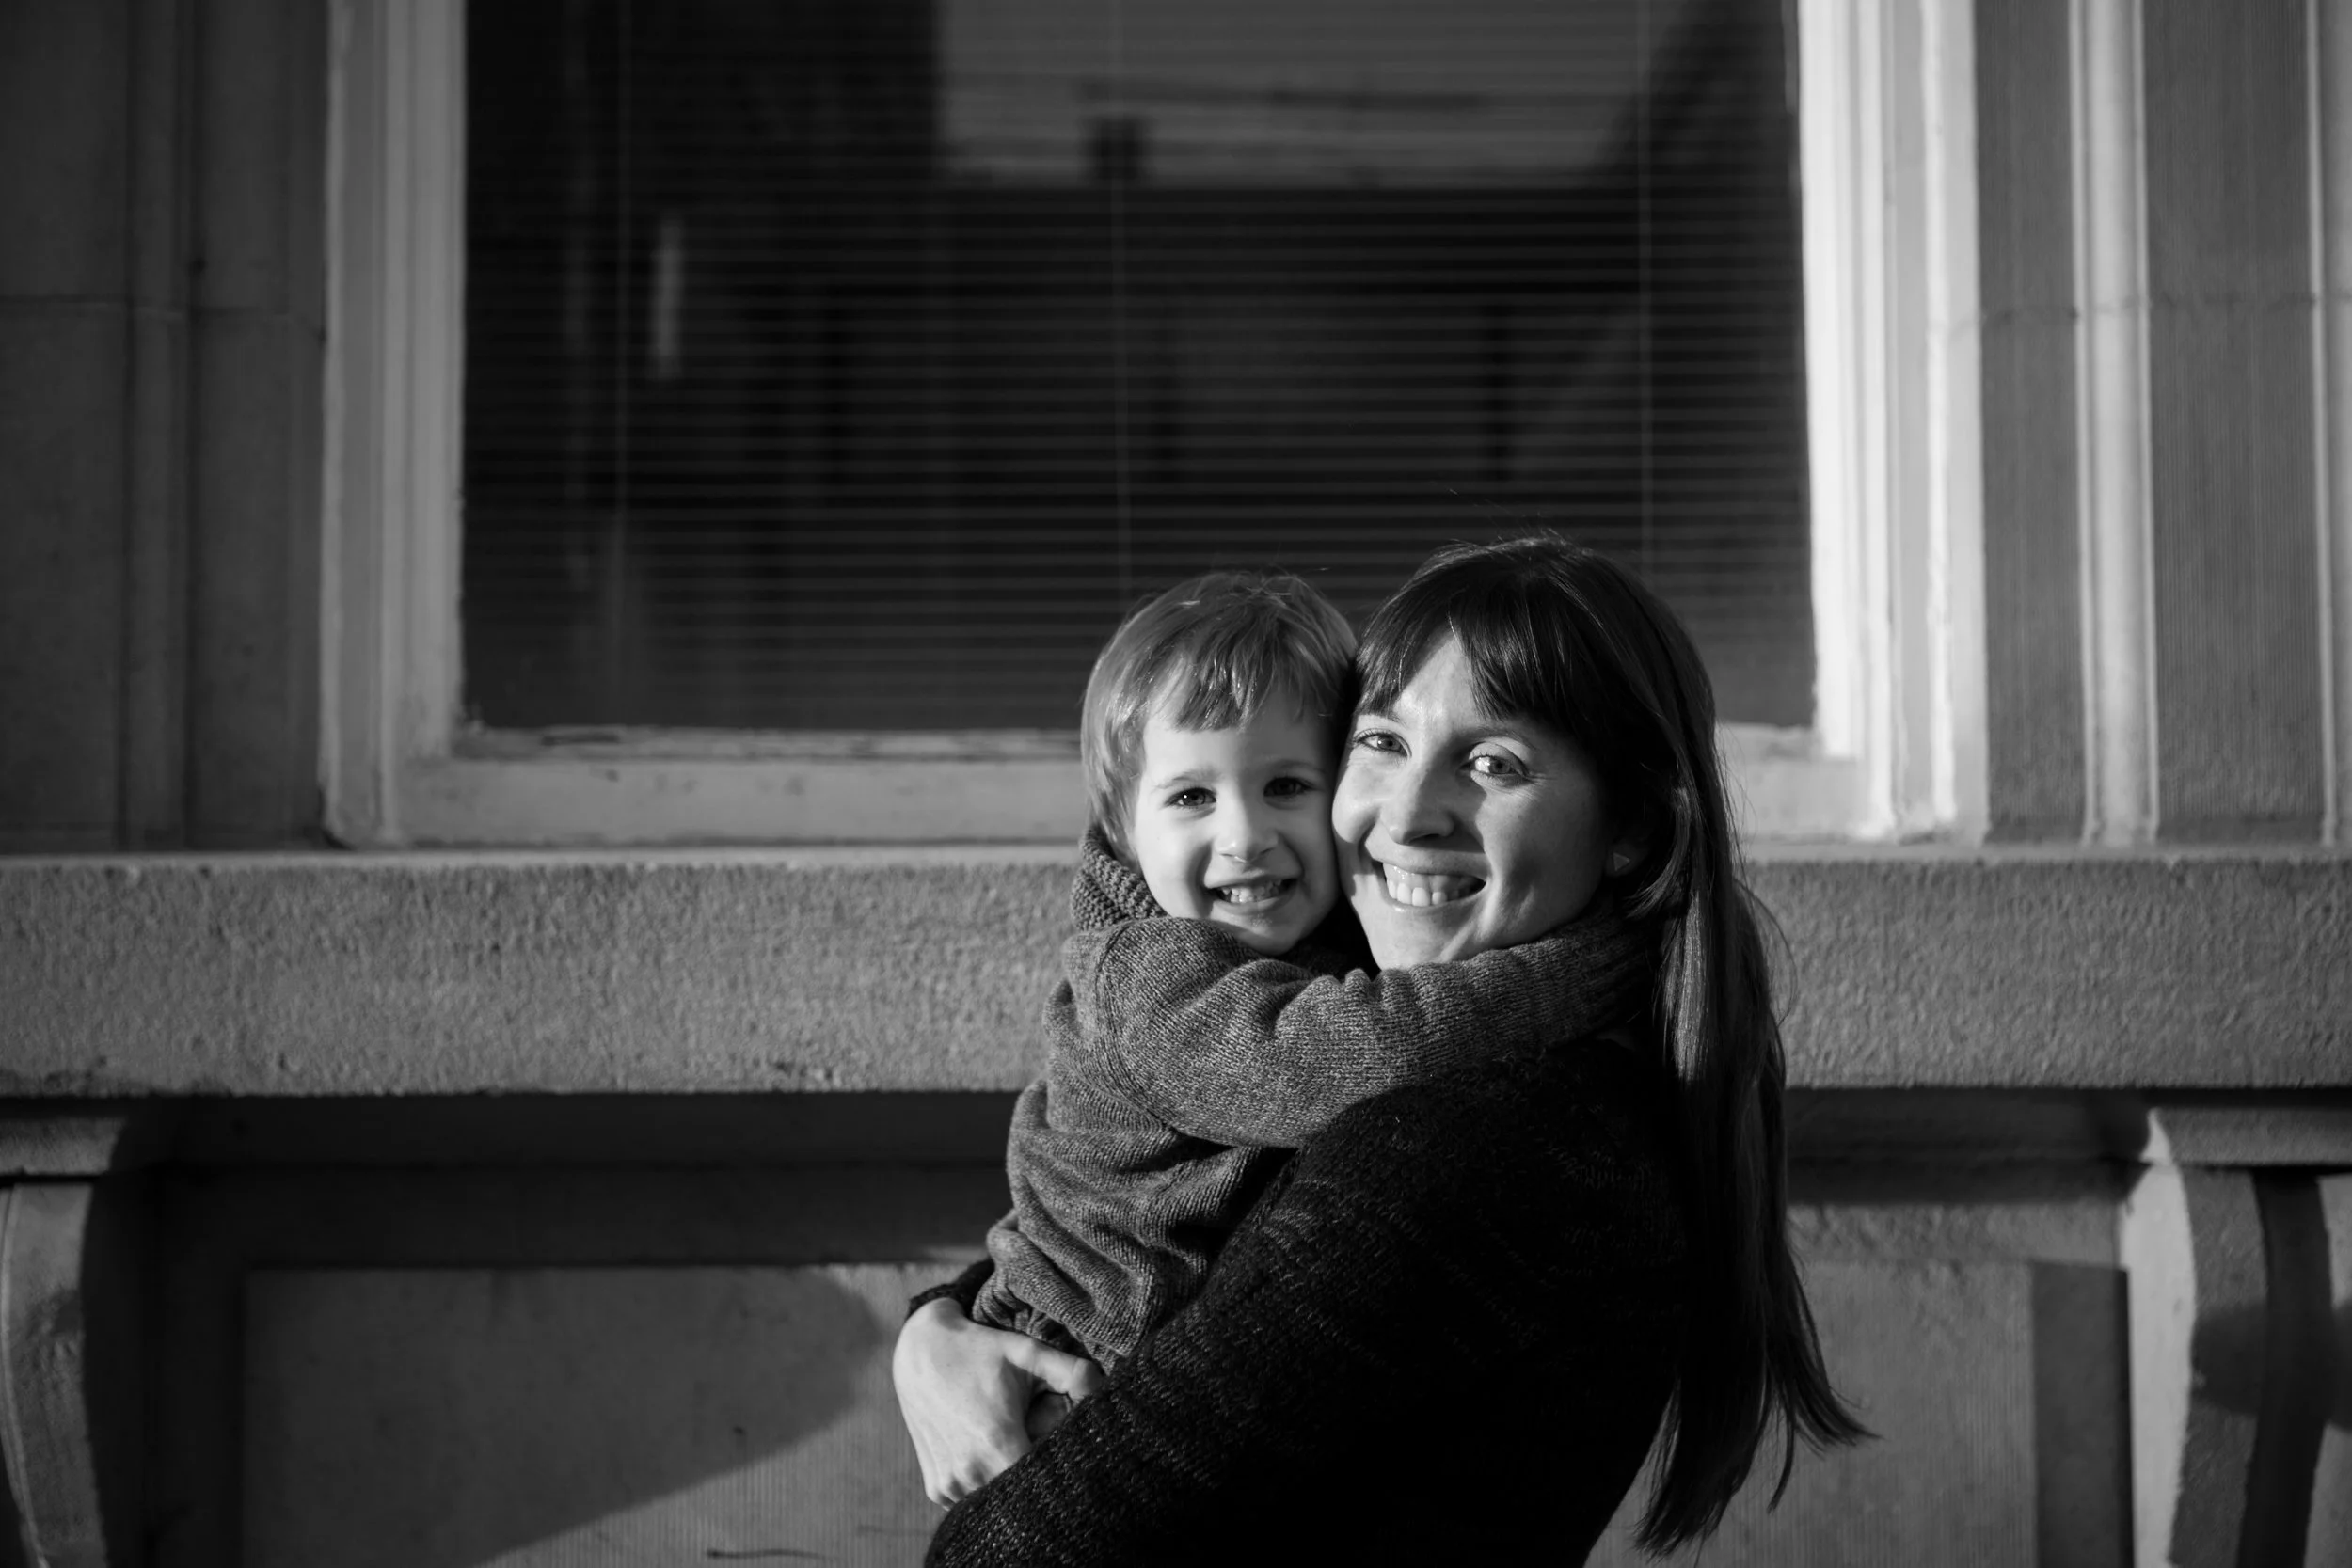
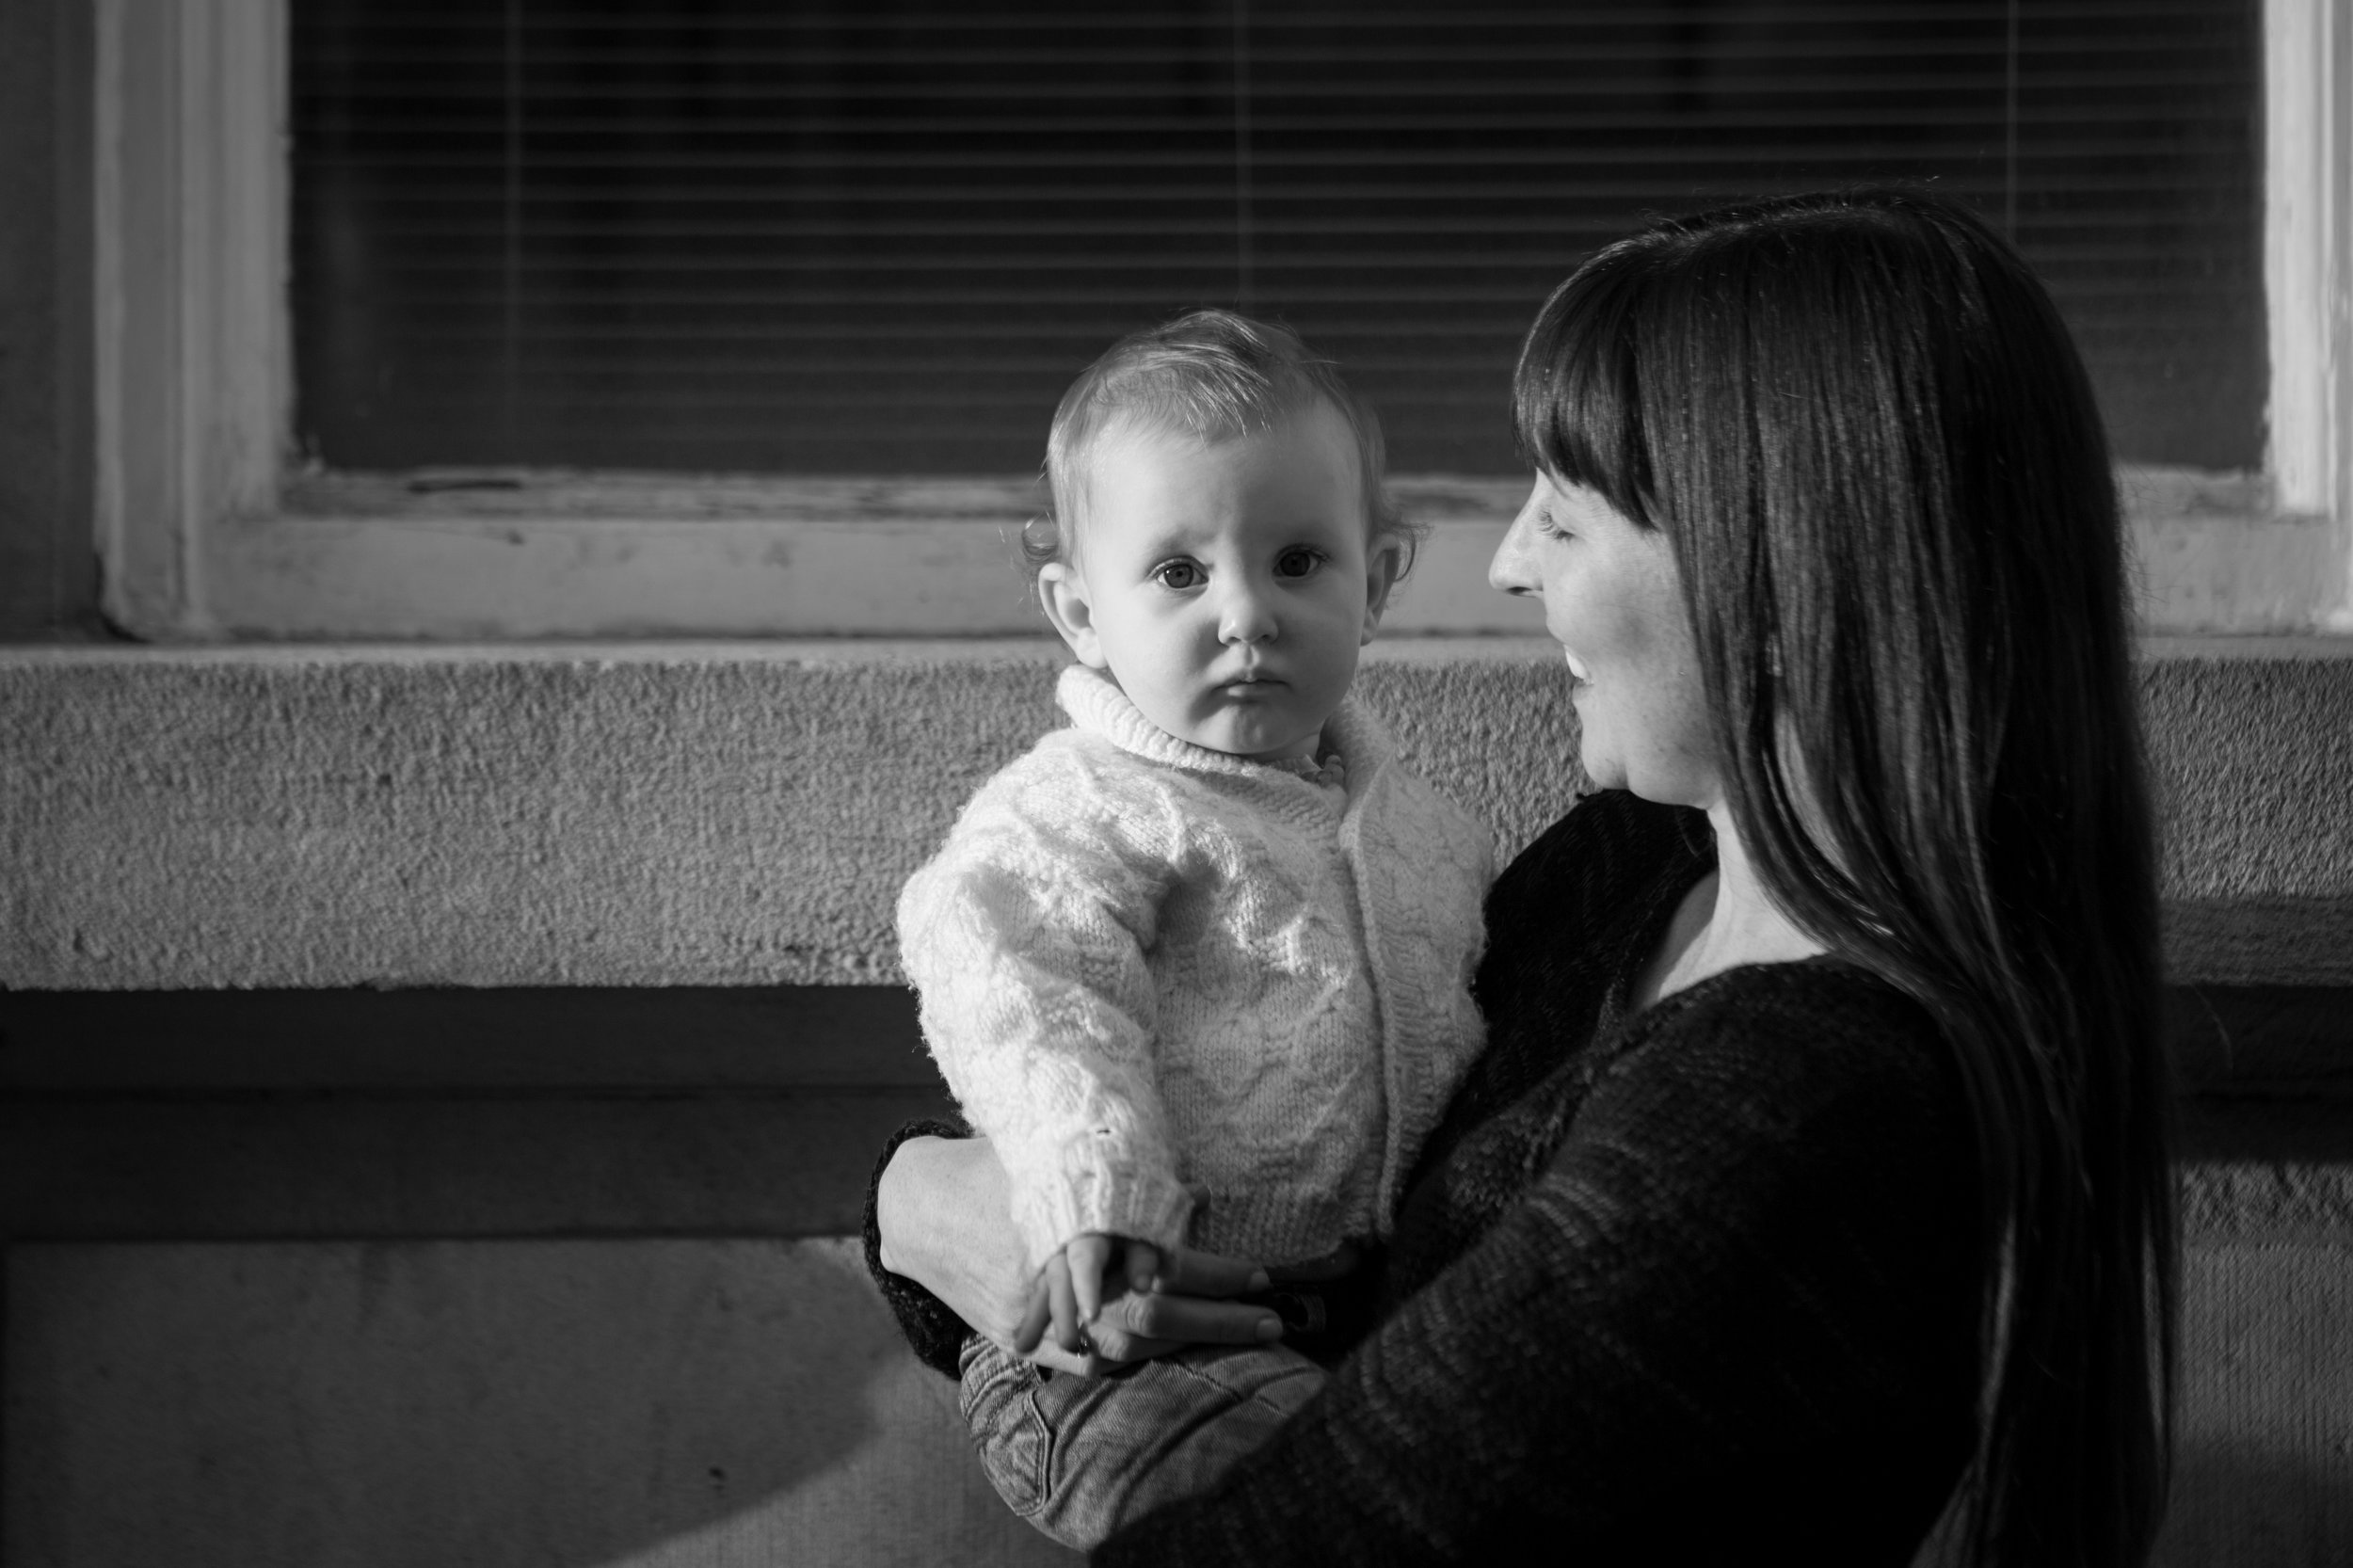
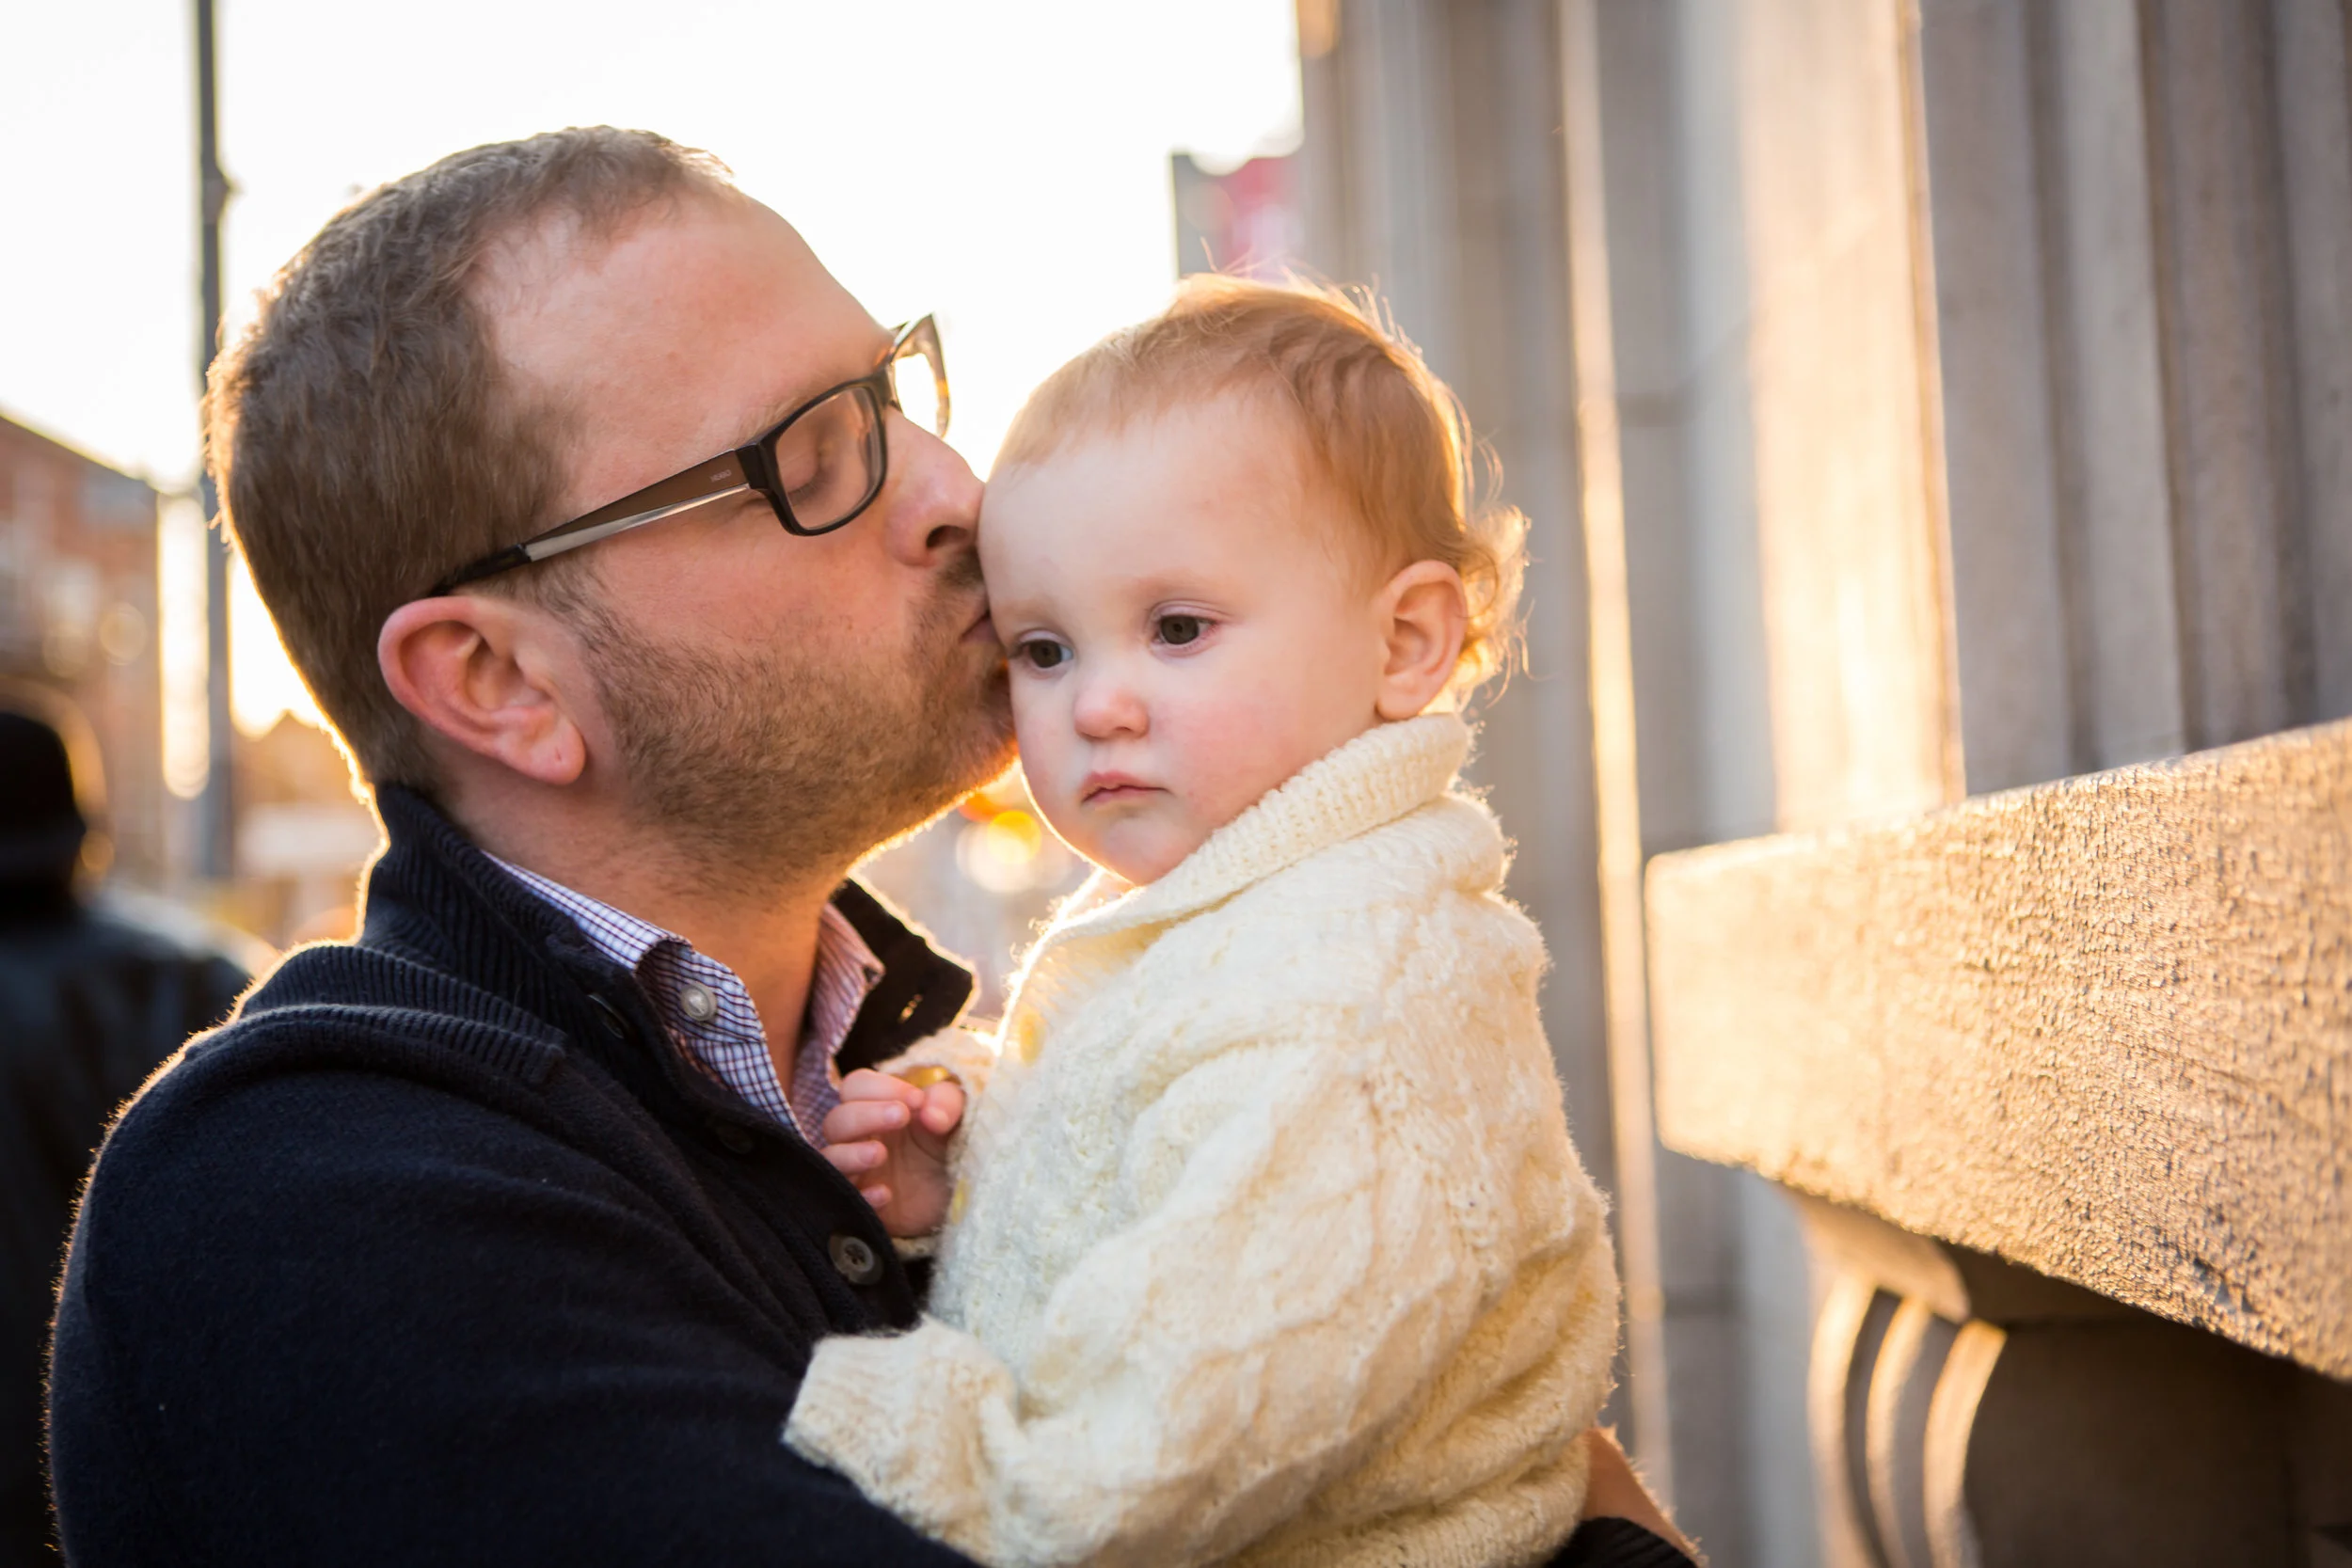
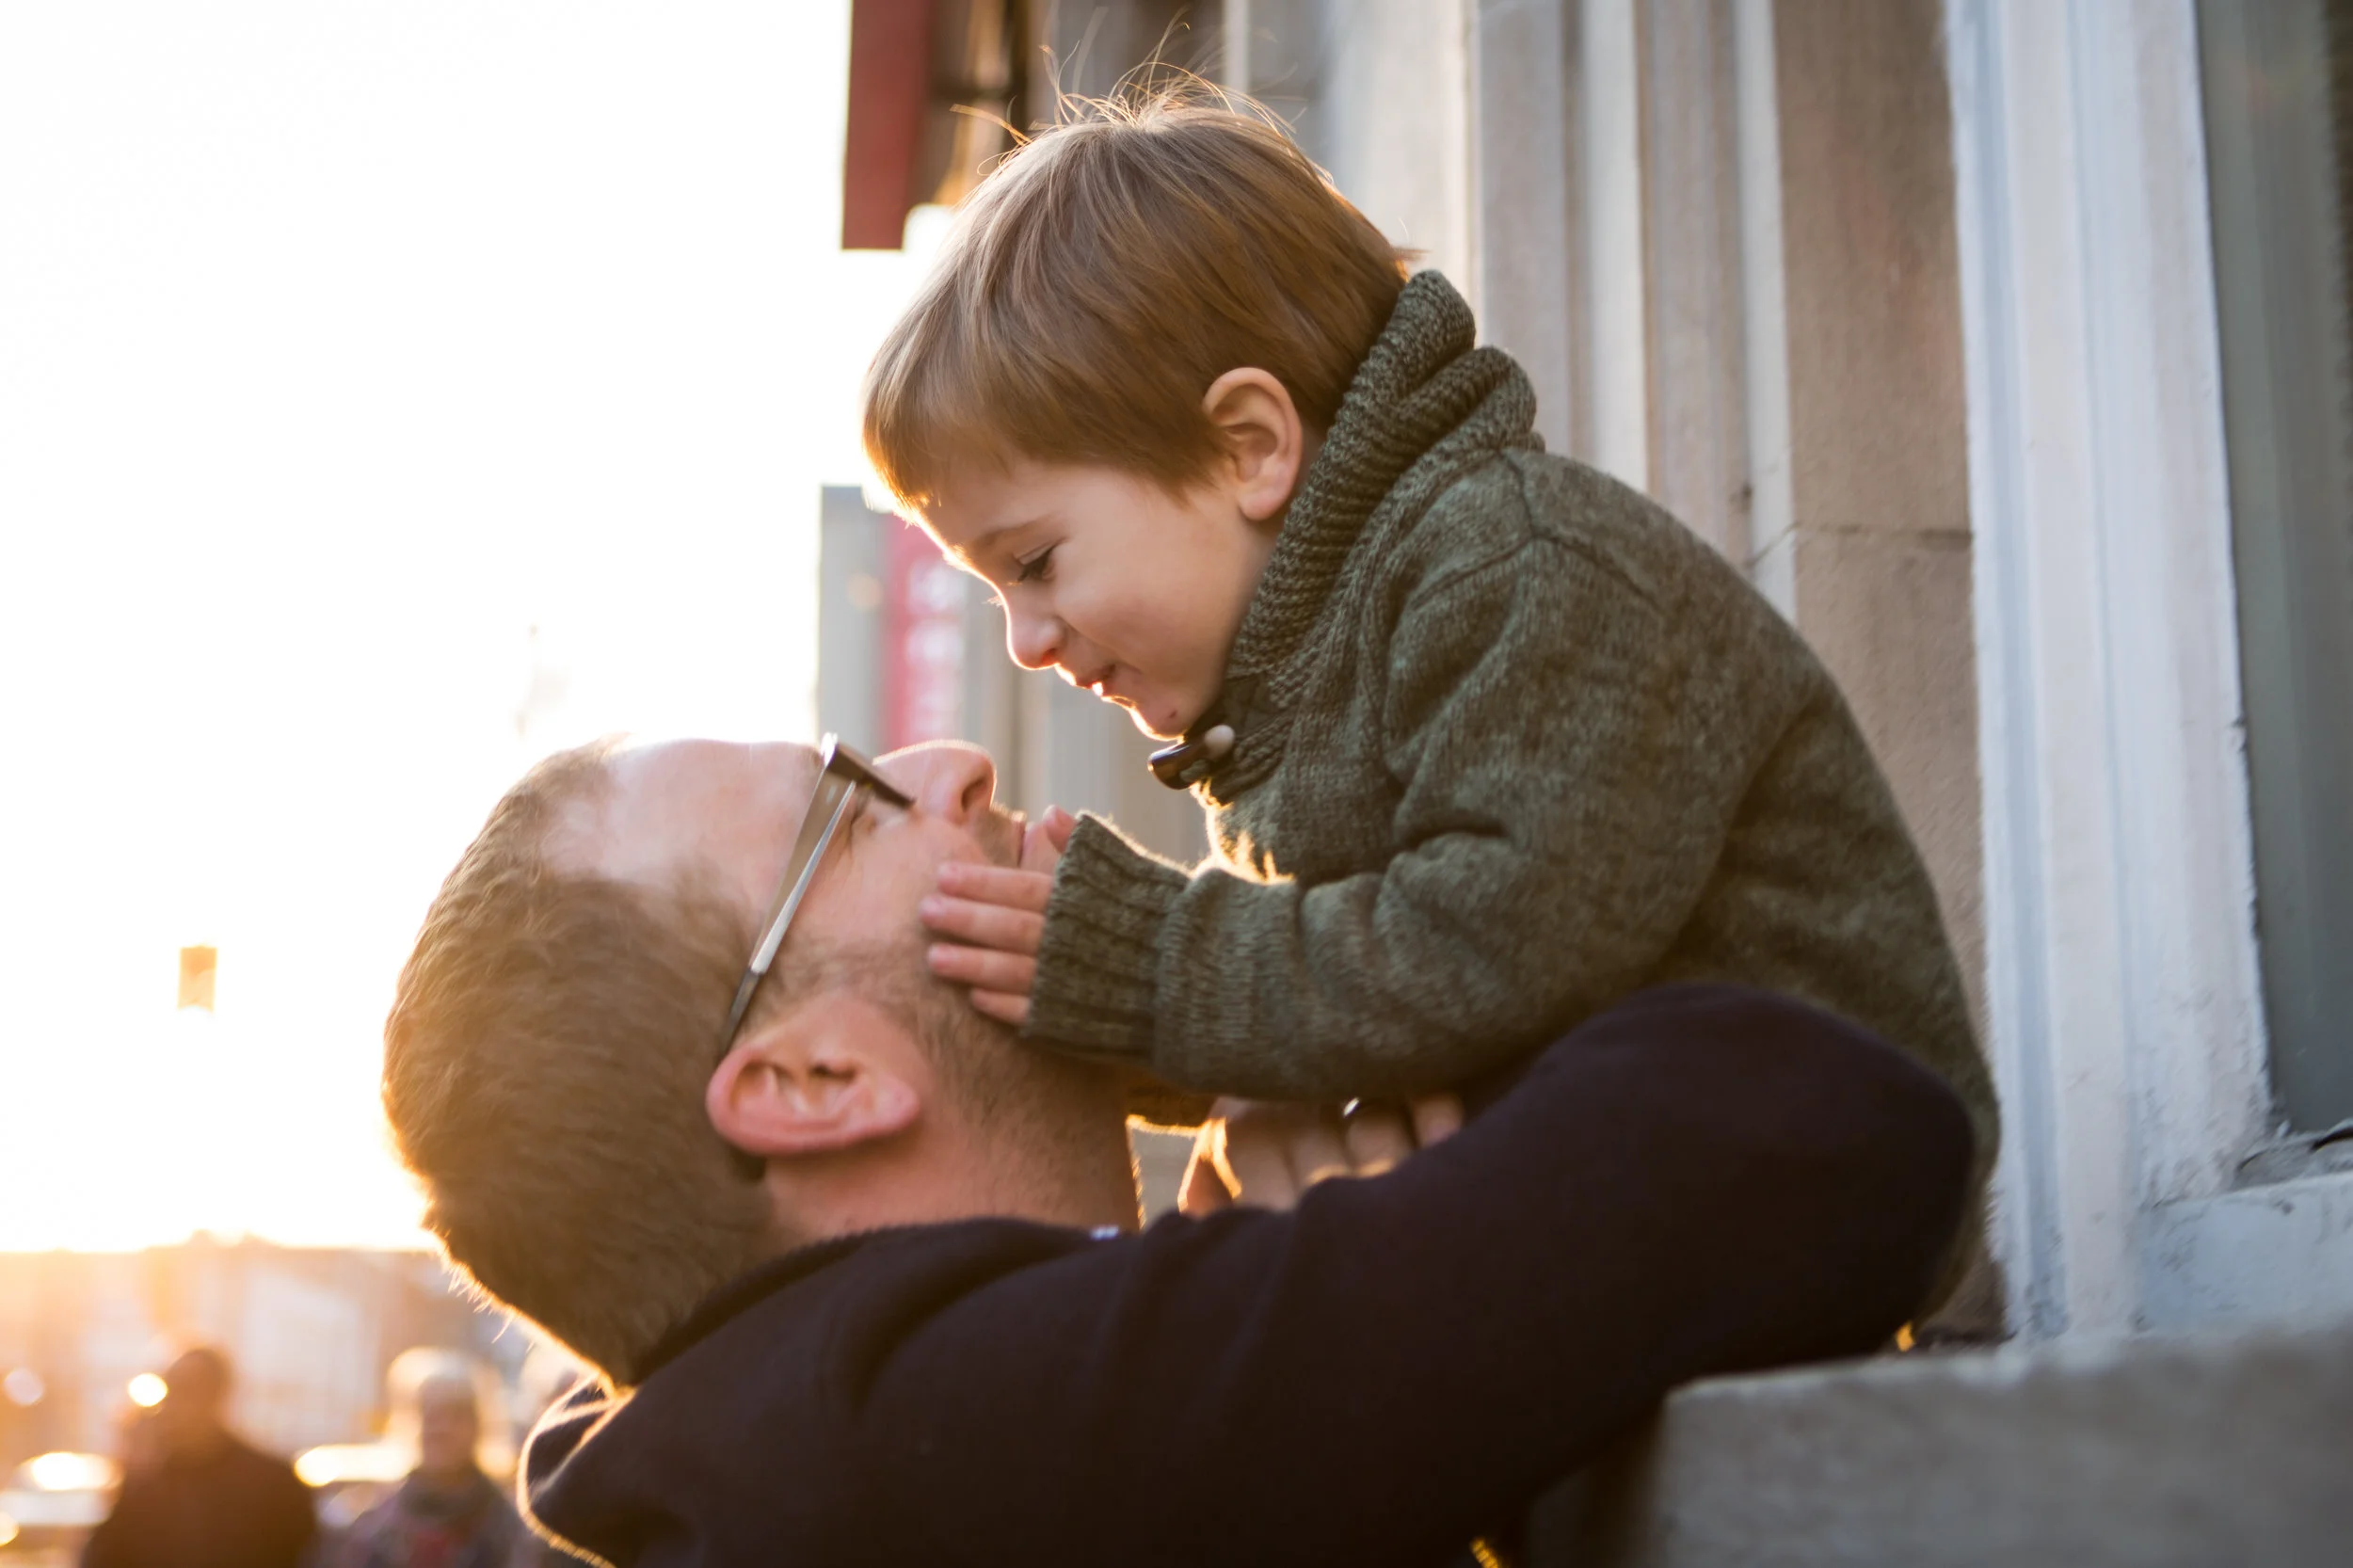
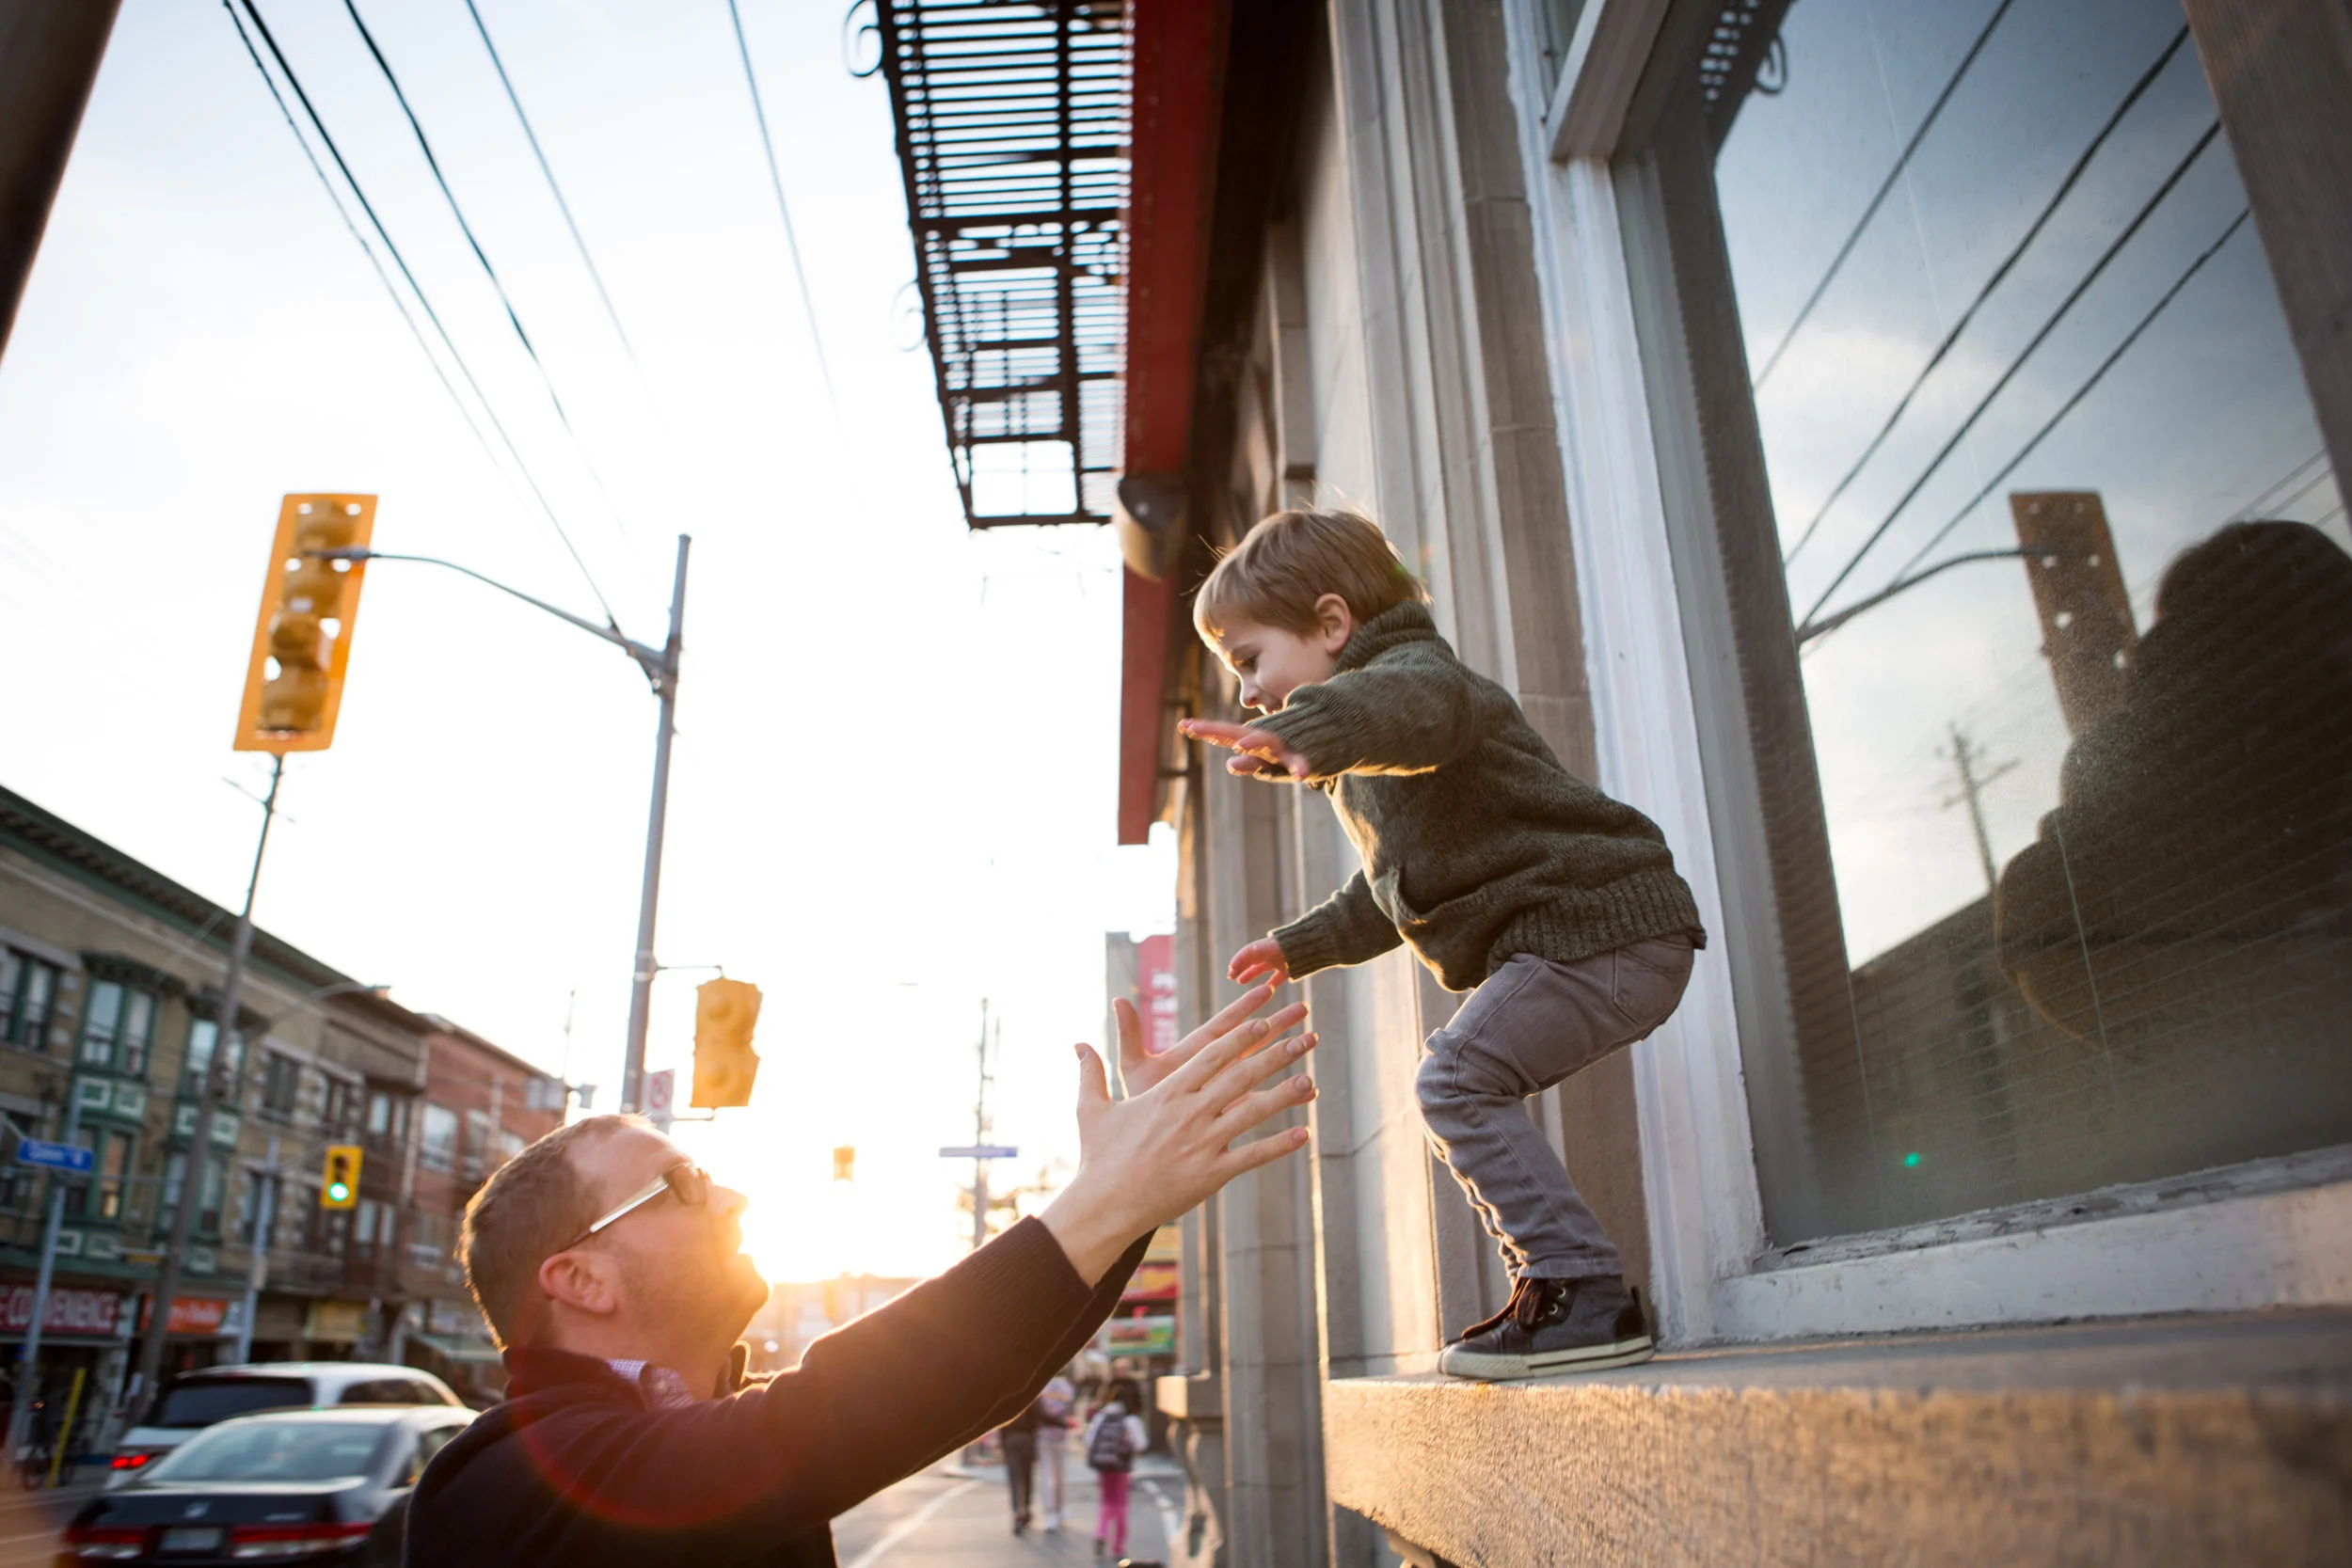
Last fall our family had a lovely photo session in Toronto's Parkdale neighbourhood with Sara Elisabeth Photography. Our session was quick and fun (so ESSENTIAL with 2 young kids!) and produced some absolutely incredible memories.
Want a chance to WIN a Professional Family Photo Session? Check it out!
Last fall our family had a lovely photo session in Toronto's Parkdale neighbourhood with Sara Elisabeth Photography. Our session was quick and fun (so ESSENTIAL with 2 young kids!) and produced some absolutely incredible memories. I've been meaning to share the photos for months, but what better time than with a GIVEAWAY!
Sara has generously offered my readers a chance to WIN a Complimentary Family Photo Session & 8x10 Print *$345 value!!
To Enter: Simply follow Fifty-Seven & Sara Elisabeth Photography on Facebook and comment on the contest Facebook Post with your name, and tag up to 2 other local Toronto families that you think deserve a photo session. If you're chosen, all 3 families will receive a Complimentary Session & Print! Winners will be announced Saturday July 25th.
Check out our family photos and Sara's beautiful work. I know you won't be able to resist entering.


Don't forget to enter for a chance to WIN!
Good luck!
- Care
*There will be another draw held via Instagram so feel free to enter both.

DIY Honey & Coconut Face Scrub
For the last few years I have been searching for a great natural face wash. Something that isn't full of harsh chemicals, dyes, fragrances or unnecessary ingredients and that leaves my skin feeling healthy and looking great. Since I've suffered with eczema in the past I'm very picky about what goes on my sensitive skin...

For the last few years I have been searching for a great natural face wash. Something that isn't full of harsh chemicals, dyes, fragrances or unnecessary ingredients and that leaves my skin feeling healthy and looking great. Since I've suffered with eczema in the past I'm very picky about what goes on my sensitive skin. I've tried and tested dozens of "natural" skin care products over the years, all costing a near fortune, and to be honest I wasn't happy with any of them. I also question how natural many of these products are. With so many companies greenwashing their image to make us think that their products are natural, it's hard to keep up.
Because I have combination skin (both oily & dry at times) I was in need of a gentle exfoliator that would also moisturize at the same time. I wasn't happy with the commercial products available so I turned to the internet for a recipe, and what I found was awesome. My friend, Selena Burgess, had created a recipe for a Honey & Coconut Face Scrub. I was a bit sceptical at first, but after trying it I was so pleased that I did, and also a bit annoyed I waited so long. I've been using Selena's recipe for 3 months now and am thrilled with the results. I have less black heads, no dry patches and my skin feels super soft.
The best part is that Selena's recipe is simple to make and only uses 5 ingredients that many people have readily available at home: water, baking soda, baking powder, raw honey & coconut oil. So if you've been searching for a natural way to keep you skin looking bright, smooth & beautiful, bust open your pantry and try making Selena's recipe. She's an all round cool chick and always has amazing ideas. Her new blog They Roar just launched recently and is sure to be a big hit. Check it out! For the full recipe click here.
Enjoy!
- Carolyn